Tuesday, February 26, 2019

Meat Pie (Hot Water Crust)


Do you watch a lot of Great British Bake Off? Are you an American and didn’t know what a hot water crust was? SAME. Also, I bet you can tell that a lot of my inspirations for this challenge came from GBBO. #maryberryforpresident.
Anyway, I wanted to try my hand at a hot water crust. I will say that my final product was not very pretty the first time, but probably one of the most delicious and stick to your ribs meals ever. You know when you just don’t care and you wear pajamas and don’t shave your legs and maybe, maaaybe brush your hair? Maybe you don’t even do that, but you don’t care because you know that you’re beautiful on the inside, and that’s what counts? Yeah, same for this meat pie. **Edit this picture up here is from my third attempt. You will see the ugly later AND see why it didn't work right the first time- because I'm an idiot.

Additionally, I made this in June because my husband didn’t want to wait for colder weather. I’d recommend doing this in like Fall or Winter, but whatever. I still ate it and enjoyed even though it was 90 degrees outside.  
I will also say that this recipe calls for beef brisket, which is a bit expensive (or I’m cheap, whatever). So, what I’m saying is save this for something special- it IS impressive. OR you can do it with a cheaper cut of meat. I’m sure it would still be delicious. You do want a chunked meat, not a ground meat. ** I have made this a few times since, and this last time I did it with bottom round roast which is significantly cheaper and still delicious!

Meat Filling:
3.3 lb beef brisket, trimmed and cut into 2in pieces 
1 tsp salt
1 – 2 tbsp olive oil
1 large onion, diced
2 garlic cloves, peeled and crushed
1 tbsp tomato paste
2 tsp Worcestershire sauce
1 tbsp brown sugar
2 c beef stock
1 ¾ c Guinness
2 tbsp flour
12 oz baby Portobello mushrooms

1. Start by trimming the brisket, trying to get as much fat off as possible. Cut into 2in cubes. You will be shredding these in the end, so it doesn’t have to be perfect. Sprinkle the meat with salt. *I also did pepper because everything should always have pepper.
2. In a Dutch oven, heat 1 tbsp olive oil over medium heat. Add brisket in batches to brown the outsides. You don’t want to crowd the pan, or they won’t sear well, so just do it in batches and put the finished ones on a plate for later. If the beef tries to rip apart when you flip it over, it’s not done yet. Patience, young padawan.


3. While the meat browns, dice onions and peel and crush garlic. When the meat is done and set aside, sauté the onion in the same pan until soft and translucent. You may need to add a bit more olive oil to the pan. Then add garlic and cook just until fragrant.
4. Add the tomato paste and Worcestershire sauce to the pan. Let it cook for a minute or two before adding liquids. You want to cook out the raw tomato flavor a bit.
5. Add the stock, Guinness, and sugar. *My can of Guinness had a little extra left, which means a little for the cook!

6. Finally, return the brisket back to the pot. Turn the heat to low and simmer for about 2 hours with the lid on, then remove the lid and simmer for another 30 minutes, until the meat is tender and shreds easily with a fork.

7. While the meat cooks, clean and chop the mushrooms into quarters.
8. You can also prepare the hot water crust at this point. *I didn’t start preparing until I had taken the lid off of the meat.
9. Once the meat is ready, remove just the meat from the pot and shred with two forks.
10. Add flour to the remaining liquid that’s still in the pot, stirring for about 3 minutes until the raw flour flavor is cooked out and the liquid thickens.
11. Return the meat to the pan and add chopped mushrooms. Stir together. It’s ready for the crust! *It’s like really thick- you want it to be thick. It’s going into a pie.  


Hot Water Crust:
21.5 tbsp unsalted butter or 300 g (a little less than 3 sticks) *hot water crust is a British thing mostly, so I used the British measurements.
1 1/3 c water (360 ml)
1 tsp salt
5 c flour (750 g)
1 egg (for the egg wash- not being added to the actual dough)

1. In a medium pot over high heat, combine butter, water, and salt, and bring to a boil.
2. While this is happening, in a large bowl, place the flour and make a well in the middle.
3. Prepare your countertop to roll out the dough. *The recipe said she likes to use parchment to roll out the dough. She also said you could just use the countertop, which I did. She sits on a throne of lies. I think maybe parchment is the way to go. Maybe you could then flip that shit right into your dish. You’ll see later what happened to me.
4. Once the water and butter come to a boil, pour into the middle of the well of flour. Mix to combine. This will be hot!! *surprise, it has boiling water in it. As you mix, it will start to cool down.
5. Once it seems pretty solid, turn it out onto the floured work surface. Knead for several minutes until smooth and elastic. *You know, maybe I didn’t do this.Look at this video! Pretty fucking sure I didn’t knead it. This may have been my “downfall”, ie why my dough was so soft. Thanks a lot, Jenna. You can see my original crust here. NOW I know and I do kneed it for about 10 - 15 minutes, and it's way easier to roll out and much easier to handle.
 
6. Once the dough is ready, roll it out. You want it to be big enough to fit all the way up the sides of a 9in deep dish pie pan. *I actually used a 9in springform pan.
7. You will need some of the dough for the top of the crust, so keep that in mind. So, basically, you will have two circles, one bigger (for the bottom and the sides) and one a bit smaller. 


Assembly:
1. Preheat oven to 400F.
2. Lightly spray the pan or grease with oil. Place the bigger circle of dough into the pan, pushing into the bottom and all the way up the sides. *See what happens when you don’t knead your fucking dough.

3. Pour in the filling.

4. Cover the pie with the second circle of pie dough, pinching the top dough with the side so that it’s sealed. *I made a hole on the top for the steam to escape. This felt right. Follow your heart. My pie looks rather sad because I didn't knead it. I will say, though, that the crust tasted totally delicious still, so I can't be completely angry. 
First Time

Third Time 
5. Brush the top with an egg wash (one egg with a tiny bit of water, whisked) or you can even do heavy cream or milk with the egg if you have it.
6. Bake for 40 – 45 minutes until the top is golden.
7. Take out and let sit for a while before trying to serve. *Since I put it in a springform, I waited like 30 minutes so that I felt confident about unmolding it. This also gives the innards time to calm the fuck down and not just spill out immediately when you cut it. Don’t worry; it will still be demon hot when you eat it.


Again, First Time 


Now - Much prettier! 
Rating (Scale of 1 – 5)
Difficulty: 2
Amount of time: 4
Awesomeness: 5

Tuesday, February 19, 2019

Mirror Glaze Cake


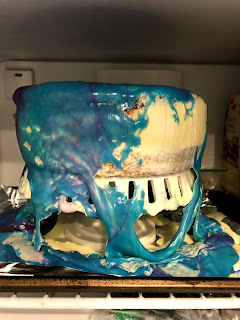
Oh, y’all. I am 22 challenges into this New Year’s resolution, and this is the only one that I would call a failure. So, if you want to read this to show you how to make a mirror cake, well, walk away. If you’re looking for a laugh, and you want to see what NOT to do, then by all means, stick around. It’s kind of like a car crash. You want to look away, but you can’t. You. Can’t.
Okay, so let’s start at the cake….
 I used this recipe: https://thefirstyearblog.com/lemon-layer-cake/

Why did I decide to use a cake recipe that I’ve never used before when I didn’t even want to make a cake from scratch for this? I don’t know. I honestly don’t know. I didn’t like this recipe. It tasted floury to me, so, you know, first hurdle.
Also, this fucking recipe tells you the amount of ingredients for ONE layer of the cake. WHY would you do this? Who makes one layer of cake for a layer cake???

For the Cake:
1 ½ sticks of butter, room temperature *or if you’re making 2 layers, 3 sticks (which seems excessive- again, I don’t trust this recipe)
¾ c granulated sugar *1 ½ c for 2 layers
Zest of one lemon * or 2
3 eggs * or 6
1 ¼ c flour * or 2 ½ c
1 ¾ tsp baking powder *or 3 ½ tsp
½ tsp salt * or 1 tsp

1. Preheat the oven to 350 F. Grease (or goop) 8 in round cake pans.
2. In a mixing bowl, combine butter, sugar, and lemon zest, beating until fluffy.
3. Add in the eggs one at a time, beating after each egg until incorporated.
4. In a smaller bowl, combine the flour, baking powder, and salt.
5. Gradually add in the dry ingredients into wet. Folding the ingredients together until all incorporated.
6. Bake for 22 – 27 minutes or until a toothpick inserted comes out clean.
Here's a little heart-to-heart at this point of the process: 
Okay, now for the rest of the mirror cake, I used this recipe: https://casuable.com/blog/2017/05/23/food-mirror-glaze-cake/

So, for this you need:
The prepared cakes
18 ounces of strawberry jam
White chocolate mousse (see below)
Mirror glaze (again, see below)

White Chocolate Mousse:
8 egg yolks
¼ c sugar
1 ½ c heavy cream (for the eggs)
1 ½ c white chocolate (over 30% cocoa butter)
2 c heavy cream (chilled for whipping)
1. In a large bowl, beat the egg yolks with a hand mixer (or in a stand mixer is totally fine) until frothy and airy, then mix in the sugar slowly. Beat until lemon-colored and fluffy.
2. Heat the cream in a pot over medium heat until steaming, but not boiling. Slowly mix half the cream into the eggs *again, you want to do this slowly so that you don’t scramble the eggs!
3. Pour the egg/cream mixture back into the pot with the rest of the cream. Cook over low heat, stirring constantly until the mixture is thick enough to coat the back of a spoon without dripping off too much.
4. Mix in the white chocolate until smooth *take it off the heat before you mix in*. Transfer to a bowl and press plastic wrap to the surface of the mousse so that it doesn’t form a skin while cooling. Chill completely.
5. Once the white chocolate mixture is set, beat the cold cream until stiff peaks. *The recipe says it’s safer to undermix than overmix. That’s bullshit here. Yes, you can make butter if you overmix, but you know what, butter is better than what I got..
6. Carefully fold in the white chocolate mixture a little at a time until completely incorporated. Set aside for later use. 
Assembly of Cake Layers:
1. Spread the jam evenly into the bottom of an 8 in round cake pan, then place one of the cake layers on top. *I put parchment paper in the bottom of the cake pan before I put the jam in. 

2. Freeze completely.
3. In a 9 x 3 in round silicon cake mold, pour 2/3 of the white chocolate mousse, then tap the pan to release air bubbles. *again, I didn't have a silicon cake pan, so I improvised. Not successfully, but I did improvise. 

4. Place the frozen cake and jam disk on top of the mousse, jam side down. Press the cake slightly, and cover with the rest of the mousse.
5. Place the second cake round on top, pressing down until the mousse rises to the level of the cake.


6. Carefully transfer to a freezer and freeze OVERNIGHT; it is vital that the cake is frozen 100% through. 
7. Once you’ve waited 24 hours, carefully unmold the cake onto a cake stand or a wire rack for glazing. 

Mirror Glaze:
300 millimeters water
1 ½ c granulated sugar
14 oz can sweetened condensed milk
15 gelatin sheets
26 oz white chocolate
Gel food coloring
1. Boil the water, sugar, and condensed milk in a pot for one minute and remove from heat.
2. Bloom the gelatin in 8 cups of cold water for 5 minutes; then wring the gelatin sheets of excess water, and mix into the sugar mixture. *I didn’t have gelatin sheets- I could only find gelatin powder. I tried to find a conversion, and it was a pain in my ass, and I still think I used too much gelatin. I found something that said 1 packet is equivalent to about 6 sheets, but also keep in mind that you don’t bloom the powdered gelatin in 8 cups of water.. Just find the sheets, or just give up at this point. I mean I kind of wish I had!

3. Pour the liquid over the chocolate, letting it sit for a few minutes to melt the chocolate. Using an immersion blender, carefully blend the chocolate, making sure to keep the blender immersed so you don’t add too many bubbles.
4. Sieve the mixture into a pourable container so that you can get rid of excess air bubbles.
5. Add food coloring.
6. When ready to use the glaze, make sure it’s about 90 – 96F so that it sets up well. Then you can just pour it over the cake quickly. 

Rating (Scale 1 – 5)
Difficulty: 5
Amount of Time: 5
Awesomeness: 1
Okay, so this whole thing sucked. I think the glaze actually did work, but the mousse didn't. The cake was almost inedible because it had to stay in the freezer the whole time because that freaking mousse would melt immediately. I tried one piece and then threw this bitch in the trash. If you have better luck with any of this or any advice, please, tell me in the comments! 


Sunday, February 17, 2019

Sour Cream Cheesecake

So, let's start this off by saying that I don't make cheesecake. My husband (Ricky) makes cheesecake. I have helped make several cheesecakes. I have never made my own because my husband. makes. damn. good. cheesecake. Anyway, so my friend Mel wanted a cheesecake for her birthday. I am not one to turn down a birthday dessert request of really any magnitude (see later the shit show that was my husband's last birthday dessert request), so of course I said I would make a cheesecake. Now, something else you must know- Ricky refuses to give up his cheesecake recipe. I have asked. I have begged. I have offered up sexual favors. Nothing. So, I went to Alton Brown for a recipe. Also, funny story, two weeks later, Ricky asked that I make him a cheesecake for his birthday as well. I'm an adult, so I said yes. Bitterly. No but really, this recipe is still hella delicious and surprisingly less scary than I thought it would be. Well, no, I was scared the first time, but then the second time was easy peasy. Here's the recipe, and I will share any discrepancies along the way!

For the Crust:
33 graham cracker squares, crumbled *I thought this was like 33 rectangles at first. No, folks. 33 squares (2 squares per rectangle). You're welcome, and if you're not an idiot like me, then disregard the side note.
4 oz (1 stick) unsalted butter, melted
1 tbsp brown sugar *I always use brown sugar in a graham cracker crust. It brings out that caramel flavor more. Alton just used granulated sugar.

1. Preheat oven to 300F. Brush some of the melted butter around a 9 x 3 inch cake pan. Adhere parchment to the bottom. *A couple of things here- yes, this is a cake pan and not a springform pan. I have had the displeasure of a springform pan leaking in the water bath and water-logging my cheesecake (well Ricky's cheesecake), so when I saw Alton use a cake pan, I was like hell yeah. ** I just used some cooking spray for the sides and bottom. *** Alton says to put the parchment on the sides too because he does his crust a little differently. The first time I put parchment on the sides also. The second time, I didn't (I really think I just forgot). It made no difference to me. The bottom is a MUST. Sides, maybe not.
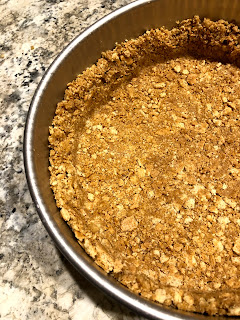
2. In a small bowl, combine crumbled graham crackers, melted butter, and sugar. Press mixture into the bottom and up the sides of the cake pan. It will reach about 1/2 to 2/3 of the way up the pan. *Alton says to do this: Press 2/3 of the mixture into the bottom of the parchment lined pan. Place remaining crumbs on a sheet pan and bake both the crust and remaining crumbs for 10 minutes. Reserve additional crumb mixture for sides. I didn't do this shit, as you can see in the picture. I couldn't be bothered. **If you're doing it Alton's way, you should probably definitely parchment the sides of your pan.

For the Filling:
20 oz cream cheese, room temperature
1 1/4 c sour cream
1 c sugar
1 tbsp vanilla extract
2 whole eggs
3 egg yolks
1/3 c heavy cream
*I also used the zest of an orange and zest of half a lemon because I think it makes it zippy.

1. In a mixer with a paddle attachment, beat the cream cheese and sugar for about 30 seconds. Add the sour cream and mix on low for about 30 seconds. Scrape the bowl. * Alton says to beat sour cream for 10 seconds to lubricate the bowl, and THEN add the cream cheese and sugar and mix on low for 30 seconds, and then turn up to medium. Scrape the bowl. I tried it this way the first time, and my cheesecake was a little lumpy. I feel like you need that extra friction of the bowl with the cream cheese. The second time, I did cream cheese first with sugar, and THEN added the sour cream. This worked out much better for me- no lumps.
2. In a separate container, combine eggs, yolks, heavy cream, and vanilla extract (and zest?).
3. With the mixer on medium, slowly pour half the egg mixture into cream cheese mixture. When half is incorporated, stop and scrape the sides. Continue with the second half. Once completely incorporated, pour into the cooled crust.

Baking: 
1. Lower the oven temperature to 250F. Place cheesecake into a preheated water bath. *You can use any cooking vessel that will fit your cheesecake in it with some room to spare (and is oven safe). **I used a deep dish skillet. I would recommend putting some water into a kettle (or I used my coffee pot) to heat up. Put your cheesecake in the pan IN the oven. Push the cheesecake to one side so you have a bit more leeway if you spill your water. Pour the water into your bigger pan about 2/3 of the way up the outside of the cheesecake. Move the cheesecake back into the center of the water bath.
2. Bake for one hour.
3. Turn off the oven, open the door for one minute, and then CLOSE THE DOOR for one more hour. *Alton says to remove it after the hour and place in the fridge for 6 hours or overnight to chill.
4. I kept my cheesecake in the oven overnight. It still felt a little too wobbly both times I cooked it, so I left it in. **I will say, don't leave it in your water bath overnight though. It will make your crust soggy. So I took it out of the water bath, stuck it back in my warm-ish oven overnight, then popped it in the fridge all the next day before serving.
5. When ready to serve, place the cheesecake pan in a hot water bath for about 15 seconds. Unmold the cake onto a serving dish. *If you did Alton's crust way and not mine, coat the sides with the remaining crust crumble. **The first time, I actually just put the cheesecake on the burner of the stove for about 30 seconds (another video I watched did this). This worked, but it was WAY easier to get out of the pan the second time when I used the water bath. It literally just slid out. Here's a video of me getting it out the first time:
For the Coulis:
This isn't in the recipe, but when you're going to a Tiki party, you make a raspberry coulis.

1 pint raspberries *you can do this with strawberries too, but I didn't like it as much.
2 tbsp sugar *you can add more sugar if you think it needs it.
Zest of half a lemon
Juice of half a lemon *you can also use less if you want, and add a bit of water instead. I like lemon, and I like tangy

1. Put all ingredients in a sauce pan and bring to a boil. Let the sugar dissolve, and break up the berries a bit to help them release their pectin.
2. Once it has thickened some (about 3-5 minutes), taste it. If it needs more sugar or lemon juice, do so now.
3. Sieve the coulis to get rid of the seeds before putting into a container. Allow to cool completely before putting on the lid and storing in the fridge. Serve with the cheesecake.

Ratings (Scale 1 to 5):
Mel's Tiki Party!
Difficulty: 2
Amount of Time: 3 *although this isn't really taking into account the wait time for cooling and setting. Active time is like a 2; Total time is like a 4/5, so 3 it is.
Awesomeness: 5 *I still think my husband's is a little better. I also really liked this cheesecake, but I wish it had a bit less tang and more creamy umami if you will. Can I use umami for dessert? I'm doing it. Maybe next time, less sour cream, more cream cheese. Zest may have also added to the tang, but I don't think I want to do without that lol.
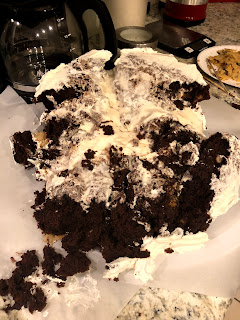
Also, as promised, this was 3 of the 6 layers of the cookie cake cake that Ricky asked for last year for his birthday. As you can see, it failed. At 11:00pm on a Monday night. There were tears and gnashing of teeth. 

Tuesday, February 12, 2019

Dacquoise


Do you ever wish you had a giant macaron the size of a cake? Yeah, me too. So, that’s pretty much what this is. A giant macaron that’s coffee hazelnut flavored and fucking delicious. As of right now, it’s still my favorite, and I’m writing this in November (after my 22nd challenge). I will say you need to start this THE DAY BEFORE you actually are going to make it. You need to let the “cake layers”? Merengue layers? Rest in the oven overnight.
Here’s the recipe I used: https://www.butterbaking.com/2015/10/21/coffee-and-hazelnut-dacquoise/


For the dacquoise AKA cake layers:
70 g hazelnut meal (flour) *I didn’t use this much because it’s hella expensive and I wasn’t going to buy two bags, so I just did 50 g and did more of the almond meal.
80 g almond meal
185 g powdered sugar, sifted *you DO want to sift; again, with like a regular cake, I don’t do that, but for this, you should.
A pinch of sea salt
6 egg whites
½ c granulated sugar *can we talk about how this recipe has half metric measurements and half American measurements?

Making it:
1. Preheat oven to 225 F.
2. Line two or three sheet trays with parchment paper. Use an 8-inch round cake tin as a stencil to draw 3 8-inch circles on the parchment paper. Flip the paper over and grease the paper. *I used two sheet trays because who has three? It was tight, but I made it work. You could also turn a 13 x 9 pan upside down and use that as an additional tray. I've done it.
3. In a medium bowl, combine hazelnut meal, almond meal, powdered sugar, and salt together.
4. In a stand mixer with whisk attachment, beat egg whites until they reach soft peaks. *the peaks will fall back on themselves a bit.
5. While still mixing, add the granulated sugar slowly and beat until you get stiff peaks. *where they stand up freely like an independent woman!
6. Gently fold the dry mixture into the egg mixture. The mixture will look goopy. *Kind of like macaron mixture because that’s basically what it is. If you haven’t tried out the macaron recipe I did, you totally should! It's the first post on this blog :) 
7. Fill a piping bag with a round nozzle.
8. Using the stencil, pipe the three circles with meringue and fill them in. *I didn’t quite know how they wanted me to fill them in, so I just kept on swirling all the way in like a lollipop. I also had a bit extra, so I made little macarons in case I wanted to decorate with them- which I did!

9. Bake the dacquoise for 3 hours. Turn off the oven and leave them in the CLOSED oven to dry for at least 6 hours or overnight. *I put a post-it on my oven because my husband likes to unintentionally sabotage.   
For the coffee buttercream:
110 g milk
1 tsp vanilla bean paste *I didn’t have this, so I just used vanilla extract
70 g granulated sugar
10 g cornstarch
2 egg yolks
220 g unsalted butter, softened and cubed *how do you cube something that is soft????
3 tbsp instant coffee
Pinch of sea salt

Making it:
1. Bring the milk and vanilla to a simmer in a medium pot. *Again, if you’re using vanilla extract, wait til it’s off the heat to add.
2. In a medium bowl, whisk together sugar, cornstarch, and egg yolks.
3. Pour the milk in a steady stream into the egg mixture, stirring constantly. *Be gentle at first- you don’t want the eggs to get all pissed and scramble on you, so do like you’re getting into a hot tub. Put one toe in at a time.
4. Transfer the mixture back to the pot. Continue mixing until the mixture goes back to a boil and cooks for one minute.
5. Pour the custard back in a bowl and cover with plastic wrap directly touching the surface. 
6. Refrigerate until cool.
7. Once cool, place in a stand mixer and whisk until creamy.
8. Add the butter, one cube at a time, whipping on medium speed until completely incorporated between each addition.
9. Once the butter has been added, add the salt and coffee and whip until combined. 

Assembly:
1. Gently peel the meringue from the parchment paper.
2. Place one meringue on a serving tray. *I always put a dab of buttercream under it to help it stay.  
3. Spread 1/3 of the buttercream onto the first layer. *I had to be stingy with my buttercream and still almost ran out. The original recipe shows these cute additional dots of buttercream around the top and bottom for decoration. I literally can't imagine how they had that much buttercream left over. Maybe double the recipe for the buttercream. No one will be mad at that. You don't NEED it, but it would make decorating easier. 
4. Continue stacking, and then cover the whole thing with the buttercream. *I decorated with some of the baby macarons (and crumbled some around the edges also). 


Rating (Scale 1 - 5):
Difficulty: 3
Amount of Time: 3 (but not all active time)
Awesomeness: 5

Tuesday, February 5, 2019

Lemon Berry Naked Cake


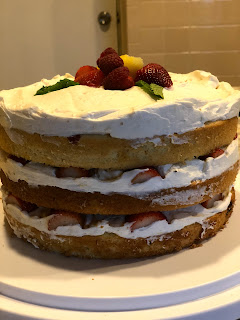
Okay, so I make a lot of cakes. I love cake. Whoever doesn’t love cake is stupid. There. I’ve said it. I don’t discriminate about other confections, though. I love them all. I just happen to really enjoy making cakes. So, this wasn’t really a challenge of making a cake; it was a challenge of doing a new form of cake decoration for me. A naked cake is pretty easy because you literally have less work to do. I made this one for Easter and it was freaking delicious. 
Something else you may not know about me yet is that I LOVE lemon. It’s my favorite flavor. Valerie Bertinelli doesn’t have the monopoly on liking lemon desserts. This cake has berries and lemon and happiness. Perfect for spring. I am also writing this in November… and now I’m saddened by the lack of happy spring flavors in my life. Pumpkin spice can go to hell. Just kidding. I love you too pumpkin spice.

But before we get into the recipe, let me share with you the recipe of goop. This is used to grease your pans, and I swear once you start using it, you will never butter and flour your pans again. This is, I am not exaggerating, life changing. 

Goop “recipe”:
Flour
Shortening
Vegetable oil
It’s just equal parts of each. I am not putting measurements here because I don’t know you. I don’t know if you need to have 3 cups of goop or like ½ cup. I usually do ½ cup of each ingredient and shove the rest in my fridge to use at a later time. Just stir before you use again. I don’t know how long it lasts, but I have kept it in my fridge for at least a month, and it’s been fine. Then just take it out when you want to use and spread some with a paper towel all over the inside of your cake pans. (Can I tell you a secret? I don’t even line with parchment anymore! The crowd gasps in shock).
Okay, I digress, back to naked cake.

I used this recipe: https://www.alattefood.com/berry-vanilla-naked-cake-with-lemon-whipped-cream/

For the berry puree:
1 c strawberries, hulled
1 c raspberries
½ c granulated sugar
*the recipe doesn’t call for this, but a put a squeeze of lemon in here because I think all berries benefit from a little lemon wake me up.
1. In a blender or food processor, puree the strawberries, raspberries, and sugar together (and lemon if you’re me). With a sieve, drain the puree to remove all the seeds. Set aside for later- you should have about a cup of puree.

*Also, you know what’s really good? If you have extra puree AFTER you use the rest (no drinks until cakes are in the oven), you can put some in a glass and add some vodka or gin. Hello! Delicious.  

For the cake:
4 large eggs, separated           
¾ c unsalted butter, softened
2 tbsp vegetable oil
1 ½ c granulated sugar
2 ½ c flour
2 tbsp cornstarch
1 tbsp baking powder
¾ tsp salt
1 c whole milk
2 tsp vanilla extract
1/3 c sour cream

1. Preheat oven to 350 F and grease three 9in round cake pans *use the goop! I’m telling you. Try it. It’ll make you a believer.
2. Separate 4 large eggs and set aside.
3. In a stand mixer, cream butter until light and fluffy (1-2 minutes). Then add in vegetable oil and beat for another minute. *every time I say use a stand mixer, please know that you can also just use a bowl and a hand mixer, but I’m lazy, and I have a stand mixer, so I’m gonna use it always.
4. Gradually add in sugar and beat until well combined.
5. Add in egg yolks, one at a time, beating until each is incorporated before adding the next.
6. In a separate bowl, sift together flour, cornstarch, baking powder, and salt. Set aside. *I’m gonna be honest. I don’t do this. I did it for macarons, but I really don’t ever sift together my dry ingredients… sue me. I did, however, put them all in a bowl together because you’re going to alternate wet and dry ingredients, so this is just easier.
7. In another bowl, mix together milk, vanilla extract, and sour cream.
8. Alternating, add dry and wet ingredients into the egg mixture, always starting and ending with the dry. *I usually do 1/3 of the dry, ½ the wet, 1/3 of the dry, ½ the wet, 1/3 of the dry. You get it.
9. In ANOTHER bowl *are you keeping track? We are at like 4 bowls.. * beat the egg whites until they form stiff peaks. *this means the egg whites won’t fall back on themselves, but stand up like good little soldiers.
10. Gently fold egg whites into the batter until completely incorporated.
11. Divide batter evenly between the three cake pans.
12. Dollop 4 – 5 tbsp of puree in each cake pan. Using a knife or toothpick, swirl the puree into the batter.
13. Bake for 25 – 30 minutes until a cake tester inserted comes out clean.
14. NOW you can make your drink if you have extra puree J

For the lemon whipped cream:
1 pint heavy whipping cream
8 oz whipped cream cheese *the whipped is important here to keep a good texture
2 tbsp lemon zest (about the zest of two large lemons) *and don’t measure this- no one is going to be mad about more lemon zest. Always err on the side of more.
½ c powdered sugar
1 tsp vanilla extract
½ c raspberries
½ c strawberries, sliced and hulled
*So yeah, I feel like this recipe lies a little because you don’t need the berries FOR the whipped cream, but rather for the assembly. 

1. With a mixer on high, beat the heavy whipping cream until it begins to thicken. Add in lemon zest, powdered sugar, and vanilla extract, until soft peaks form. 
2. Add whipped cream cheese to the whipped cream mixture and beat until stiff peaks form. 

Assembly:

1. Once the cakes are cooled, remove from the cake pans and level off if you need to. 
2. Place the bottom layer on a cake stand *I always put a dollop of the whipped cream or frosting down on the cake stand first- this helps the cake not to slide around while you’re icing or transporting. 
3. Add one cup of the lemon whipped cream and spread mostly to the edges. 
4. Place a few raspberries and strawberries on top of the cream. *I also made sure that they were right on the edge as well- recall that this is a naked cake; everyone’s gonna see these layers, so make it pretty!
5. Repeat with the second layer of cake and whipped cream. 
6. Add the final cake layer and whipped cream. 
7. If any of the cream has come out of the sides, take an offset spatula and smooth it around the cake. *My cake came out more like a semi-naked cake, like she’s wearing a bikini, not necessarily taking a shower. I think this is totally okay. You can have it be as naked or covered as you want. Use your discretion and cake modesty as a guide. 
8. Top with fresh strawberries and raspberries. 


Rating (Scale 1 - 5):
Difficulty: 2
Amount of Time: 3
Awesomeness: 4


Gluten Free Brownies

This recipe is riffing off of a flourless chocolate cake recipe I have used in the past. So, like duh, it's already, gluten free, but I ...