Tuesday, December 15, 2020

Spiced Clementine Pound Cake


Yeah, you read that title and were like what the hell? It's okay, I promise it's good. So my friend Liz made some candied clementines and gave me some, and I thought, you know what, let's make a cake with those. I asked her to send me the link to the recipe she used, and she sent me three links and told me about the bastardization of a recipe that she did, so I'll try to give you what she did. 

For the Clementines:

12 clementines 

4 c granulated sugar

3 c water

1 cinnamon stick

1 piece candied ginger

3 - 4 cardamom pods

1. Wash the clementines well and poke with a toothpick or fork several times to pierce the skin. In a pot, combine all the ingredients above. 

2. Bring to a simmer, cover, and simmer for 1 - 2 hours (the longer, the softer the rind will be). Be careful not to boil them. Let the clementines cool in the syrup. 

3. Chop up 4 of them and reserve for the cake. The rest, you can chop and use almost like a marmalade on toast. and the simple syrup is delicious in a drink as well! 

For the Cake:

3 sticks unsalted butter, room temp

1 c granulated sugar

1/2 c brown sugar

6 large eggs

1 3/4 c all-purpose flour

1 1/2 tsp salt

1 1/2 tsp baking powder

1/2 tsp cinnamon 

1/4 tsp ground ginger

1. Prepare bundt pan with goop and preheat oven to 325F. 

2. Cream together butter and sugars in a stand mixer fitted with paddle attachment. 

3. Slowly add in eggs, making sure to incorporate between each egg. 

4. Combine dry ingredients in a small bowl (flour, salt, baking powder, spices). Add them to the wet ingredients slowly until incorporated. 

5. Add chopped up clementines to the batter and combine. 

6. Bake for 45 - 55 minutes or until a toothpick inserted comes out clean. 

For the Glaze:

1/4 c clementine syrup (again, I'm sorry; I am very bad at actually measuring things for a glaze... this is an estimate)

Juice of 1 lemon

2 ish c powdered sugar (also an estimate- you want it to be thick, but also pourable)

1. Combine in a bowl until you get a fairly thick consistency. 

2. Once cake is turned out onto a tray and cooled completely, drizzle glaze over the top. Allow to harden. 

Tuesday, November 10, 2020

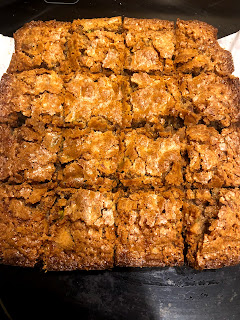
Chai Spice Blondies


Our book club meets once a month where we discuss our book, drink far too much beer, and usually have a themed dessert to go along with everything. This month, we read "Erotic Stories for Punjabi Women"- I recommend by the way. Anyway, Chai was a prominent flavor in the book, so that's how these blondies came to be! This makes about 12 larger blondies or 16 smaller squares. 

For the Chai Spice: 

This was taken from Dessert for Two. I used ALL of it in the blondies- it is a bit potent, but I wasn't mad about it. Mix the following spices in a bowl and set aside:


1/2 tsp ground ginger

3/4 tsp ground cardamom

1/2 tsp freshly ground black pepper

1/2 tsp ground cloves

1 tsp ground cinnamon 


For the Blondies:

3/4 c (1 1/2 sticks) unsalted butter, melted

1 1/2 c brown sugar

3 eggs 

1 1/4 c all-purpose flour 

1/2 tsp salt 

1 tsp vanilla extract 

1/4 c chopped pistachios *I would do more than this next time; I only did this much because I accidentally bought the shell-on pistachios and started hating my life after shelling 1/4 c of them. Patience isn't my strong suit. 

1. Preheat oven to 375F. Prepare an 8x8 inch pan with some nonstick spray and parchment paper. I leave a little parchment hanging off the sides so I can easily lift out of the pan. 

2. Melt butter in the microwave. Stir in the brown sugar. 

3. Once it's a little cooled off, stir in eggs one at a time, mixing between each to fully combine. Add vanilla. 

4. Add flour, chai spice, and salt to the wet mixture and mix well to combine. 

5. Add in pistachios. *I also think a little white chocolate might be nice in here. You do you, boo. 

6. Bake for 50 - 60 minutes or until a toothpick inserted comes out clean. Again, I feel like this is a case where underdone is better than overdone. Think about brownies- you want some chew and goo in a blondie. 

Here's the book, by the way:


Snickerdoodle Cookies


It's holiday season, y'all, so that means snickerdoodle. I actually made this recipe over the summer and never wrote the blog post and every time I go to make snickerdoodle, I'm like damnit, where did I put that recipe, so here we are. It's perfect timing to get this out to anyone who needs a little cinnamon sugar love this time of year. Answer: we all need it. All of us. 

This recipe makes about 3 dozen cookies. 

For the cookies: 

1 c (2 sticks) unsalted butter, room temp

1/2 c brown sugar

1/2 c granulated sugar

2 eggs

1 tsp vanilla extract

2 c all-purpose flour

1/2 tsp baking soda

3/4 tsp cinnamon 

3/4 tsp salt

Cinnamon and sugar for rolling *I don't measure how much I put in a bowl.. I do like half a cup of sugar and maybe a tsp cinnamon? I just do it until I feel like I have enough cinnamon. Spoiler alert- a lot of cinnamon. 

1. In a stand mixer fitted with paddle attachment, cream together butter and sugars. 

2. Add one egg at a time, mixing to incorporate. Add vanilla. 

3. In a separate bowl, combine dry ingredients- flour, baking soda, salt, and cinnamon. Slowly add to the wet ingredients and mix to combine. 

4. Allow dough to chill in fridge for about 30 minutes. Preheat oven to 350F.

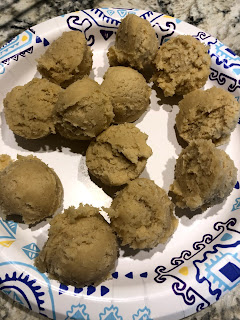
5. Scoop into balls (I use an ice cream scoop, but a spoon is fine too); roll them in your hand to form a ball and roll them in cinnamon and sugar mixture. Bake for about 8 -12 minutes. *I find that a little underdone is better than overdone. 

6. Turn on some holiday music and drown your COVID Christmas sorrows in cinnamon and sugar. 


Monday, September 28, 2020

Pumpkin Cupcakes with Cream Cheese Frosting


Basic white bitch here, and I don't care who knows it. It's fall, and I want pumpkin. There, I said it. I don't know why there's so much pumpkin hate all of a sudden, but I say, find any pleasure you can in this cataclysmic world that is 2020 right now. I prefer to have my happiness slathered with some cream cheese frosting, thank you very much. 

This recipe makes a three layer 9-inch round cake or 24 cupcakes (plus a little extra). 


For the batter:

1/2 c vegetable oil

1 c pumpkin puree (not canned pumpkin pie filling)

1 1/2 c granulated sugar

1/2 c brown sugar

3 eggs 

1 tsp vanilla extract 

3 1/2 c all-purpose flour

1 1/2 tsp baking powder

1 1/2 tsp baking soda

1 tsp salt 

3/4 tsp cinnamon

1/4 tsp ground cloves

1/4 tsp ground ginger

1 c buttermilk 

1. Preheat oven to 350F and prepare cupcake pans with liners and grease a small pan (I usually do 6 in) for the extra batter. 

2. In stand mixer fitted with paddle attachment, mix together oil, pumpkin puree, granulated sugar, and brown sugar. 

3. Add in vanilla extract and the eggs, mixing to incorporate after each egg. 

4. In a separate bowl, combine flour, baking powder, baking soda, salt, and spices. 

5. Pour 1/3 of the dry ingredients into the sugar mixture and mix to combine. 

6. Pour 1/2 of the buttermilk into sugar mixture and combine. 

7. Pour another 1/3 of dry ingredients. 

8. Pour second 1/2 of buttermilk. 

9. Pour in last 1/3 of dry ingredients. 

10. Distribute into pans and bake for 18 - 22 minutes or until a toothpick inserted comes out clean. 

11. Allow to cool completely before topping with frosting. 

For the frosting:

1 1/2 sticks unsalted butter, room temp

12 oz (1 1/2 boxes) cream cheese, room temp

5 ish c powdered sugar

Splash of vanilla

Pinch of salt  

Splash of milk or cream (optional)

1. Put butter and cream cheese into stand mixer fitted with paddle (or whisk) attachment and start to add in powdered sugar slowly to incorporate. Start with about 4 c, and see how you like the texture. You can always add more. 

2. Add in vanilla and salt. Whip for a few minutes until fluffy. You can add a splash of milk if it's too thick. *This is a pretty thick frosting though, because cream cheese. 

3. Put in a pastry bag with your desired tip and frost the cupcakes. *I actually just snipped a big whole in my pastry bag and went to town; didn't use a tip. I feel like there's a that's what she said joke in there somewhere. 

4. Please ask me how much frosting I made the first time and why I ended up with an entire pastry bag still full at the end of all my frosting... 


Tuesday, September 15, 2020

Apple Pie Crumb Bars


I am very much a summer girl, but I tell ya, this Fall got me leaning hard into it. I feel like COVID is sucking all the joy out of everything, so if I want to celebrate Fall, I will, damnit. Sorry, the anger is not directed at you. Anyway, we continue our sepia-toned journey this Fall with apple pie crumb bars. Shortbread crust covered with apple pie filling and topped with crumb topping (as all pies should be). This makes about a 13 x 9 pan- I actually made two 8x8 inch pans with this recipe, but it'll work well in a 13 x 9 as well.  OR You can do it all in one 8x8 inch pan and have fatties. I've done this also, and I'm not mad about it. *You will see just a few changes to the original recipe that need to be made for this option. 

For the apple pie filling:

I like to start here so that you don't feel rushed trying to cut up all these apples while the shortbread bakes. 

7 apples *I used golden delicious and pixie crunch because we went apple picking, and that's what we had, but you want to use any kind of tart, baking apple- the queen is always granny smith. ** IF you are doing the fatties (just one 8x8 in pan, you will use 4 apples)

1/2 c granulated sugar *Or 1/3 c for fatties

3/4 tsp cinnamon

1/4 tsp cardamom

1/8 tsp ground cloves

Pinch of ground ginger

Pinch of salt

Juice of 1/2 a lemon

1 tbsp corn starch * 1/2 tbsp corn starch for fatties

1. peel and cube apples into smallish pieces- you want it to homogenize some so that it stays in the bars after cooked, so smaller is better. 

2. Put apples, spices, and lemon juice into a medium pan on the stove and start to cook at medium-low heat. 

3. Once some of the juices start to come out of the apples, add the tbsp of corn starch. This will help thicken all those juices. 

4. Continue to cook until the filling becomes rather thick and the apples start to soften- a little bite in there is fine! You can start on the shortbread while this cooks. 

For the shortbread:

2 sticks unsalted butter, room temp

1/2 c granulated sugar 

2 c all-purpose flour *this is a little less than I usually use, but it worked well for me. If it feels too wet and not very sandy, you can add a bit more*

3/4 tsp salt

1/2 tsp cardamom 

Zest of 1 lemon

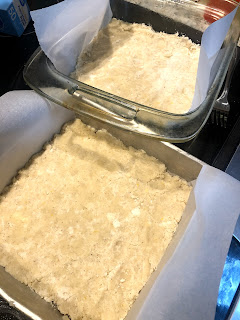
1. Preheat oven to 350 F and line pan with parchment (with a bit of overhang so you can pull it out of the pan for cutting and serving), and spray with cooking spray. 

2. Put butter and sugar in stand mixer fitted with paddle attachment and cream together for a few minutes. 

3. Add spices and lemon zest. Slowly add in flour until you get the desired texture (that 2ish cups we discussed). 

4. Pour out into prepared pan and press down into a solid layer. 

5. Par-bake at this point for about 20 minutes; start on the crumb topping while it's baking. 

For the crumb topping:

1/2 c all-purpose flour

1/2 c brown sugar

1/2 c butter, cold and cubed

1/2 c rolled oats 

1. Place all ingredients in a bowl and combine. *use a pastry cutter or your hands to get butter to about pea size. 

Assembly:

1. After shortbread is par-baked, take out of oven and top with the apple pie filling and the crumb topping. 

2. Bake again for about 40 - 50 minutes or until topping is golden brown and set. 

3. Allow to cool COMPLETELY before trying to take out of pan to cut. Or if you're not planning to share, stick a spoon in it and go to town, but don't say I didn't warn you that it's demon hot. Proceed with cautious abandon. 


Tuesday, September 8, 2020

Peanut Butter Cookies


These are an oldie, but a goodie. I have been trying to get my freaking cookie recipes down, and I think I finally got this one! These are chewy, peanut buttery, and the exact kind of nostalgia I want in a peanut butter cookie. I have found that you always need more fat and less flour for cookies than you think you will. I find that's mostly true in life in general as well. This recipe makes about 2.5 dozen (more or less depending on the size you make them). 


For the Cookies: 

1 stick unsalted butter, room temp

1 c peanut butter *I used creamy, but you could totally use crunchy as well. 

1/2 c brown sugar

1/2 c granulated sugar

2 eggs

1 1/2 c all purpose flour

1 tsp vanilla

3/4 tsp salt

1/2 tsp baking soda 

Extra sugar for rolling dough in

1. Preheat oven to 350F. 

2. In a stand mixer fitted with paddle attachment, combine butter and peanut butter. Add sugars and cream together. 

3. Add eggs and vanilla, stirring to incorporate. 

4. In a separate bowl, mix together dry ingredients; slowly incorporate into wet ingredients. 

5. Chill for about 20 minutes before scooping out. 

6. Scoop out cookies and roll into balls. Drop them into a little bowl of sugar to coat. 

7. Place them on a baking sheet and press down with a fork in a cross-hatch pattern to get the signature look.

8. Bake about 10 - 12 minutes. I find that these are kind of like brownies- you do NOT want to overbake them, but a little underbaked is fine. 


Saturday, September 5, 2020

Oatmeal Cream Pies


So mom and I took a Friday off and decided to day drink and bake, like you do. She was like let's do oatmeal cookies, and I was like, I see your oatmeal cookies, and I raise you oatmeal cream pies. So we made oatmeal cream pies, and mom was like, the big scoop will be fine, so now we have oatmeal cream pies the size of our heads. So, if you want the giants, you will get about 1 dozen pies. If you want more normally sized pies, you could probably get about 18 or so. Follow your heart, though. You know what you need. 


For the cookies:

1 c (2 sticks) unsalted butter, room temp

1/2 c brown sugar

1/2 c granulated sugar

2 eggs

1 tsp vanilla extract

1 c all-purpose flour

2 c old fashioned oats

3/4 tsp salt

3/4 tsp baking powder

3/4 tsp cinnamon 

1. Preheat oven to 350F. In a stand mixer fitted with paddle attachment, cream butter and sugars together. 

2. Add eggs and vanilla extract. 

3. In a separate bowl combine dry ingredients (oats, flour, salt, baking powder, and cinnamon) and then slowly incorporate into the butter mixture. 

4. Scoop onto a baking sheet and bake (if you're doing the big mamas, it's about 15-18 mins; if you're doing normal sized cookies, it's about 10 - 12 mins). 

For the buttercream center:

1 c (2 sticks) unsalted butter, room temp

3 ish c powdered sugar

Splash of vanilla

Pinch of salt 

1. In a stand mixer fitted with paddle attachment, put in butter and slowly incorporate powdered sugar. 

2. Add the vanilla and salt and mix to incorporate. *you do want this to be pretty thick so you get the classic cream pie feel. 

3. On completely cooled cookies, pipe (or just schmear with a knife) the buttercream on half of the cookies and top with the other cookies. 

4. If you made the big ones, feel free to cut them in half and pretend like you're only going to eat half of it... and then go back and eat the other half when no one is looking. 


Monday, August 31, 2020

Cookies and Cream Brownies

Obviously, I am in a cookies and cream place. It's not the worst place I've been though, so I'm fine with it. This uses my regular brownie recipe with a few additions. I also baked it in a 9x13 instead of an 8x8, so they were thinner. It gave me more surface area for the cheesecake swirl, so that's why I did it, but if you want fatty brownies, you follow your heart. 

For the Brownies:

1 stick unsalted butter

8 oz chocolate chips (you're really going to use the whole 12 oz bag, but 2/3 of it for now)

1/2 c brown sugar

1/2 c granulated sugar

3 eggs

1/2 c flour

1/4 c cocoa powder

1/4 tsp salt

1 tsp vanilla extract 

4 oz chocolate chips for mixins (see, I told you)

8 Oreos crushed up (big chunks is fine)

1. Preheat oven to 375F. Grease 13x9 pan (I just used cooking spray). 
2. Put 8 oz chocolate chips and butter in a heat-safe bowl and microwave in 30 second intervals until chocolate and butter are just melted. Don't over-heat. If there's still a few lumps, just stir, and the residual heat will melt everything. 
3. Add sugars to the melted chocolate mixture and combine. This will help cool the chocolate off a little before you add the eggs.
4. Add eggs one at a time and mix well before adding the next. Add vanilla.
5. Add flour, cocoa powder, and salt to the bowl and mix well to combine. Don't worry about over-mixing here. 
6. Add the other 4 oz of chocolate chips now and about 2/3 of the Oreo chunks; stir to incorporate. 

For the Cheesecake Swirl: 

4 oz (half a block) cream cheese, room temp

1 egg

1/4 c granulated sugar

Splash of vanilla

1. Using a mixer, beat to combine all ingredients. 

Assembly:

1. Pour brownie batter into prepared pan. Top with the cheesecake swirl- I just poured lines of the cheesecake mixture. 

2. Take a knife and create swirls with the chocolate and cheesecake layers. 

3. Top with the remaining Oreo chunks. 

4. Bake at 375F for about 30 - 40 minutes. *I baked them for 30 minutes, and they were still a little gooey, which I mean isn't a bad thing, but they could've stood a few more minutes. My oven is also notorious for this, so still check at 30 minutes. 

Wednesday, August 19, 2020

Cookies and Cream Macarons


Here we are again, back at our favorite, the macaron. A friend had ordered some macarons and wanted cookies and cream flavor, and who am I to say no? Who am I to not make an extra dozen to eat by myself in a dark room while Netflix plays softly in the background? So here we are, making macarons again. Honestly, they were fucking scary to make in the beginning, but the more you make them, the less intimidating they are, and they're still the same amount of delicious, so I say, give it try, folks! 
This recipe makes about 2 dozen small macarons. 

For the Shells:

1 part egg whites - 69 grams (2 egg whites for me- this is why I always go by weight, because sometimes 2 egg whites is 64 grams, so it is better just to weigh and change your weights accordingly)

1.25 part almond flour - 86 grams (69 from egg whites x 1.25)

0.8 part granulated sugar - 55 grams

1.5 part powdered sugar - 103 gram

0.3 part Oreo cookie crumbs (outside of Oreos crushed up) - 20 grams

1/8 tsp cream of tartar

1. In a stand mixer fitted with whisk attachment, start mixing egg whites. Don't mix them on too high of a speed (no higher than 6 on a kitchenaid). While this starts out, move to the second step.

2. Sift together almond flour, powdered sugar, and Oreo crumbs into a bowl. *I just put my bowl on my food scale and poured through my sifter until the right weight because I'm lazy.* Put aside until the egg whites are finished.

3. After the egg whites have started to foam up, add cream of tartar. *this is just to help stabilize the meringue, so you can leave it out if you want.

4. Start adding in the granulated sugar to the foamy egg whites a bit at a time. Let mixer keep whipping until you get to stiff peaks, like you see in the picture.

5. Pour in about half of your dry ingredients into the egg whites. You'd think you have to be gentle here because it's egg whites and you don't want to lose all that air. Nah. You can mix the shit of out of this; it's okay.

6. Pour the second half of dry ingredients in and keep mixing. Here I was a bit more gentle. You want to keep mixing until it looks glossy and it ribbons back on itself. You want the ribbon to homogenize and mix back into the mixture within about 20 seconds or less. 

7. Line baking sheet with silpat mat and/or parchment. *You will want to draw a circle template to pipe your macarons on to if you're using parchment;**You'll need at least two baking sheets with the parchment ***If you plan to make a lot of macarons, just invest in some mats. I bought mine on amazon for like 12 bucks for 2 mats. ****this is a lot of addendums, but I also just put the parchment on top of the silpats because they tend to come off of the parchment better, but I like that I can see the circles on the silpats. Okay, I'm done now.... 

8. Pour batter into a prepared piping bag with a large round tip. Pipe into the circles on your parchment of silpat. I just blop it in there; I don't make a circle motion, if that makes sense. 

9. Whack the cookie sheet on the counter at least 3 times to get all the air bubbles out. *Again, you can whack them on the counter pretty hard.

10. Allow to sit at room temperature until they look matte and when you try to gently touch them with your finger, they don't stick. They form a skin on top. This can take between 20 minutes to an hour (usually more like an hour). In more humid months, this will take longer, but it's one of the most important steps! *also put them away from the edge of the table if you have a dog ;)  

11. While you're waiting, preheat oven to 350F.

12. BEFORE you put them in the oven, drop to 325F. I would only bake one sheet at a time. I tried double once. It doesn't work out well. Anyway, bake for 12 - 14 minutes, but check at 10 minutes. If you can lightly touch it and the macaron doesn't move on it's base, it should be done.

13. Allow to cool completely before trying to remove from the sheet and fill.


For the Buttercream:

4 tbsp (1/2 stick) unsalted butter, room temperature

Insides of 15 regular Oreos *it would behoove you to get double stuffed so you don't have to scrape as many cookies.

1/2 c powdered sugar

2 tbsp Oreo crumbs *sift these so that you don't have big clumps stopping up your piping tip later

Splash of vanilla

Pinch of salt

1. In a stand mixer fitted with a paddle attachment, put in butter and Oreo innards. Slowly add powdered sugar and Oreo crumbs into the butter.

2. Add vanilla and salt into the mix. Check for taste. If you feel like it needs a bit more powdered sugar, this is a good time to add it, and if it feels too thick, you can add a splash of cream or milk if you feel so inclined; I did not.

Assembly:
1. Put buttercream in a piping bag with a round tip *or any tip really- you do you, boo.

2. Pipe a dollop of cream on half the shells- a little goes a long way. 

3. Put the other half of the shells on top of the buttercreamed shells.

4. Most recipes say to store in the fridge; I don't like this, so I don't do it. It's buttercream, so, pretty shelf-stable. I just store them in an air-tight container on the counter. They may last longer if you put them in fridge, but eating them before they go bad has never been an issue for me!


Monday, August 10, 2020

Pecan Pie Cupcakes

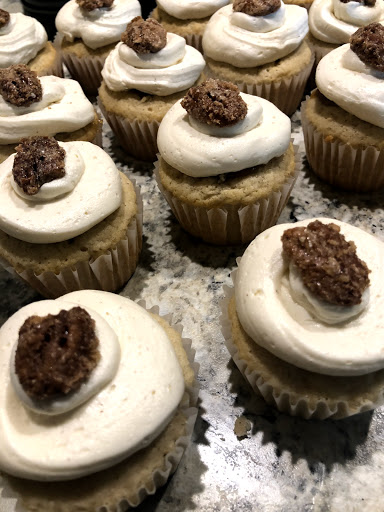
I made these babies for my birthday. Yes, I realize my birthday is in August, and pecan pie is so not a summery dessert,but you know what, it was like 70 degrees, and felt like Fall, and I do what I want, so come at me. Anyway these were everything I wanted them to be. They are a spiced cupcake filled with pecan pie filling, topped with cinnamon buttercream and a candied pecan. I'm drooling just thinking about them again. This recipe makes 24 cupcakes and a little extra (or three 9inch round cakes). 

For the candied pecans:

I used this recipe and just tweaked a bit (and halved it because I didn't need so many)

1 egg white

1 tbsp water

1/2 c granulated sugar

1/2 tsp salt

1/2 tsp cinnamon

splash of vanilla

pinch of cardamom 

2 cups halved pecans

1. Preheat oven to 225F. Prepare baking sheet with parchment paper. In a large bowl, beat egg white, vanilla, and water until frothy. Add pecans and stir to coat. 

2. In a separate bowl, combine sugar, salt, cinnamon, and cardamom. Pour over pecans and stir to coat. 

3. Pour pecans onto prepared baking sheet and bake for one hour, stirring every 15 minutes. Allow to cool completely before snacking (and placing on cupcakes). *I made these the night before cupcakes, which was a good idea. 

For the batter:

1/2 c vegetable oil

1/2 c unsalted butter, room temp

2 c granulated sugar

3 eggs, separated

1 tsp vanilla extract

2 c all purpose flour

1 1/2 c cake flour 

1 tsp salt

1 1/2 tsp baking soda

1 1/2 tsp baking powder

3/4 tsp cinnamon

1/4 tsp ground cloves

1/4 tsp ground ginger

1 1/2 c buttermilk

1.Preheat oven to 350F and prepare cupcake pans with liners and grease a small (I usually do 6 in) pan for the extra batter.
2. In a stand mixer fitted with paddle attachment, cream together oil, butter, and sugar. Add in the yolks of the three eggs- keep the whites separate. Add in vanilla extract.
3. In a small bowl, whisk together egg whites until at stiff peaks. Set aside.
4. In a separate bowl, combine all dry ingredients- flour, baking powder, baking soda, salt, and spices.
5. Pour 1/3 of the dry ingredients into the sugar mixture and mix to combine.
6. Pour 1/2 of the buttermilk into sugar mixture and combine.
7. Pour another 1/3 of dry.
8. Pour second 1/2 of buttermilk.
9. Pour in the last 1/3 of the dry ingredients.
10. Slowly fold in the egg whites that were whipped up earlier. *This ensures that the batter will be light and fluffy.


11. Distribute into pans and bake for 18 - 22 minutes or until a toothpick inserted comes out clean.

For the filling:

I used this recipe for the filling; it will make more than you need for the cupcakes, but I say you still want to make this amount, and then you can stick it in a jar and eat it with a spoon, like I did. 

3 eggs

3/4 c dark corn syrup *I used light corn syrup, and it was fine

3/4 c dark brown sugar

1 tsp vanilla extract

1/4 c unsalted butter, cubed

1/2 tsp salt

2 c chopped pecans

1. Combine all ingredients into a saucepan except the pecans. Heat over medium heat until it starts to boil, stirring constantly. 

2. Add the pecans and boil for another 30 seconds or so. 

3. Remove from heat and allow the mixture to cool. *You can stick it in the fridge if you want it to cool faster. 

Ask me how many times I "tasted" this for quality testing....

For the buttercream:

2 c unsalted butter, room temp (4 sticks)

5 1/2 (ish) cups of powdered sugar

Splash of milk or cream (optional)

1 tsp vanilla 

1/2 tsp cinnamon 

Pinch of salt

1. Put butter in a stand mixer fitted with paddle attachment and start to add in powdered sugar slowly to incorporate. 

2. Add in vanilla, cinnamon, and salt. Whip for a few minutes until light and fluffy. If it's too thick, you can add a splash of milk. 

3. Put in a pastry bag with your desired tip. 

Assembly:

1. Take the cooled cupcakes and hull out the center, making sure to not go all the way to the bottom. 

2. Spoon in some of the pecan pie filling. 

3. Pipe some buttercream on to the cupcakes. 

4. Top with a candied pecan. 

5. Pretend like it's Thanksgiving and wear your stretchy pants. 


Wednesday, July 1, 2020

Honeymoon Cookies

So I made these cookies for my neighbors who just got married. If you know me, you know I love a good themed gift, and this gift was beer themed. So, I made cookies using honey and blue moon = honeymoon cookies. It's adorable, damnit. Love it. You know you want to.

Anyway, these are a really easy dough, and they aren't overly sweet. The beer makes they yeasty and earthy, and the honey (and orange zest because, hello, blue moon) bring it all together. This recipe makes about 2 and 1/2 dozen cookies or so.


For the dough:
12 oz of blue moon (you're going to reduce this and use it for both the dough and the glaze); you could probably get away with 8 oz, but I had a bottle, soooo here we are. What I'm saying is buy the bottles, and if you want, you can take a few swigs of it before you start reducing.
1 c (2 sticks) unsalted butter, room temp
1/2 c brown sugar
1/2 c granulated sugar
1 tbsp honey
2 eggs
2 c flour
1/2 tsp baking soda
1/2 tsp baking powder
3/4 tsp salt
Zest of 1 orange
*I didn't put any cinnamon in here, but imagine that is a great idea, and I may do that next time. I just didn't want it to overpower the beer flavor.

1. Put blue moon in a small saucepan and place over medium heat. Reduce until about half. This does take a while- you don't want to crank up the heat to make it go faster. Ask me how I know... I also did mine the night before so that it's cooled off; if you do it day of, just allow it to come to room temp before using.
2. Preheat oven to 350F.
3. In a stand mixer fitted with paddle attachment, cream together butter, honey, and sugars.
4. Add one egg at a time, mixing to incorporate. Add 1 tbsp of blue moon reduction.
5. In a separate bowl, combine dry ingredients- flour, baking soda, baking powder, and salt. Slowly add to the wet ingredients and mix to combine. Add in orange zest.
5. Allow dough to chill in fridge for at least 30 minutes to firm up a bit.
6. Scoop out balls and place onto cookie sheet. Bake 8 - 12 minutes or until slightly golden around the edges. *mine took about 12, but my oven always tends to take longer*
7. Allow to cool completely before glazing.

For the glaze:
3 tbsp blue moon reduction
1 tbsp honey
1 1/2 c powdered sugar
Pinch of salt

1. Mix together. If it feels too thin, you can add more powdered sugar. If it feels too thick, you can add more blue moon.
2. Dip top of cookies into glaze and allow to firm up.
3. Enjoy with your favorite beer :)

Friday, June 12, 2020

Fudgy Brownies

People who like cakey brownies are wrong. There, I said it. If you want a cakey brownie, eat some
freaking cake. I feel better now with that off my chest. So, if you're wondering what kind of brownies these are (and you didn't read the title), now I am sure we are all on the same page. Brownies are a crowd pleaser for even the pickiest of dessert people. Another great thing about brownies- one bowl, no mixer, less clean up!

For the Batter:
1 stick unsalted butter
8 oz chocolate chips (you're really going to use the whole 12 oz bag, but 2/3 of it for now)
1/2 c brown sugar
1/2 c granulated sugar
3 eggs
1/2 c flour
1/4 c cocoa powder
1/4 tsp salt
1 tsp vanilla extract 
4 oz chocolate chips for mixins (see, I told you)

1. Preheat oven to 350F. Prepare pan with some non-stick spray and parchment paper. *I use an 8 X 8 inch square pan. This makes THICK brownies, but I'm not mad about that, and when I asked my husband if he wanted me to put them in like a 13 X 9, he literally told me that was a stupid idea because he wanted chunky brownies, so here we are. You follow your heart. Obviously they'll cook faster in a 13 X 9, so there's that. 
2. Put 8 oz chocolate chips and butter in a heat-safe bowl and microwave in 30 second intervals until chocolate and butter are just melted. Don't over-heat. If there's still a few lumps, just stir, and the residual heat will melt everything. 
3. Add sugars to the melted chocolate mixture and combine. This will help cool the chocolate off a little before you add the eggs.
4. Add eggs one at a time and mix well before adding the next. Add vanilla.
5. Add flour, cocoa powder, and salt to the bowl and mix well to combine. Don't worry about over-mixing here. 
6. Mix in your favorite brownie fixins- I just add more chocolate chips. I'm a purist. You could do nuts or other chocolate candies or really anything. 
7. Bake for 50 - 60 minutes or until a toothpick inserted comes out kind of clean. This is such a personal preference. I err on the side of less done, but you know what you like. 
8. I would say allow to cool before eating, but let's be honest, no one will ever do that. I am pretty sure I burned my entire esophagus while eating these firey chunks of chocolate bliss. No regrets. I mean, minor regrets, but not much. 

Sunday, May 17, 2020

Cinnamon Swirl Pound Cake

Is anyone else having a hard time baking in quarantine? I feel like my shit just isn't turning out like it usually does. Can it sense my stress? I don't know, but I was determined to have something come out, and this cake did NOT disappoint. Thank god- I felt like I was losing my touch for a minute! This is a straight up pound cake recipe with a cinnamon swirl and some streusel for good measure. By straight up, I mean all the same weight for butter, sugar, and flour. I did weigh this, but I will try to give you pretty close to cups measurements. It's easiest to start with the accouterments and then move on to the batter so that you have everything ready to assemble.


For the Cinnamon Swirl:
3 tbsp brown sugar
1 tbsp cinnamon
1 tbsp milk (I used heavy cream because that's what I had)

1. Combine all ingredients a small bowl.
2. Pour into a small piping bag or ziploc bag for assembly.

For the Streusel:
1/3 c packed brown sugar
1 tbsp unsalted butter, cold
2 tbsp all-purpose flour
1/8 tsp ground cinnamon

1. Combine all ingredients into a small bowl and mix with fingers until you get the butter about the size of peas. Set aside until assembly.

For the Cake:
3 sticks unsalted butter, room temp (12 oz)
1  1/2 c granulated sugar (12 oz)
1 3/4 c flour (ish) (12 oz)
6 large eggs (12 oz)
1 tsp vanilla
1 1/2 tsp salt
1 1/2 tsp baking powder

1. Prepare a bundt pan with goop and preheat oven to 325F.  *You can also do this in a loaf pan or really any pan that it'll fit into, and do your streusel on the top.
2. Cream together butter and sugar in a stand mixer fitted with paddle attachment until the mixture becomes a pale yellow and is slightly fluffy. This will take about 2 - 3 minutes.
3. Slowly incorporate eggs, making sure mixture is combined between each addition.
4. Combine dry ingredients in a small bowl. Then add them to the wet ingredients slowly until incorporated.
5. Add the vanilla. Let's assemble!

Assembly:
1. Pour half of the batter into the prepared bundt pan.
2. Cut a hole in the corner of the ziploc bag and pipe in swirls of the cinnamon swirl mixture, using half now, and half later.
3. Take a toothpick or butter knife and swirl the mixture into the cake batter just slightly- like you're making a marble cake.
4. Sprinkle half of the streusel topping on top.
5. Repeat- cake batter, cinnamon swirl, toothpick, streusel.
6. Bake for about one hour, but check at about 50 minutes. When a toothpick inserted comes out clean, you are good.
7. Allow to cool before turning it out, and then glaze.
For the Glaze/Icing:
1 cup (ish) powdered sugar
3 tbsp milk (again I have heavy cream)
1 tbsp corn syrup *I tried this, and it does make it thicker and a little more luxurious

1. Mix together until it's at the consistency you want.
2. Pour on top of the cake. *mine was really thick, so it was more of a smear than a pour, but I liked it like that. Follow your heart.

Saturday, May 2, 2020

Everything Bagel Crackers

It's still quarantine time. Still.. Week 6 of at least 10... Mustn't dwell. Anyone struggling a little bit, like I am? I wanted to get into the kitchen and play around with some recipes because that makes me feel better, but as I have said a few times already, I need treats that the two other people in my house will actually eat with me, and I need to not make a million of something. This recipe checked both of those boxes. I also wanted to try making crackers because I have really only made shortbread, and that is so not the same. These crackers are crunchy and sharp and would be a great addition to a charcuterie board if you happen to have the fixins at home. I didn't, so I've just been eating them straight up or with some hummus. You really can't go wrong. Did I also mention that this recipe from start to eating is like maybe 30 minutes at most? I didn't count the crackers because I am bad at forethought, but this recipe makes two cookie sheets-worth of crackers.

For the crackers:
4 tbsp (1/2 stick) butter, cold and cubed
1 1/4 c-ish all-purpose flour
1 tbsp granulated sugar
1 tsp salt
1/4 tsp cayenne pepper
1 tbsp everything bagel seasoning (plus more for topping)
1/3 c cold water

1. Preheat oven to 400F and line two baking sheets with parchment paper.
2. In a food processor, add in all ingredients but the water and pulse to combine. *I just have one of those baby food processors, and that's totally fine. I feel like you could probably make this by hand like you would a pie crust, but I didn't try that yet, so I don't have a ton of pointers for you.
3. Slowly stream in the water while pulsing until the dough starts to come together and pull away from the sides.
4. Dump out onto a clean surface with a little flour dusted and roll out really as thin as you can get it.
5. What I should have done is probably do this step here, but I did it when they were cut, which is fine, but I bet it would be easier here- sprinkle some more everything bagel seasoning on top of the dough and gently press down so that the seasoning sticks.
6. Take a pizza cutter and cut the dough into strips and then into squares, or really whatever shape you want. *Also, as you can see, I am really bad about cutting into even squares. Like I really can't do it, and I can't be bothered to measure out and do it precisely when I'm just making them for my own snackies.
6. Place the squares onto lined baking sheets and dock with a fork to give some steam holes.
7. Bake for about 10-13 minutes or until they are slightly golden brown. I rotated my pans about halfway through.
8. Allow to cool completely before devouring. Store in an air-tight container.

Gluten Free Brownies

This recipe is riffing off of a flourless chocolate cake recipe I have used in the past. So, like duh, it's already, gluten free, but I ...