Tuesday, July 30, 2019

Oreo Buttercream

This will be a pretty quick post because we are just gonna talk about buttercream. I will also link this to the black cocoa cake if  you aren't wanting to just eat straight up buttercream with a spoon. No judgement if that IS what you want. I've done it a time or two myself.

For the Buttercream
3 sticks of unsalted butter, room temperature
Innards of 12 regular Oreos
4 c powdered sugar
Crushed Oreo shells
1 tsp vanilla
1/4 tsp salt
*optional, a splash of heavy cream

1. In a stand mixer fitted with a paddle attachment, cream together butter and Oreo innards.
2. In a separate bowl, sift together powdered sugar and crushed Oreo shells.
3. Slowly start to incorporate powdered sugar mixture into the butter mixture.
4. Add vanilla and salt and mix to incorporate.
5. At this point, you can add a little heavy cream if you want to loosen it up a bit, but I didn't.

These are what the cupcakes look like with the black cocoa recipe. Pure Oreo cookie bliss!

Black Cocoa Cake

You know how Oreos are not a normal chocolate color? That's because they use black cocoa powder! This stuff is hella dark and earthy. You can buy it on Amazon (surprise; you can buy everything on Amazon), and it will change up some of your favorite recipes. This cake was made for my friend Peter's birthday. It is a black cocoa cake with black cocoa frosting and a white chocolate ganache dyed green to look like slime. This is just a slight departure from my regular chocolate cake, but it does take on a personality of its own. It is a banging cake that would perfect for any monsters in your life. This recipe is enough for three 8-inch round cakes or 24 cupcakes (with a little extra).

For the Cake
2 c granulated sugar
2 1/2 c all-purpose flour
3/4 c cocoa powder
1/4 c black cocoa powder (this cocoa powder doesn't have as much chocolate-y flavor, so  you want to use just a little bit of it)
3/4 c vegetable oil
3 large eggs
2 tsp baking powder
1/2 tsp baking soda
1 tsp salt
1 tsp vanilla
1/2 c buttermilk
1 c hot water

1. Preheat oven to 350F. Grease three 8-inch round pans using goop.
2. Combine sugar and vegetable oil in stand mixer fitted with paddle attachment.
3. Add eggs one at a time until incorporated. Add in vanilla extract as well.
4. In a separate bowl, combine the dry ingredients.
5. Alternate dry ingredients and buttermilk, incorporating each into the batter before adding more. Start and end with the dry ingredients.
6. Add the hot water *make sure your speed is on the lowest!* to the batter a little at a time. Once all incorporated, scrape down the sides of the bowl, and then turn to medium-high speed and whip for one minute. This batter will look pretty loose, but that's how it should be, so don't worry!
7. Pour batter evenly into cake pans and bake for 18 - 22 minutes or until a toothpick inserted comes out clean.
8. Let cool slightly before turning out on a cooling rack to finish cooling completely.

For the Buttercream
3 sticks unsalted butter, room temperature
1/2 c cocoa powder
1/4 c black cocoa powder
3 c powdered sugar
1/4 tsp salt
1 tsp vanilla

1. Sift together powdered sugars and cocoa powders in a large bowl.
2. In a stand mixer with paddle attachment, cream butter.
3. Slowly add powdered sugar and cocoa powders to the butter.
4. Add salt and vanilla and mix to incorporate.
5. If it seems too loose, add a bit more cocoa powder; if it seems really tight, you can add a bit of heavy cream or buttermilk to it.
**I did NOT add any food coloring to this, and it was pretty dark. It also gets darker as the buttercream sits.You can add black food coloring if you want to make it midnight black, but I don't really think it's necessary.

For the Ganache
10 oz white chocolate
2/3 c heavy cream
1 1/2 tbsp unsalted butter
A pinch of salt
*optional food coloring of your choice*

1. In a small saucepan, heat heavy cream. *You aren't looking for it to boil; you just want to warm it.
2. In a heat-safe bowl, combine white chocolate and butter (cut your butter into small cubes).
3. Once the heavy cream is warm, pour it on top of your chocolate and cover with plastic wrap for five minutes to help the melting process.
4. Once it's melted, stir to combine. You can add food coloring at this point if you like. The mixture will be pretty runny at first. Give it time to firm up a bit. You want it to still be pourable, but you also don't want it to just slide off the cake.

Assembly
1. Level off your cake layers if needed.
2. Put a dollop of buttercream on your cake stand, and then add your first layer of cake.
3. Cover top of first layer with buttercream and then add second cake layer.
4. Repeat process until all three cake layers are stacked. Cover entire cake in the black buttercream.
5. Once the ganache is cooled to a good consistency, start by pouring in the middle of the top of the cake. I just take a spoon and carefully start to push it to the edge of the cake at various spots to let it drip over the edge. The ganache will continue to harden as the cake sits.

I also want to link you to some Oreo buttercream that is a good alternative to the black cocoa with white chocolate ganache. Full circle, back to the Oreos!


Tuesday, July 23, 2019

Lemon Blueberry Bombshell Cake

This is the lemoniest (and possibly sweetest) cake ever. There's lemon in everything. EVERY. THING. And it's glorious. I feel like Will Farrell- MORE COW BELL! MORE LEMOOOON! Okay, sorry, I don't know what happened there. Anyway, I'm gonna just say when you go to make this cake, just buy a bag of lemons and plan on using most of them. This is the perfect spring or summer cake. I'd recommend making the lemon curd the night before- this just makes it easier when you go to make the cake because it requires some cooling.
Side note, this was a cake for our two year birthday of our book club because we are adorable! I will post a pic of our group at the bottom so that you can look if you want and can just stop reading by then if you don't ;)

This recipe makes three 8-inch round cakes OR 24 cupcakes (with a little extra).

For the Lemon Simple Syrup
1/2 c granulated sugar
1/4 c water
Zest and juice of one lemon

1. Combine all ingredients in a small sauce pan and bring to a boil.
2. Reduce to a simmer for about 10 minutes, or until the mixture thickens to a syrup.
3. Remove from heat and cool.
**You will have extra syrup left over from the cake. KEEP IT! Put it in your cocktails! Pairs great with cucumber gin. Just saying.


For the Lemon Curd
I am still using Ina Garten's lemon curd recipe because it's delicious.
3 lemons *bullshit, Ina.
1 ½ c granulated sugar
¼ pound unsalted butter, room temp (that’s 1 stick)
4 extra-large eggs
½ c lemon juice (3 – 4 lemons) *Really, it depends so much on how juicy your lemons are. Sometimes it takes me 6 lemons, and sometimes 4. So what I'm saying is buy more lemons than you think you will need. 
1/8 tsp salt

1. Using a vegetable peeler, remove the zest of 3 lemons, being careful to avoid the white pith. Put the zest in a food processor. Add the sugar and pulse until zest is very finely minced into the sugar.
2. Cream the butter and beat in the sugar and lemon mixture.
3. Add one egg at a time, and then add the lemon juice and salt. Mix until combined.
4. Pour mixture into a 2-quart saucepan and cook over low heat until thickened, about 10 minutes, stirring constantly. The lemon curd will thicken at about 170F, or just below a simmer. For this recipe, I kept cooking it for about 10 more minutes because I wanted it to be thicker so that it would not squish out of the cake layers.
5. Remove from heat and run through a strainer to get any lumps or bigger pieces of zest out of it. Cool or refrigerate. I put it in mason jar and let it cool slightly before putting the lid on and putting it in the fridge. 

For the Lemon Blueberry Cake
1/2 c vegetable oil
1/2 c (One stick) unsalted butter, room temperature
3 large eggs, separated
2 c granulated sugar
2 c all-purpose flour
1 1/2 c cake flour
1 1/2 c buttermilk
1 tsp salt
1 1/2 tsp baking soda
2 tsp baking powder
1 tsp vanilla
1 pint blueberries
Zest and juice of 1 lemon (although more wouldn't really hurt)

1. Preheat oven to 350F and prepare three 8-inch round cake pans with goop.
2. Combine oil, butter, and granulated sugar and cream together in a stand mixer fitted with paddle attachment.
3. In a small bowl, whip up the egg whites to soft peaks. Set aside.
4. Add egg yolks one at a time, into the butter and sugar mixture, incorporating each before adding another.
5. Add vanilla.
6. Combine flour, salt, baking soda, and baking powder together in a separate bowl.
7. Alternate dry ingredients and buttermilk, incorporating each into the batter before adding more. Start and end with the dry ingredients. **SAVE a little of the dry ingredients at the end.
8. Take your last bit of dry ingredients and toss your blueberries around in there. This will help the blueberries to be coated in flour and not sink to the bottom of the cakes.
9. Throw in your egg whites and fold them in to incorporate.
10. Incorporate the blueberries, lemon zest, and juice into the batter and mix by hand. You don't want to use the electric mixer for this part because you don't want to break the blueberries apart.
9. Divide batter into pans and bake for 25 - 30 minutes or until a toothpick inserted comes out clean.

For the Lemon Buttercream 
4 sticks unsalted butter, room temperature
5 1/2 c powdered sugar (sifted)
1/4 tsp salt
1 tsp vanilla
Zest of one lemon

1. Cream butter in a stand mixer with paddle attachment.
2. Slowly (in batches) add powdered sugar until incorporated. *You can add more powdered sugar if you feel it needs it. Sometimes I add more if it's a humid day.
3. Add vanilla, salt, and lemon zest and mix until incorporated.

Assembly
1.  Place a dollop of frosting on your cake board to hold layers in place.
2. If the cake layers are a bit uneven, level off tops with a serrated knife.
3. Put some buttercream in one piping bag and the lemon curd in another piping bag.
3. Place your first layer on the cake board. Take the simple syrup and brush the top of the cake with the syrup.
4. Take the buttercream and first make a circle of buttercream all around the edge of the top of the cake. This will create a dam to make sure that no lemon curd escapes! Continue to make a spiral of with the buttercream all the way into the middle of the cake.
4. Take the lemon curd and fill in the buttercream spiral with the lemon curd. (See video below)
5. Add next layer and then repeat.
6. Once the final layer has been put on, soak that layer with the simple syrup, and then cover the cake in buttercream.
7. If you want to do the cute little lemon drops on top, put some lemon curd in a ziploc bag and cut a TINY hole in the corner of the bag. Make little drops of lemon curd in a spiral on top of the cake. Take a toothpick and run it through each dot of curd to create a dragging pattern. You may need to wipe off your toothpick every once in a while as you go.

Tuesday, July 16, 2019

Strawberry Shortbread Bars

It's July, and tomorrow I am meeting some friends for a late birthday celebration of our friend Lucy, and I wanted to bring a little treat, but I also have to work all day, so wanted something that would travel well and be able to sit in my car all day, which is a big task in July heat in the Midwest! Second reason why I made these bars is because my friend Nina, who will also be at dinner, had left a full jar of strawberry preserves at my house, so here we are. These bars have a shortbread crust that just dissolves in your mouth, gooey strawberry preserves, and a crumble topping because everything should have a crumble topping. This recipe will make a batch of 12 bars, but they are thick little babies, so a little goes a long way. You could maybe even cut them into smaller pieces, but I didn't because I love myself and my friends. Another option that I'm not quite as offended by is putting this in a larger pan so that your shortbread is thinner, thus making this go a bit further, but you'd definitely want more preserves. You probably don't need more crumble topping lol. It's a lot of crumble.
Also, these do have a long bake time AND need to cool, so maybe make them a day before you need them. Just saying.

For the shortbread:
Shortbread is a 1-2-3 ratio. One part sugar, two butter, three flour by weight. It made more sense for me to just do my two ratio of butter first since it's in sticks and then do my measurements off of that.

2 sticks unsalted butter, room temp (226 grams)
1/2 c granulated sugar *a heaping half cup* (113 g)
2 3/4 c all-purpose flour (339 g)
3/4 tsp salt
1/2 tsp cardamom *I know I use it a lot. Come at me*
Zest of 1 lemon

1. Preheat oven to 350F and put parchment into a square 8x8 inch pan (with some overhang to help you pull these out later) and spray with cooking spray.
2. Put butter and sugar in a stand mixer fitted with paddle attachment and cream for a few minutes.
3. Add flour, salt, cardamom, and lemon zest, mixing until you get a crumble texture.
4. Press into the prepared pan and bake for about 20 minutes. This is just to get the shortbread to set a bit before adding the rest. While that's baking, you can get your crumble topping together.
Before the Bake
For the crumble topping:
This is the crumble topping I use for every pie. I did have a little extra that I didn't put on these bars, but after baking them, I feel like it would have been alright to throw all that shit on there. Also, can we talk about how easy these recipes are? First the shortbread, and now this:

1/2 c butter, unsalted, cold (one stick)
1/2 c rolled oats
1/2 c brown sugar
1/2 c all purpose flour
*I also put another pinch of salt and cinnamon in there*

1. Cut butter into cubes and combine with the rest of the ingredients in a large bowl. Squish with your hands until butter is the size of peas.

Assembly:
1. After shortbread has done the par-bake, take it out of the oven and spread the whole 13 oz jar of preserves on the shortbread. *just a reminder that your pan is hot, so be careful!*

2. Sprinkle the crumb topping over until it covers. If a little strawberry preserve is poking out, that's okay. She can show a little skin.
3. Return to the oven until golden brown and set. It took me about an hour.
4. Allow to cool COMPLETELY before lifting the parchment out and cutting into squares.
5. Someone please take these on a picnic because they are dying to go.

Tuesday, July 9, 2019

Bananas Foster Bizcocho

A long time ago, in a land far far away, AKA Spain, Jenna learned how to make a cake called a
Bizcocho. Then, she went home and was like what does that mean? It literally is a general term for a cake... so... I guess this is a bananas foster cake, but it's not like any cake you've ever tried. When my friend taught me this in Spain, she didn't measure anything, so I took notes as best I could, and now I am finally getting around to figuring out actual measurements and writing a real recipe. I have put my own spin on this as well by adding some banana rummy goodness! This cake has several components, but I promise, I can make it start to finish in about 2 hours, so it's not terrible. Trust me when I say you're gonna want to try this. And not share it. With anyone.

For the Cake:
3 eggs
6 tbsp granulated sugar
3 tbsp flour

1. Preheat oven to 300F.
2.Grease a 9-inch springform pan with butter on the bottom and sides. Place a round of parchment paper on the bottom for extra insurance and grease that as well. Sprinkle sides and bottom with granulated sugar to help the cake rise (like you would for a souffle).
3. In a stand mixer, whip egg whites and sugar to stiff peaks.
4. In a separate bowl with a hand mixer, whip the egg yolks. Here you are looking for them to be light in color and a little fluffy. I just whipped them the whole time my whites were getting to stiff peaks.
5. Gently fold the egg whites and flour into the egg yolks until completely incorporated.
6. Pour into pan and bake for about 30 - 35 minutes. It will be very lightly golden on the top when ready.
7. Allow to cool on a wire rack until ready to assemble. Release from the pan.

For the Buttered Rum Soak:
I used this recipe with slight changes.
4 tbsp unsalted butter
1/4 c water
1/4 c granulated sugar
1/4 c dark rum
1/2 tsp vanilla
Pinch of salt

1. In a small saucepan, heat butter, water, sugar, and rum until sugar dissolves.
2. Off the heat, add vanilla and salt.
3. Allow to cool until assembly. The butter may start to re-harden a bit, but that's okay. Just stir it up when you go to use it.

For the Bananas Foster Filling:
I used this recipe with slight changes.
6 tbsp unsalted butter
3/4 c brown sugar
1/4 tsp salt
1 tsp vanilla
3 bananas cut into small circles
1/4 c dark rum

1.Melt butter in a large skillet. Add brown sugar and stir until incorporated.
2. Add bananas and salt and cook about 3 - 5 minutes on one side until the bananas have developed a brown crust.
3. Flip slices over and cook for another 1 - 2 minutes.
4. Remove pan from heat and add rum. Return to heat and bring back to a simmer.
5. Ignite rum with a match or if you have a gas stove, you can just tilt the pan toward the flame. Cook until the flame dies out.
6. Off the heat, add the vanilla.
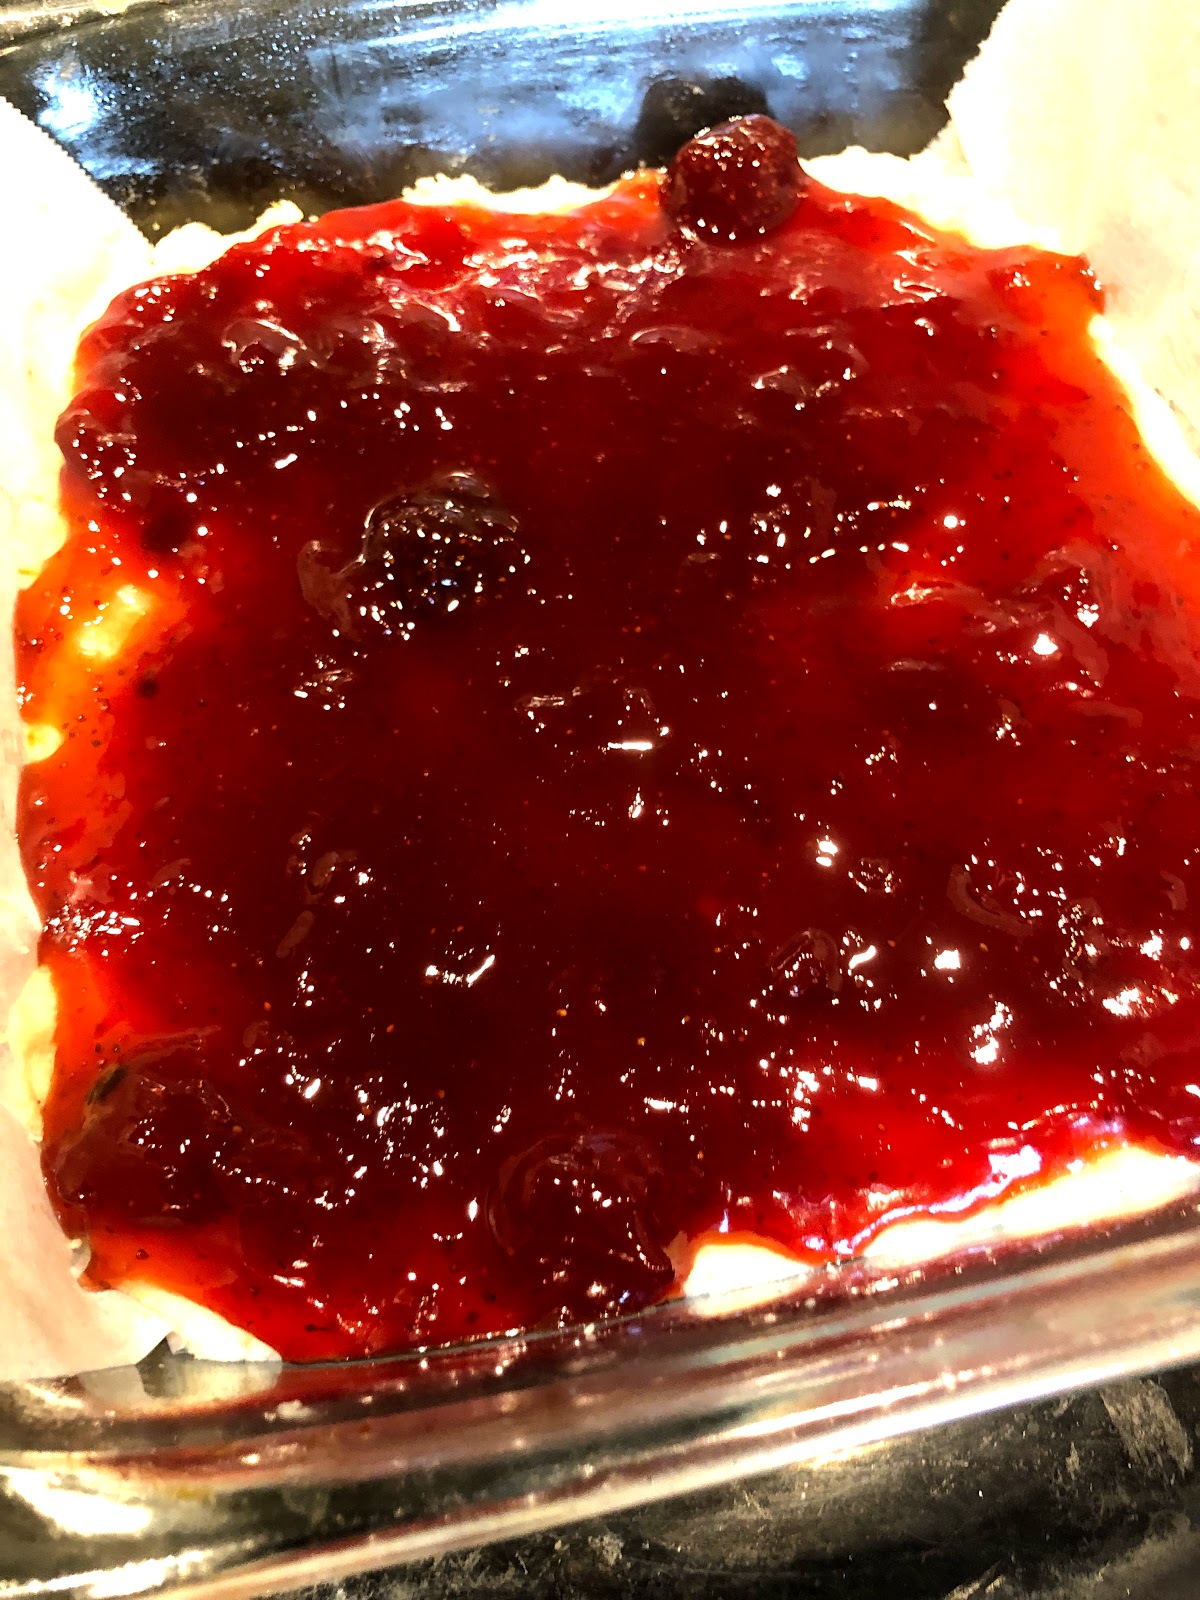
7. Put in a heat-proof bowl and allow to cool. It needs to be at least room temperature before you add to the cake so you don't melt the whipped cream. I stirred it every so often. It gets to like a jam consistency.

For the Candied Walnuts:
1/4 c water
1/2 c granulated sugar
1 c chopped walnuts (fairly finely chopped)
Pinch of cinnamon

1. Prepare a baking sheet with a sheet of parchment paper.
2. Add water and sugar to a saucepan until sugar dissolves and the mixture starts to thicken. You will know its ready when you can run a spoon through the bubbles and it takes a little bit for the bubbles to come back together, about 4  - 5 minutes.
3. Take off heat and add walnuts and cinnamon.
4. Pour onto baking sheet to cool. Once cooled, I ran my knife through them again to break up all the pieces. You want small pieces to be able to add smoothly to the cake.

For the Whipped Cream:
1 pint whipping cream
1/4 c sugar (more or less to taste- although everything else is pretty sweet, so err on the side of less sweet)

1. Pour whipping cream into stand mixer. Start mixing. Once it starts to fluff, add the sugar slowly.
2. Whip to medium peaks.

Assembly:
1. Cut cake in half with serrated knife. This cake is very fragile, so be careful!
2. Put a dollop of whipped cream on serving plate and add first layer of cake.
3. Soak the cake with some of the buttered rum soak. *you will have extra soak- that's okay, maybe heat it up and add more rum for a delicious drink. Hello!
4. Add half of the bananas foster mixture on top of first layer.
5. Put whipped cream on top and smooth.
6. Add second layer, soak again, add more bananas foster mixture, and cover whole cake in whipped cream.
7. Add walnuts all around sides of cake. You can also sprinkle some on top if you like.
8. Allow to sit in the fridge for a few hours before serving.
9. Keep any extra in the fridge. Will keep for a few days.


Tuesday, July 2, 2019

Brown Butter Sugar Cookies

This recipe is the first recipe I tried to make on my own. I decided that I wanted to start making my own recipes from scratch. So, I went down the rabbit hole of baking ratios. Then I get hella confused. Then I tried using the ratios I had found for sugar cookies of 1 part sugar, 2 parts fat, 3 parts flour (by weight). I didn't trust it because it felt like a LOT of butter, so my first try wasn't awesome lol, so I tried again and actually did stick to the ratios, and I have some delicious sugar cookies with a lemon cardamom royal icing.
These cookies have brown butter in them because I'm at a place in my life where I want all my butter to brown. Come at me, bro. The brown butter makes a major difference in the sugar cookie flavor. These are kind of nutty with a deeper, more sophisticated flavor than a normal sugar cookie. Okay, let's get into this!
One last thing- this recipe only makes about 2 dozen fairly large sugar cookies. You can totally easily double or triple this if you want more cookies. 

For the cookies:
*I'm going to give you measurements AND weights here because the ratios are based on weight, so I think if you're trying to figure out ratios yourself, you'll be able to more easily see mine in the weights. 

1/2 c granulated sugar (100 grams)
1 c unsalted butter (~228 grams)
2.5 c all-purpose flour (300 grams) *I doubled this recipe, and ended up using a bit less flour than double this amount. You are looking for the dough to be able to stick together. It is not a big deal if it's a bit sandy at first (like a shortbread), but if you use less flour than this, and it's at the right consistency, that's totally fine!
1 large egg
1 tsp vanilla
1 tsp baking powder
1/8 tsp salt 

1. Start by browning the butter. *You will want to do this a bit in advance so that it can come back up to room temp before making the cookies.* Put 2 sticks of butter into a medium saucepan on medium heat. Bring to a boil and stir constantly. At first it will look really foamy, but then it will calm down a bit so that you can see it start to change color. Pull off the heat when it gets to an amber color- this took me about 5 minutes. Make sure you get all those brown bits! Those are the best. Allow to cool before using. 
2. Preheat oven to 350F.
3. Cream butter and sugar. LOOK at those beautiful little brown butter specks! 
4. Add egg and vanilla. 
5. Combine flour, salt, and baking powder. Slowly add to the butter mixture. 
6. Once all combined, turn dough out onto a piece of plastic wrap. Let cool in fridge for at least 30 minutes. 
7. Place dough on a lightly floured surface. Roll out with a rolling pin to about a 1/4 inch thick. Cut out shapes with a cookie cutter and place on a parchment-lined baking sheet. 
8. Bake for about 12 - 14 minutes. The cookies will still be pretty light in color.  
For the royal icing:
6 oz powdered sugar 
1 egg white
Zest of half a lemon
1/3 tsp lemon juice (or how I measure- a squeeze of lemon)
1/8 tsp cardamom
1/2 tsp vanilla 

1. Sift powdered sugar into stand mixer. *I don't sift hardly anything. Sift this powdered sugar! You don't want lumpy icing. 
2. Add the rest of ingredients into the mixer and mix on high for about 5 minutes until you have stiff peaks. 
3. Spread onto cooled cookies. *I just used an offset spatula. You can also put some of the icing into a piping bag and pipe borders on your cookies. Then you can add a bit of water to the rest of your icing for a thinner consistency to "flood" the rest of your cookies inside of the border. This creates a cleaner look. I was going for rustic this time ;)