Monday, May 27, 2024

Gluten Free Brownies


This recipe is riffing off of a flourless chocolate cake recipe I have used in the past. So, like duh, it's already, gluten free, but I also can't do egg whites, so here we are, adjusting the recipe to my persnickety body. This recipe is chocolatey, gooey, and has a crackly top, so in my book, that makes for a delicious brownie! It makes an 8x8 pan of brownies. 

For the Brownies:

12 oz dark chocolate chips

7 tbsp unsalted butter

5 egg yolks 

1 c granulated sugar

1/4 c brown sugar

3/4 c pumpkin puree OR unsweetened applesauce

1 tsp vanilla

1/4 tsp salt 

1/4 c cocoa powder

1 tsp Xantham gum (this and the pumpkin/applesauce are what act as binders in place of the egg whites)

1. Preheat oven to 350F and prep pan with parchment paper (overhang a bit so you can easily lift out of the pan) and non-stick cooking spray. 

2. Put 10 oz of the chocolate, brown sugar, and cocoa powder in a heat-safe bowl and set aside while you brown the butter.

3. In a small pan, melt the butter and continue to stir until it starts to smell nutty and there are little bits of brown in the butter. Once browned, pour over the chocolate and sugar mixture, stirring until fully melted, and set aside. 

3. In a stand mixer fitted with whisk attachment, combine egg yolks and sugar and mix until light in color. 

4. Add in the pumpkin puree (or applesauce), vanilla, and salt. Mix to combine.

5. Add in the chocolate/butter mixture until combined. 

6. Add in Xantham Gum and mix to combine. 

7. Mix in the remaining 2 oz of chocolate chips and pour batter into prepared pan. 

8. Bake for about 55-60 minutes or until a toothpick in the center comes out mostly clean. *This is a gooey brownie, so a little on the toothpick is to be expected.* Also when it first comes out it doesn't look super crackly (see picture below), but once you cut into it, the top crackles delightfully. 

9. Allow to cool completely before cutting. Serve with your fav ice cream! 


Friday, May 24, 2024

Lemon Coconut Shortbread Cookies Gluten and Dairy Free

I haven't posted for quite a while, and part of that is because I was diagnosed with Hashimoto's (an auto-immune disease), and have been on a very restricted diet for the past year. As I have reintroduced foods and found out what works and doesn't work for me, I have been struggling with my baking journey. I definitely can't do gluten anymore. Dairy is a bit iffy as well... and egg whites are a negativo. Not to mention that common substitutes for some of these things (like rice flour and aquafaba) also don't sit well with me. All of this to say that shit's fucked, and I am trying to play around with some of my old recipes (and make some new ones) that I CAN eat. It's been a challenge, as I don't know the ingredients and what how they interact together like I did my regular ingredients. Anyway, in true Bravely Baking fashion, I thought, well let's start documenting recipes that DO work for me- and maybe they will work for you too. This is a riff on my dairy free lemon coconut shortbreads- so now they are also GF. This recipe makes about 24 cookies (more or less depending on your cookie cutter size). 

For the Cookies:

1/2 c granulated sugar 

1 c coconut oil

Zest and juice of 1 lemon 

1 tsp vanilla extract 

1 1/4 c coconut flour

1/3 c arrowroot starch 

2 tbsp gelatin (so these are NOT vegan; just GF- could sub a vegan gelatin sub like Agar Agar probably just fine)

1 tsp baking soda

1/2 c sweetened coconut flakes, toasted 

1/4 tsp salt

1. Preheat oven to 350F and toast your coconut flakes in a pan on the stove top- you can do it in the oven, but let me tell you how many times I've burned it this way. Allow coconut flakes to cool while you continue on.  

2. Put sugar and coconut oil into a stand mixer fitted with paddle attachment and mix to combine. 

3. Add vanilla extract, lemon zest, and juice. Mix to combine. 

4. Combine dry ingredients (not the coconut flakes yet) into the wet batter and mix. You're looking for wet sand consistency. You want it to be a little crumbly, but hold together when you squeeze it in your hand.

5. Add in coconut flakes.

6. Dust a clean surface with some additional coconut flour and turn the dough out onto the surface. Work the dough until it just comes together into a ball. 

7. Flour a rolling pin as well and roll out the dough to about 1/4 inch thick or so. Cut using the cookie cutter of your choice. 

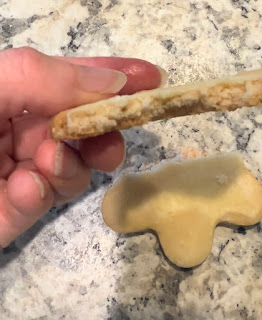
8. Bake for 8 - 10 minutes. These baked off much faster than my gluten cookies, so keep an eye. Also cautionary tale- I wouldn't use parchment paper on your baking sheet. I tried one batch like that, and they didn't crisp up as much. 

9. While cooling, work on the glaze. 

For the Glaze:

Juice of 3 lemons

1 1/2 c (ish) powdered sugar, sifted

1. Put lemon juice into a bowl. 

2. Whisk in the sifted powdered sugar until you get the consistency you want. I'd say you want it a little thick so that you can dunk the cookies into the glaze and it doesn't just slide off. If it's too thin, add more powdered sugar; too thick, add more juice (or even water is fine). 

3. These require a double dip for sure. I dipped them once (like I would the regular cookies), and these little babies just soaked up all of that glaze straight up. I was worried about them being soggy, but they totally weren't- so do the double dip. Just allow to set up a bit between dippings. 

4. These are good the first day, but honestly, SO much better the second day once the cookie and the glaze have really had a chance to be friends. 

Let me know if you have any tips for me as I am on this new journey!