Monday, September 30, 2019

Krantz Cake aka Chocolate Babka

This is a fun one! A krantz cake is also known as a chocolate babka. Thank you, wikipedia. I saw this recipe and was like this looks like a babka. Then I made it and was like this tastes like a babka. Then I googled and was like oh, it is a babka. This is fucking delicious and it is easier than it seems. Really. This is a two-dayer, so just keep that in your head. You're not making babka at 5:00pm to eat for dessert at 8:00.
I am going to immediately apologize for a few digressions here. Okay, first of all, I did this recipe for our cookbook club. Yes, I know, you wish you were as cool as me and my friends and had your own cookbook club. It's never too late, I say! Anyway, so we choose one cookbook every month, and everyone chooses a recipe (or two) to make out of it. Then we all get together and eat every magical thing. It's amazing and will make you gain at least three pounds. Totally worth it.
For January, we used the Jerusalem book by Yotam Ottolenghi. I had not heard of him before. I know. That's ridiculous. I have heard of him now, obviously. You know the Baader-Meinhoff Phenomenon where once you hear about some random thing or person, it seems like you repeatedly see or hear about that thing again? So, that's what happened with Ottolenghi. I was listening to Gastropod's episode about cookbooks like two days after we had chosen this book, and Yotam was on the show. THEN I was reading a book for my regular bookclub (I know, I lead a crazy life), and the character was cooking out of one of Ottolenghi's books! I can't make this shit up. What I'm trying to say is that this was serendipitous, and I totally feel like the universe needed me to have Krantz cake in my life. Thank you, universe, I am indebted.
One final side note- this makes TWO loaf cakes. Don't worry. You could literally eat both of them by yourself without any trouble.
Okay, so like I said, I used the cookbook. I will try to make it clear where I digress or add in my two cents as we go, since I am not providing a link. I would highly recommend this book though because all the recipes we made out of it were delicious.
For the dough:
4 1/2 c all-purpose flour, plus more for dusting
1/2 c superfine sugar *I used granulated- it was fine
2 tsp fast-rising active dry yeast *one packet is 2 1/4 tsp
Grated zest of 1 lemon
3 extra-large eggs *I just used large eggs
1/2 c water
2/3 c unsalted butter, room temperature, cubed
Sunflower oil for greasing *I just used cooking spray

1. Place the flour, sugar, yeast, and lemon zest in a stand mixer fitted with a dough hook and mix on low speed for 1 minute.
2. Add the eggs and water and mix on medium speed for about 3 minutes until the dough comes together.
3. Add the salt; then start adding the butter a few cubes at time, mixing until it's incorporated into the dough. *This will seem like a lot of butter. Your mixer is gonna be greased up like a pig. **This is a weird expression, btw.
4. Continue mixing for about 10 minutes on medium speed, until the dough is completely smooth, elastic, and shiny. *Yotam says during the mixing, you may need to scrape down the sides and add a bit more flour. I didn't need to scrape down the sides, because, like I said, there was so much butter, but I did add just a small amount of flour, and this really helped things to come together better.
 
5. Once all the dough has mixed for about 10 minutes, and it's coming off the sides of the bowl cleanly, place the dough in a large bowl that's been lightly oiled. Cover with plastic wrap, and leave in the fridge for at least half a day, preferably overnight.
*The recipe doesn't say how much this dough should rise. I assumed it would rise in the fridge overnight because it has yeast in it. Mine didn't rise AT ALL. That's okay. Everything still worked out okay. Mine did rise later in the process, so if yours doesn't then, you might have problems, but at this point, it's okay. Don't panic!
For the filling:
1/2 c powdered sugar
1/3 c cocoa powder
4 1/2 oz dark chocolate, melted
1/2 c butter, melted
1 c pecans
2 tbsp granulated sugar

1. Grease two 2 1/4 lb loaf pans (9 x 4 in) (again I just used cooking spray). Line the bottom with parchment paper. *I left an overhang on the sides so I could easily lift the cakes out after they were done baking. I also sprayed on top of the parchment paper with cooking spray.
2. Melt the dark chocolate and butter. *You can just melt them together in the microwave in short increments of time (like 15 seconds). Be careful not to overheat it.
2. Make the filling by mixing together the powdered sugar, cocoa powder, melted butter, and chocolate. You will get a spreadable paste. *The pecans and granulated sugar will NOT be mixed with this. **As this cools down a bit, it will be more spreadable and less pourable. If you still feel like it's too thin when you go to use it, just add a pinch more powdered sugar.
3. Divide the dough in half and keep one half covered and in the fridge while you work. *I left it covered on the counter, and this made the second loaf much easier to roll out. This dough is hella dense. Like you could take out someone if you threw it at them.
4. Roll out the dough on a lightly floured surface into a rectangle measuring 15 x 11 inches.
5. Trim the sides to make them even. Then position the longest side closest to you.
6. Use an offset spatula and spread half the chocolate mixture onto the dough, leaving 3/4 in border all around.
7. Sprinkle half the pecans on top of the chocolate. Then sprinkle over half the granulated sugar.
8. Brush a little water along the edge farthest from you. *This will help seal up the roll.
9. Using both hands, roll up the rectangle tightly, starting with the long side that is closest to you and ending with the long side that has the water on it. Press to seal the watered edge, and then with both hands, smooth out the log to make sure it's a uniform size, resting on the seam.*This is like making cinnamon rolls.
10. Trim the two edges of the log about 3/4 in on both sides with a serrated knife.
11. Cut the log in half lengthwise. You are dividing the log into two even halves. *Mine started to unravel a bit, but it's okay. You can stick it all back together when you braid.
12. With the cut sides facing up, gently press together one end of each half; then lift the right half over the left. Repeat this process, but this time, lift the left half over the right, creating a two-pronged braid. Gently squeeze together the other ends. You will be left with a twisted look, showing the chocolate innards. *Also, I'm sorry for a lack of pictures during this step. I was by myself, and my hands were very busy...  This is what it looks like before you put it in the loaf pan. Don't worry if it's not perfect.
13. Carefully lift the cake into the loaf pan. *AND REPEAT THIS PROCESS ALL OVER AGAIN WITH THE SECOND DOUGH! **I promise the second one goes much more quickly.
14. Cover the loaves with a damp tea towel and put in a warm place to rise for an hour to an hour and a half. The loaves will rise about 10 to 20 percent this time. *I turned my oven to it's lowest setting while I was working. Once it preheated, I turned the oven off. This is where I put my dough to rise. It works every time!
15. Preheat oven to 375F, making sure that the oven has completely preheated before putting your loaves in. Remove the tea towels, and bake for 30 minutes or until a skewer inserted into the middle comes out clean (or kind of clean- there is chocolate after all). *Please make sure that if you put your loaves in the oven to proof, that you take them OUT before you preheat the oven.
16. While the cakes are in the oven, make the syrup.
For the syrup:
2/3 c water
1 1/4 c superfine (granulated) sugar

1. In a small saucepan, combine the water and sugar. Bring to a boil. As soon as the sugar dissolves, remove from heat and allow to cool down.
2. As soon as the cakes are out of the oven, brush all the syrup over them. It is important to use all the syrup. *You will be thinking, my god, I can't use all the syrup. There are puddles, woman, puddles! Just keep going. It'll be alright.
3. Leave the cakes until they are just warm, and remove them from the pans to let cool completely before serving. *I think you want to take them out while they're a little warm still so that all that sugar doesn't harden and make your life impossible later.

Difficulty: 3
Amount of Time: 4
Awesomeness: 5


Monday, September 23, 2019

Apple Pie

It's the first day of Fall, and one of the few days below 90 degrees in the Midwest, so I did the damn
thing and went apple picking with my husband and made an apple pie! #basicwhitebitch right here! Also it's weird that I haven't posted a fruit pie on this blog yet, so here we are. Also (again) this has a crumble topping because I believe that all fruit pies should have a crumble. Fight me.

For the crust:
**I used to make this crust and divide it into 2 crusts, but now I just use the whole thing as 1 crust, and I like it far better, but if you wanted to do that and top with the second crust, you're welcome to, but then you wouldn't have crumble topping, soooooo**

2 c all-purpose flour
1 tsp salt
1 tbsp granulated sugar
2/3 c butter
1/3 c milk (or heavy cream)*ish- it really depends on the humidity
1 tbsp vinegar *I have also just used buttermilk instead of the milk and vinegar combo
1/2 tsp cinnamon *optional, but nice

1. Preheat oven to 400F.
2. Combine flour, cinnamon, sugar, and salt in a large bowl. Grate in the butter and then incorporate with a pastry cutter (or just your hands) until you have pea-sized pieces of butter incorporated.
3. Add vinegar and gently mix.
4. Add milk (or heavy cream) a little at a time, mixing as you go until you have a dough that mostly comes together- it can be a little more or less depending on the day.
5. Turn out the dough onto a clean surface and just work it until it all comes together and you can form it into a ball.
6. Wrap in plastic wrap and put in the fridge for about 30 minutes (or just until you get everything else together- because I'm impatient.)

For the filling:
5 or 6 baking apples *I used golden delicious because that's what we picked, but granny smith is also perfect
1/3 c brown sugar
1 tbsp corn starch
1/2 tsp apple pie spice *I used pumpkin pie spice because..... same thing mostly
Pinch of salt
Juice of 1 lemon

1. Peel and slice apples into small-ish  half moon slices (like 1/4 inch thick)
2. Combine all ingredients in a large bowl, making sure all the apple pieces are coated, and set aside.


For the crumble topping:
1/2 c rolled oats
1/2 c all-purpose flour
1/2 c brown sugar
1/2 c unsalted butter, cold, cubed
1/4 tsp cinnamon *I don't really measure this. Just do what feels right
Pinch of salt
Pinch of cardmom *optional, but again, delicious

1. Combine all ingredients in a bowl.
2. Get ya hands in there and combine until you have pea-sized clumps of butter. Set aside for assembly.

Assembly:
1. Take pie crust out of the fridge. Flour a clean surface and your rolling pin.
2. Roll out the dough until about 1/4 to 1/2 inch thick.
3. Roll the dough up over the rolling pin for easy transport and place into pie dish.
4. Crimp edges.
5. Place apple filling in the pie crust.
6. Top with all of the crumble topping. Yes, all of it.
7. Put pie dish on top of a baking sheet just in case there's spillage.
8. Bake for about 45 - 55 minutes or until the crust and topping are golden brown.
9. Allow to cool to about room temp and dig in!


Tuesday, September 10, 2019

Peanut Butter Cup-Cakes

You see what I did there? That's a hard name, but let it marinate for a minute. Peanut butter cup.... cupcakes! When you're an adult, you can make candy cupcakes on a Tuesday and no one will stop you! I mean yes, but I also have a potluck at work tomorrow, and someone was like what are you going to make? I was like, oh, chocolate cupcakes. She was like just chocolate cupcakes? That seems kind of boring for you.
I see what you're doing, and it's working damnit. So here we are, on a Tuesday, upping the ante. This is a chocolate cake, stuffed with a mini Reese's cup, topped with a peanut butter frosting, and a few Reese's pieces because I can.
This batter is my go-to chocolate cake recipe (makes three 8-inch cake rounds or 24 cupcakes with a little extra for a baker's snack- you're welcome).

For the chocolate cake:
2 c granulated sugar
2 1/2 c flour
1 c cocoa powder
3 eggs
3/4 c vegetable oil
2 tsp baking powder
1.5 tsp baking soda
1 tsp salt
1 c boiling water *I just put mine in a clean coffee pot.
1/2 c buttermilk
1 tsp vanilla extract
1 bag of Reese's mini's (the individually wrapped ones) * I didn't do this the first time, and now this is the only way I do it, so I wanted to tell you that here as well as an option for you. 

1. Preheat oven to 350F. Prepare 24 cupcake tins with cupcake liners (or tin holes? Two tins, 24 cupcake slots- you get it).
2. Combine sugar and vegetable oil in stand mixer fitted with paddle attachment.
3. Add eggs one at a time until incorporated. Add in vanilla extract as well.
4. In a separate bowl, combine the dry ingredients.
5. Alternate dry ingredients and buttermilk, incorporating each into the batter before adding more. Start and end with the dry ingredients.
6. Add the hot water *make sure your speed is on the lowest!* to the batter a little at a time. Once all incorporated, scrape down the sides of the bowl, and then turn to medium-high speed and whip for one minute. This batter will look really loose (see below), but that's how it should be.
7. Fill up the cupcake tins to about 2/3 full. *Place one unwrapped reese's mini into the batter of each cupcake.* Also take the extra batter and put in a 6 inch cake round that has been sprayed or prepared with goop. Bake for 18-22 minutes or until a toothpick inserted comes out clean. (Mine took 20 minutes). *Keep in mind that if you are baking your reese's in the cupcakes, you will want to take that into consideration when putting a toothpick in to check doneness*. The extra cake takes about 26 - 28 minutes.

For the Peanut Butter Frosting:
1 1/2 c (3 sticks) unsalted butter, room temp
1 1/2 c creamy peanut butter
4 c (ish) powdered sugar, sifted
1/2 tsp salt
1 tsp vanilla

1. Put butter and peanut butter in stand mixer fitted with paddle attachment and mix to combine.
2. Start SLOWLY adding the powdered sugar until incorporated.
3. Add salt and vanilla. Continue to whip until fluffy (about 2 minutes).
Assembly:
If you didn't do my baked in option, then you have an additional step. 
For the assembly, you will also need 1 bag of mini Reese's peanut butter cups. **Buy the bag with the unwrapped ones- they are smaller and will fit better into a cupcake AND you don't have to unwrap all the candies!** Yo- I lied. Like I said I made changes. I mean these are fine, but I like the bigger mini cups- the individually wrapped ones. AND I just put them in the batter and baked them inside saving time, and I think I like it better anyway! 

You will also need (or want) 1 bag of Reese's pieces for topping.

1. Take the cooled cupcakes and take a piping tip (or I have also used a pairing knife) to make a small hole in the center of each cupcake.
2. Insert a mini peanut butter cup. *Again, if you baked it in, we are saving time, folks!
3. Add a little bit of the top that you just made a hole with back in so that the cupcake top is level again.
4. Put the frosting in a piping bag (or just a large ziploc bag with a large hole cut into one corner). Pipe onto each cupcake.
5. Top with a few Reese's pieces for curb appeal.
6. Then top your extra cake and eat it in a dark room with a spoon and let no one judge you. You do you, butter cup!


`

Banana Muffins

This is one of my favorite recipes. I am not sure who I got it from originally- maybe my friend Liz? I've made a few minor adjustments to the recipe throughout the years, but it's a great easy recipe that requires zero heavy equipment and is great for breakfast or a dessert! It's also a good one to do with your little ones. Let's jump right in!

For the batter:
1 1/2 c all-purpose flour
1 tsp baking soda
1 tsp baking powder
1/2 tsp salt
1/8 tsp ground cinnamon
3 ripe bananas (more ripe, more better)
3/4 c granulated sugar
1 egg (lightly beaten)
1/3 c unsalted butter, melted
1 tsp vanilla
*1/2 c walnuts optional (my husband doesn't like nuts, so I don't usually do it, but it is delicious)

1. Preheat oven to 375F and line one muffin tin with 12 liners. (you can totally make this into a bread in a loaf pan as well- I have done this many times. I just find that muffins are easier for taking somewhere and sharing.)
2. In a large bowl, combine flour, baking soda, baking powder, salt, and cinnamon. Set aside.
3. In a medium bowl, mash up bananas and add sugar, egg, butter, and vanilla.
4. Stir banana mix into dry ingredients until just combined. Don't over mix!
5. Go ahead and make the streusel BEFORE you put the batter into the muffin tin- we are layering, folks.

For the streusel topping:
1/3 c packed brown sugar
1 tbsp unsalted butter, cold
2 tbsp all-purpose flour
1/8 tsp ground cinnamon

1. Combine all ingredients into a small bowl and mix with fingers until you get the butter about the size of peas.
2. Using a small cookie scoop, put one scoop of batter into each muffin liner.
3. Sprinkle some of the streusel topping on the batter.
4. Add another scoop of batter to the liners. (you will be about 2/3 or a little more full).
5. Sprinkle the remaining streusel topping on the batter.
6. Put in the oven and bake for 18 - 20 minutes, or until a toothpick stuck in the middle comes out clean.

Rating (Scale of 1 - 5):
Difficulty- 1
Amount of Time- 1
Awesomeness- 5 (maybe one extra point for nostalgia)


Sunday, September 1, 2019

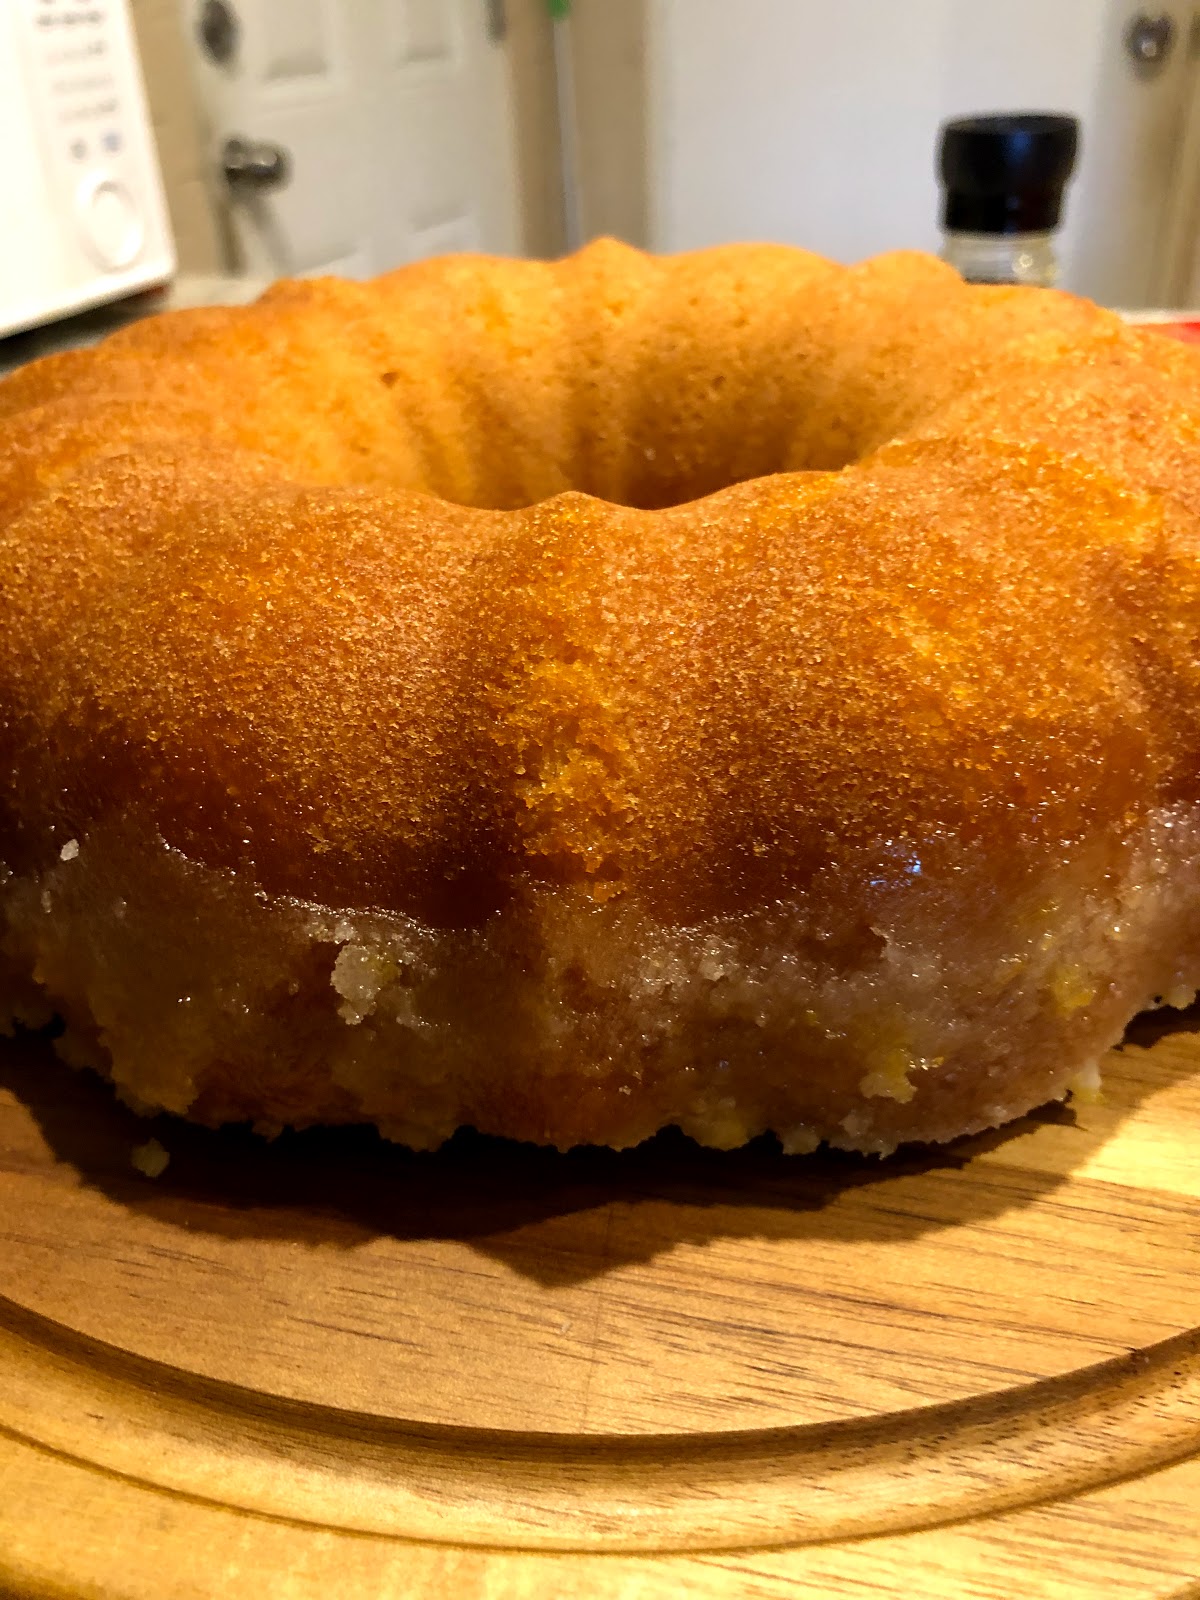
Lemon Pound Cake

It is the last weekend in August, and I am not ready to give up summer flavors. Summer is over when
I say it is, so stop, you pumpkin sluts. It's not time yet. Maybe next week though lol. Anyway, we had our low country boil which just happens to be the social event of the season, and a cake that holds up to the heat is the way to go. I did use exactly the proportions of a pound cake, although I just did half a pound of everything because I thought it would make too much cake (said no one ever), and I'm still a little sad about it, so feel free to double or triple this recipe! A pound cake is just equal parts butter, sugar, flour, and eggs. I added a couple extra flavors and a bit of salt and baking powder (just to help with leavening).

For the Pound Cake:
2 sticks unsalted butter, room temp (8 oz)
1 c granulated sugar (8 oz)
1 1/2 c flour (ish) (8 oz- I did go by weight and it was a little less than 1 1/2 c)
4 large eggs
1 tsp vanilla
1 tsp salt
1 tsp baking powder
zest and juice of 1 lemon

1. Prepare a bundt pan with goop and preheat oven to 325F. *You can also do this in a loaf pan or really any pan that it'll fit into, although the bundt does work especially well with this because you are gonna soak the bottom and then ice the top. This is more difficult when you have a pan that doesn't innately make you bake your cake upside down.*
2. Cream together butter and sugar in a stand mixer fitted with paddle attachment until the mixture becomes a pale yellow and is slightly fluffy. This will take about 2 - 3 minutes.
3. Slowly incorporate eggs, making sure mixture is combined between each addition.
4. Combine dry ingredients in a small bowl. Then add them to the wet ingredients slowly until incorporated.
5. Add the vanilla, lemon juice, and zest.
6. Pour into the prepared pan and bake for about one hour, but check at about 50 minutes. When a toothpick inserted comes out clean, you are good.
7. Once it's out of the oven, you can prepare the soak.
For the Soak:
1/3 c unsalted butter
3/4 c granulated sugar
1 tsp vanilla
zest and juice of 1 lemon

1. Combine all ingredients in a saucepan over medium low heat until butter is melted and sugar is dissolved. Do not bring to a boil.
2. Poke holes all over the cake-  I used a toothpick - while it's still in the pan- ie the bottom of the cake and pour the soak all over the cake. It will look like a lot of soak, but trust me, it WILL all soak in. Allow the cake to cool completely before turning it out. Another tip- as it's cooling, take a toothpick and run it around the edges including around the middle ring of the bundt pan because this soak will harden and that sugar will try to ruin your life, but if you do this step, it should still pop right out when you turn it over.
For the Glaze:
zest of 1 lemon
juice of 2 lemons *my lemons were hard AF, so I needed a second one, but let's be honest, when making a glaze, measurements are pretty much made up*
1/2 c powdered sugar
1. Combine juice and powdered sugar until you get a pourable but thick glaze. If it's too loose, add more powdered sugar. If it's too stiff, you can add more lemon juice or just a bit of water.
2. Pour over the top of the cooled and plated cake.


Saturday, August 24, 2019

Lemon Meringue Cupcakes

I am on a kick of changing pie flavors into cupcakes, and if that's wrong, I don't wanna be right. These sweet little babies have a graham cracker crust, a lemon cake filled with lemon curd, and a 7 minute frosting lightly torched. Curb. Appeal. For. Days. 

This recipe makes 24 cupcakes (with a little extra) or three 8-inch cake rounds. 

For the Lemon Curd
I am still using Ina Garten's lemon curd recipe because it's delicious. This is also good to make in advance- at least a few hours or even the night before.

3 lemons *bullshit, Ina.
1 ½ c granulated sugar
¼ pound unsalted butter, room temp (that’s 1 stick)
4 extra-large eggs
½ c lemon juice (3 – 4 lemons) *Really, it depends so much on how juicy your lemons are. Sometimes it takes me 6 lemons, and sometimes 4. So what I'm saying is buy more lemons than you think you will need. 
1/8 tsp salt

1. Using a vegetable peeler, remove the zest of 3 lemons, being careful to avoid the white pith. Put the zest in a food processor. Add the sugar and pulse until zest is very finely minced into the sugar.
2. Cream the butter and beat in the sugar and lemon mixture.
3. Add one egg at a time, and then add the lemon juice and salt. Mix until combined.
4. Pour mixture into a 2-quart saucepan and cook over low heat until thickened, about 10 minutes, stirring constantly. The lemon curd will thicken at about 170F, or just below a simmer. For this recipe, I kept cooking it for about 10 more minutes because I wanted it to be thicker so that it would not squish out of the cake layers.
5. Remove from heat and run through a strainer to get any lumps or bigger pieces of zest out of it. Cool or refrigerate. I put it in mason jar and let it cool slightly before putting the lid on and putting it in the fridge. 

For the Graham Cracker Crust
2 c graham cracker crumbs *I just bought the box because I couldn't be bothered, but if you have a little pent up anger that you wanna take out on some grahams, you do you boo.*
2 tbsp brown sugar
1/2 stick (4 tbsp) unsalted butter, melted
Pinch of salt

1. Preheat oven to 350F and prepare 24 cupcake tins with liners (and I also did a 6-inch pan because, like I said, extra batter- ie snackies for baker if you have to take these cupcakes to an event and can't eat them all by yourself in a dark room like you want to).
2. Combine all ingredients in a bowl and mix. Test with your hand- squeeze it in your hand and see if it lightly packs together.
3. Take about an 1/8 c or so of the graham cracker mixture and put it in the bottom of each lined tin.
4. Take a 1/4 c measuring cup and use the back of it to pack the crust down into the bottom of the tins.
5. Cover with the batter that follows (no need to bake beforehand).
*Side note- I did not put graham cracker crust in the bottom of my extra cake pan. I just sprinkled the crumbs on top of the cake later*

For the Lemon Cake

1/3 c vegetable oil
One stick unsalted butter, room temperature
3 large eggs
2 c granulated sugar
3 1/2 c all-purpose flour
1 c buttermilk
1 tsp salt
1 1/2 tsp baking soda
2 tsp baking powder
1 tsp vanilla
Zest and juice of 1 lemon (although more wouldn't really hurt)

1. Combine oil, butter, and granulated sugar and cream together in a stand mixer fitted with paddle attachment.
2. Add eggs one at a time, incorporating each before adding another.
3. Add vanilla.
4. Combine flour, salt, baking soda, and baking powder together in a separate bowl.
5. Alternate dry ingredients and buttermilk, incorporating each into the batter before adding more. Start and end with the dry ingredients.
6. Incorporate the lemon zest and juice into the batter and mix.
7. Divide batter into cupcake tins and bake for 18 - 22 minutes or until a toothpick inserted comes out clean.

For the 7 Minute Frosting
I used Smitten Kitchen's recipe for the frosting- it is also known as a marshmallow frosting. Light and fluffy and perfect for a torch!

4 large egg whites
1 c granulated sugar
1/2 c light corn syrup
4 tbsp water
2 tsp vanilla extract
Pinch of salt

1. Combine all ingredients into a metal bowl (I used my bowl of my stand mixer, and you will see why in a minute). 
2. Place metal bowl over a pot of simmering water- it should just barely be touching the bottom of the bowl. (For a stand mixer, you can have it go past the part that connects to your mixer and touch the bottom of the actual bowl part- you get what I mean). 

3. Beat with a handheld mixer until light and fluffy- about 7 minutes (hence the name). Mine took a little longer because I didn't let the water start simmering beforehand. 
4. Take the bowl off the simmering water and put it on your stand mixer. Mix until it gets suuuuuuuper fluffy and is cooler. 

Assembly
1. Once the cupcakes have cooled, take a piping tip to make a small hole in the center of the cupcake. 
2. Take the cooled lemon curd and put it in a piping bag (or just a ziploc bag) and cut the tip off to fill in the holes in the cupcakes. 
3. Put your frosting in a big piping bag and cut a BIG hole. Pipe fluffy mcflufferson clouds on top of your cupcakes. 
4. If you have a kitchen torch, go to town on your frosting for a nice little sun tan on the cupcakes. 

Sunday, August 18, 2019

Peach Pie Cake (and/or Cupcakes)

It was my friend Elizabeth Carter's birthday, and this cake was in celebration! I asked her what she wanted, and she was like anything, and I was like give me a flavor at least, and she said peach. My first thought was peach pie, but then I was like, wait... what about if peach pie and peach cake had a baby! This is a 3 layer cake with peach preserves and pie crumble topping between the layers, topped with a cinnamon buttercream, and really from start to finish, I think it was just a little over two hours, so not bad at all. I have also done this as cupcakes- cut a little hole in the cupcakes and fill with peach preserves. Add the buttercream on top and crumbles!!  This recipe makes three 8-inch round cakes OR 24 cupcakes (with a little extra).

For the Cake:
This is pretty much my same pineapple cake recipe subbed with peaches instead.
1/3 c vegetable oil
1 stick unsalted butter, room temperature
3 eggs
2 c granulated sugar
2 c all purpose flour
1 1/2 c cake flour
1 tsp salt
1 1/2 tsp baking soda
2 tsp baking powder
1 tsp vanilla
1 c buttermilk
8 oz by weight of canned peaches, chopped into small chunks *this was about the whole amount of a 15oz can of peaches also SAVE THE JUICE*
1/2 c peach juice *see, told you to save the juice- this was pretty much all the juice in my can of peaches*

1. Preheat oven to 350F and prepare three 8-inch round cake pans with goop.
2. Combine vegetable oil and butter in the bowl of stand mixer fitted with paddle attachment.
3. Gradually add in the granulated sugar and whip until light and fluffy.
4. Add in eggs and vanilla to the sugar mixture.
5. In a separate bowl combine dry ingredients: flour, salt, baking soda, and baking powder.
6. Pour 1/3 of the dry ingredients into the sugar mixture and mix to combine.
7. Pour the buttermilk into sugar mixture and combine.
8. Pour another 1/3 of dry.
9. Pour the peach juice in and mix to combine.
10. Pour in the last 1/3 of the dry ingredients.
11. Add the peach chunks and stir to incorporate.
12. Divide the batter between the three cake pans. Bake for 22 - 27 minutes or until a toothpick inserted comes out clean.
13. Allow to cool slightly before turning out on a cooling rack to cool completely before assembly.

For the Crumble:
2/3 c brown sugar
2/3 c unsalted butter, cold and cubed
1 c all-purpose flour
1/4 tsp cinnamon (I measure with my heart, so this is an estimate)
Pinch of salt

1. Turn oven up to 375F. Prepare a baking sheet with a piece of parchment paper.
2. Combine all ingredients in a bowl and squish together with hands (or a pastry cutter) until you have small chunks of butter throughout, about the size of peas.
3. Turn it out onto the baking sheet and bake for 15 - 20 minutes until golden brown, mixing every 5 minutes or so. *It will look melty in the oven, but it'll come together. Don't worry.
4. Allow to cool completely- it will get crunchy as it cools. *Also, this made more crumble than I used, so you could make less, or you could make this amount and have the best yogurt topping for your breakfast or a delicious snacky snack whenever you want. I always opt for snacks.

For the Cinnamon Buttercream:
4 sticks of unsalted butter, room-temp
5 c (ish) powdered sugar, sifted
1/4 tsp cinnamon (again, measure with your heart)
1 tsp vanilla (saaaaame)
1/4 tsp salt
*Optional to add a splash of milk or cream- I did this (actually a splash of buttermilk because that's what I had)

1. Put butter in a stand mixer fitted with paddle attachment. Start mixing.
2. Slowly add powdered sugar until incorporated.
3. Add in cinnamon, vanilla, and salt. Whip until fluffy.

Assembly:
1. Place a dollop of frosting on your cake stand. Add first layer of cooled cake (if you need to level your cakes, do so before assembly with a serrated knife).
2. Put about 1/3 of the buttercream into a pastry bag equipped with a large round tip (or you can just use a ziplock bag if you don't have a pastry bag. Just fill and cut a hole in the corner of the bag).
3.. Take your peach preserves and put a layer of preserves on the cake layer, leaving a little space at the edges.
4. Pipe a dam of buttercream around the peach preserves.
5. Add a layer of crumble topping on the peach preserves.
6. Add second cake layer and continue process. 
7. Add last layer and cover the whole cake in buttercream. (I didn't add peach preserves to that last layer because it's on top.)
8. Add more crumble topping on top of your cake for decoration.

Here's the Cupcakes:
1. Pour the same batter into cupcake tins with liners. Bake for about 18 - 22 minutes or until a toothpick inserted comes out clean.
2. Take a piping tip (or I used a pairing knife) to make a small hole in the center of each cupcake.
3. Put peach preserves in a piping bag (or a ziploc bag with the tip cut off) and pipe into the center of each cupcake.

4. Top each cupcake with a dollop of buttercream. I tried to make a dip in the middle of my buttercream so that it's easier to top with crumbles! 

Tuesday, August 13, 2019

Funfetti Cupcakes


These cupcakes are the epitome of childhood. I will say that these guys are a slightly different texture than those fluffy store-bought cupcakes. They have more chew to them, and I'm down with that. They are slathered with a vanilla buttercream and sprinkles and no child (or adult) has ever turned that away! My five-year-old niece ate two in one sitting! (Don't tell her mother.) This makes 24 cupcakes (with a little extra batter- which I just pour into a small cake pan and that's my baker snack- you know if you're taking cupcakes somewhere and so you don't get to eat any of them because they're for a party? Well, problem solved.) This also can make three 8-inch round cakes.

For the Cake:
1/2 c vegetable oil
1 stick unsalted butter, room temperature
3 eggs
2 c granulated sugar
2 c all purpose flour
1 1/2 c cake flour
1 tsp salt
1 1/2 tsp baking soda
2 tsp baking powder
1 tsp vanilla
1 1/2 c buttermilk
Zest of 1 lemon *optional*
Sprinkles- measure these with your heart. I probably put like 1/3 cup, but I literally poured them in until I got the amount that I wanted.

1. Preheat oven to 350F and prepare 24 cupcake tins with liners.
2. Combine vegetable oil and butter in the bowl of stand mixer fitted with paddle attachment.
3. Gradually add in the granulated sugar and whip until light and fluffy.
4. Add in eggs and vanilla to the sugar mixture.
5. In a separate bowl combine dry ingredients: flour, salt, baking soda, and baking powder.
6. Pour 1/3 of the dry ingredients into the sugar mixture and mix to combine.
7. Pour 1/2 of the buttermilk into sugar mixture and combine.
8. Pour another 1/3 of dry.
9. Pour second 1/2 of buttermilk.
10. Pour in the last 1/3 of the dry ingredients.
11. Add in lemon zest and sprinkles and stir to incorporate.
12. Divide the batter between cupcakes liners. Bake for 18 - 22 minutes or until a toothpick inserted comes out clean.

For the Buttercream:
4 sticks unsalted butter, room temperature
5 c (ish) powdered sugar, sifted
1 tbsp vanilla
Pinch of salt
*Again, you could put a bit of lemon zest in here. I did.*
**You could also add a splash of heavy cream to loosen it up if you like. I did not.*

1. Put butter into stand mixer fitted with paddle attachment and start to mix.
2. Slowly incorporate the powdered sugar.
3. Add vanilla and salt.
4. Whip until light and fluffy. If you feel like it's too loose, add more sugar. If it feels too tight, add a splash of cream or milk.
5. Slather on everything. Everything.

Assembly:
1. I don't feel like this really requires explanation, but here you are.
2. Take cooled cupcake. Put on buttercream. Add sprinkles on top.
3. Here's a bonus picture of my niece with her funfetti smash cake on her first birthday!
Bonus:
I have also used excess cake and buttercream and made some cake balls. (I made too much cake for the party. I don't know what happened....)
1. Take leftover cake (that is not "dressed with buttercream yet"- although honestly, I bet you could do this just with leftover cake and cupcakes in general as well- let's try that and reconvene.) and crumble with your hands in a bowl.

2. Add leftover buttercream (mine was pink for this last round of funfetti cakes- it's whatever). You are looking for a consistency that can stay together when you ball some of it up in your hand.
3. Scoop out mixture with a cookie scoop and place them on a parchment lined cookie sheet (or you could just use a spoon- although the scoop does allow for more consistency).
4. Once you have scooped them, gently roll them in your hands to create a ball shape. Allow to cool in fridge for about 45 minutes to an hour. (That pink color kinda makes them look like meatballs lol).
5. Melt candy melts (or white chocolate- I did both because I didn't buy enough candy melts) in microwave at 15 second intervals. Be careful not to overheat. Stir after each interval. Take out of microwave when there's still just a few lumps in the chocolate. Stir til completely smooth.
6. Take cool cake balls and dunk in chocolate with a fork, knocking excess chocolate off before landing it back on the parchment. Immediately put sprinkles on top- the chocolate hardens faster than you would think.
 

Tuesday, August 6, 2019

Chocolate Chip Cookies


Yeah, we are gonna go straight up chocolate chip cookies. No frills. No fuss. 100% delicious. These are an old friends' recipe that I have used for many years and have never found another recipe that exceeds this (IMO). They have a little chew, a little crunch around the edges, and that perfect hint of salt at the end. This recipe makes like 4 dozen cookies, so prepare yourself for a lot of them and for the fact that they will still only last like 20 minutes. 


For the Cookies:
2/3 c unsalted butter, room temperature
2/3 c vegetable shortening
1 c granulated sugar
1 c brown sugar
2 eggs
2 tsp vanilla *measure with your heart*
3 c all-purpose flour
1 tsp baking soda
1 tsp salt
12 oz semi-sweet chocolate chips *or whatever chips you want; you do you, boo*

1. Preheat oven to 350F.
2. Combine butter and shortening and both sugars into a stand mixer fitted with paddle attachment and beat for a few minutes to cream together. The mixture will look a little fluffy.
3. Add eggs one at a time, incorporating after each one. Add the vanilla and mix.
4. In a separate bowl, combine dry ingredients. Slowly add dry ingredients to wet, scraping down the bowl occasionally, until fully incorporated.
5. Mix in the chocolate chips. *I just do this by hand so that the mixer doesn't destroy my chocolate*
6. With a small ice cream scoop (or just spoons) drop 12 cookies on an ungreased cookie sheet, leaving a little space for them to spread.
7. Bake for 10 - 12 minutes or until golden brown. If you want them softer, take them out sooner; if you want them crunchier, you can bake a little longer.
8. Enjoy straight out of the oven, huddled in a corner so that no one can see you as you shovel them in.

Dark Chocolate Torte (GF)

 This is a twist on a recipe from an Indigenous cookbook called "Seed to Plate, Soil to Sky" our friend group cooked out of for Co...