Okay, so after two challenging challenges, I did a
soufflé which was a daunting task in my head, but was totally quick and easy
and freaking delicious. I did it on wine night (Thursday nights with my mom),
so that tells you how quick it is. I make nothing that takes more than like 30
minutes on wine night because I want to eat, and I need to drink. Once I am done with all the challenges, I will hopefully post more favorite wine night meals and food prep meals. Right now, though, we are only on number 3 of 24, so hang tight!
Also she has a basset hound, which I happen to
have as well! Meet Perrin, and my mama!
Okay, done going down the rabbit hole. Anyway,
here’s what you’ll need:
For
the soufflé:
3 tbsp unsalted butter, plus some for greasing the
ramekins
¼ c finely grated parmesan cheese, plus some extra
for sprinkling
3 tbsp all-purpose flour
1 cup scalded milk
Kosher salt and freshly ground pepper
Pinch of cayenne
Pinch of nutmeg
4 extra-large egg yolks, at room temperature
5 extra-large egg whites, at room temperature1/8 tsp cream of tartar
3 ounces good Roquefort cheese, chopped *let’s be
honest, I used Aldi bleu cheese. No regrets.
Making
it:
1. Preheat oven to 400F. Butter the inside of an 8-cup
soufflé dish and sprinkle with parmesan cheese. *Again, I didn’t use the big
soufflé dish- I used the ramekins and made 4 small soufflés. Also, can we just
comment that you get to put parmesan cheese even on the dish! Delicious.
2. Melt butter in a small saucepan over low heat. With
a wooden spoon, stir in the flour and cook, stirring constantly for about two
minutes.
3. Off the heat, add in milk and spices. Put back on
the heat and cook over low heat for about a minute until smooth and thick.
4. Off the heat again, while the mixture is still hot, whisk
in the egg yolks one at a time. Stir in the bleu cheese and parmesan. Transfer
to a large mixing bowl.
5. In a stand mixer, put the egg whites and cream of
tartar in with a whisk attachment. Beat on low for about 1 minute, on medium
for 1 minute, and on high until they form glossy stiff peaks. *again, do I know
that you NEED to do it on 3 different speeds? No. Did I do it? Yes, because I
do what Ina tells me to (most of the time).
6. Whisk ¼ of the egg whites into the cheese sauce to
lighten it, and then fold in the rest. Pour into the soufflé dishes, then
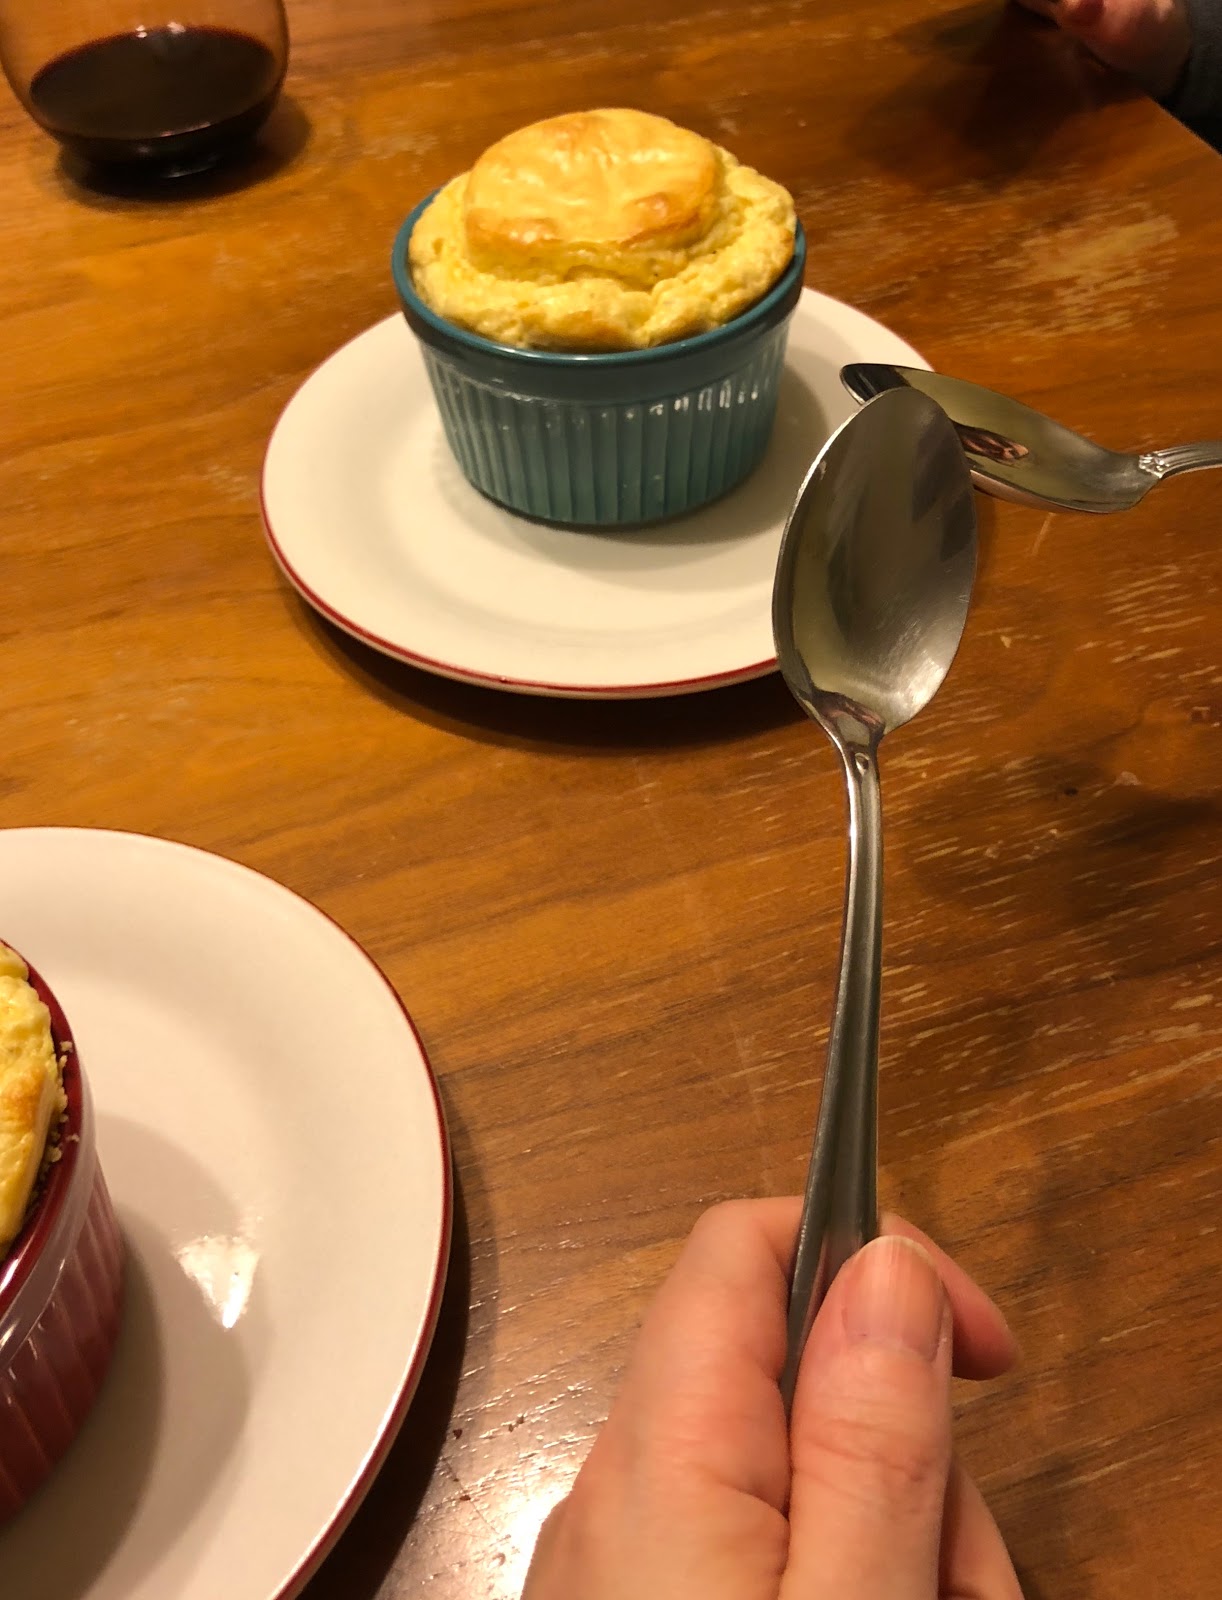
smooth on top. Draw a large circle on top to help the soufflé rise evenly, and
place in the middle of the oven. *I did the circle thing. You can see what
happened because of that... Yes, I realize I have a muffin top on my souffle. Come at me, bro.
7. Turn the temperature down to 375. Bake for 30-35
minutes if in the big pan. DO NOT OPEN THE OVEN! It will make it deflate. *I
think that I baked my small ones for 15-20 minutes.
8. Enjoy hot. It’s still okay later, but it’s best
straight out of the oven where you burn the whole roof of your mouth when you
eat it. I promise it’s worth it.
9. Fluffy pillows of cheesy awesome….
10. I’m just daydreaming about cheese now. You can stop
reading any time.
Rating (scale of 1 - 5): Difficulty: 1 Amount of Time: 1 Awesomeness: 5
The second recipe I decided to tackle for my challenge was a cake
roll. *Sidebar, if you don't know what the hell I'm talking about with the challenge, take a look at the macarons post!* I know, glutton for punishment. I was going to not do a design on top of mine,
but my husband was like, what’s the fun of that? Put a pattern in the sponge.
Don’t be a baby. I was like, damnit… fine. More on how that turned out later. Also, this post contains a lot of videos, but I think this is a good recipe to show some of the process while it unfolds *see what I did there? Unfolds? Maybe I should say unROLLS. Get it? Okay, I'm done.
1. Preheat
oven to 350 F. Line the bottom of a sheet tray with parchment paper, but do NOT
grease.
2. Add eggs to a stand mixer with a whisk attachment
and beat on high for about a minute, until foamy. Gradually add granulated
sugar and whisk for about 7 minutes until thick, fluffy, and tripled in volume.
3. Sift flour and baking powder into egg mixture 1/3 of
the mixture at a time; fold in with a rubber spatula. Make sure to check for
hidden flour pockets. Stop mixing when you no longer see flour streaks.
4. If you aren’t going to do a design, then just put on
the sheet tray and smooth. *If you ARE going to do a design, here’s what I did-
I took about ¼ of the mixture and put it in a separate bowl. I dyed it purple
(because, blackberries). I drew a design in pencil on the back side of the
parchment paper. Then I piped the purple mixture onto my designs. Finally, I
poured the rest of the batter over the design carefully and smoothed.
5. Bake in the oven for about 15 minutes, or until the
cake is golden brown.
6. While the cake is still hot, take a knife to loosen
from the sides of the pan. Invert the cake onto a clean, dry linen towel. *What
I did not do that I wish I had- used a smooth towel (mine had some texture).
Also, put some powdered sugar on the towel to help the cake not stick to it.
This was my downfall. **Also, if you want to pretend like I'm a professional, watch these videos without sound. If you want a laugh, turn that volume up!
7. Remove the parchment paper (carefully if you have a
design, I mean or even if you don’t). Roll the cake into the towel and let sit
for about 30 minutes to cool to room temperature.
For
the lemon syrup:
1/4 c warm water
1 tbsp granulated sugar
4 tbsp fresh lemon juice (from one medium lemon)
1. This part is easy- just combine all ingredients and
stir to dissolve the sugar
For
the blackberry frosting:
8 oz cream cheese, softened
2 sticks unsalted butter, softened
1 c powdered sugar
6 oz blackberries, chopped
1. In a stand mixer, combine cream cheese, butter, and
powdered sugar. *I always cream my cream cheese and butter first- I don’t know
if it matters, but I do. Add powdered sugar slowly and mix for 2 – 3 minutes
until light and fluffy.
2. Add blackberries and mix slowly until incorporated.
Assembly:
1. Take a deep breath!
2. Carefully unroll the cake from the towel. If you
powder sugared it, hopefully this will be easier for you than it was for me.
3. Brush the top (aka the inside of the roll) with the
lemon syrup. *But I also saw someone brush the actual top of the cake with it after you roll it up. This helps the design that you've made pop more, and you can actually see it even if you used powdered sugar to help you in the towel.
4. Put the blackberry frosting in an even layer. *Leave
a border, otherwise it poops out the sides when you try to roll.
5. Roll the cake in the same direction that it was
rolled the first time.
6. Decorate- I ended up putting powdered sugar on top
because I killed my design in the rolling process. You can also save a bit of
the frosting and put dollops of it on top with some extra blackberries or lemon
slices.
This past year, I decided that I was going to do a
baking challenge. Stipulations to said challenge:
1. Make
at least two things each month
2. Must
be something I have NOT made before OR something I have failed at before
I thought this would be a good place to start with a
blog. I am not a professional baker. I am a professional professor of English as a Second Language. This is a hobby that I love, and I thought others might love it too. What follows is the chaos of my baking challenge. Most were wins, some
were losses. I will share the things I found to work AND not work. I apologize
in advance for all the profanity. #sorrynotsorry
Pistachio
Macarons
Yes, I did just jump right in. I was like, you know
what, let’s start with a really complicated recipe. That’ll be good. Sink or
swim, right? But I LOVE macarons, and they’re hella expensive to buy most of
the time. Well, first of all, they’re not cheap to make either, but that’s
neither here nor there. Well, yes it is. It’s exactly here. Anyway…
Put
in a food processor and pulse. Make sure you don’t let it go too long or it’ll
get hot and start to goo. If you don’t have a food processor, then you can chop
by hand… godspeed.
Put
on a lined sheet tray and bake at 200 F for about 30 minutes. Let it cool
completely.
Making
the macarons:
You’ll need:
112 grams of pistachio flour (that you just made
yourself, you badass)
200 grams powdered sugar
50 grams granulated sugar
90 grams egg whites (I think it was about 2 eggs)
*The recipe said to make sure your egg whites were aged for a few days- putting
them in a fridge alone for 2 days to let some of the liquid evaporate. I didn’t
do this because ain’t nobody got time for that. Then it said to let them come
to room temp- I did do this.
Sieve
112 grams of your pistachio flour with 200 grams of powdered sugar *Side note
here: I had a hell of a time with this part- maybe I overthought it. Anyway, I
would recommend sieving your pistachios first all by themselves and then
weighing again (to make sure you have 112 grams. Some of my bits were bigger
and wouldn’t go through the sieve. That’s why you make a little extra. THEN you
can sieve again with the powdered sugar.
Prepare
a pastry bag with a big round tip. *I always use a big cup to hold my bag in place
because I don’t have 4 hands.
In
a stand mixer with a whisking attachment, whisk the egg whites on medium speed
until soft peaks. Then add your 50 grams of granulated sugar and whisk on high
until you get stiff peaks- The peaks will stand up by themselves and not fall
back on themselves.
Once
they have reached stiff peaks, you can add food coloring. *I didn’t do this
because I didn’t have green and it would be weird to have purple pistachio
macarons, although I do enjoy the alliteration.
Fold
in your dry ingredients (your sifted pistachio flour and powdered sugar). DON’T
use the stand mixer for this. Just use a rubber spatula. Your
batter should be shiny and stick together nicely.
6. Pour
the batter into your piping bag and pipe into circles on a parchment-covered
sheet tray. *I drew circles in pencil on the backside of the parchment paper
first because I don’t trust myself. You can make them as big or little as you
want, but I did about the size of a half dollar.
7. After
you finish, drop the sheet tray on the counter about 5 times to get the bubbles
out. *Don’t be gentle, but don’t hulk out either.
8. Let
them be for at least 30 minutes on the counter. * I know…. Patience. When they’re
ready to go in the oven, they’ll be more matte instead of shiny and you can
lightly touch them. GENTLE. I see you. If they don’t stick to your finger,
you’re good to go.
9. Bake
in the oven at 275 – 300 F for 12-15 minutes. You don’t want them to be too
brown on the top, but you want them to be able to get off the paper.
10. You
want FEET! See this if you don’t know what the hell I’m talking about, see the video.
*my feet were fatty, but it’s fine. Chunky and funky
NOW,
for the innards:
For the pistachio buttercream, you’ll need:
½ c pistachios (shelled and chopped) – yes the
recipe turned American all of sudden with the measurements.
1 c powdered sugar
1 egg 1/2 c unsalted butter cold
Beat
powdered sugar and egg in stand mixer with whisk attachment on high speed for
about 4 minutes until mixture is fluffy and voluminous.
Pour
the sugar mixture into a saucepan. Add chopped pistachios. Heat over low/medium
heat and stir constantly until the mixture turns into a thick batter- about 5
minutes.
Remove
the batter and put into a shallow pan. Cover with plastic wrap and let cool *do
this while you’re macaron shells are baking so that you don’t hate yourself
later for having to wait longer to eat deliciousness.
While
you wait for it to cool, cut the cold butter into slices and beat in a stand
mixer on high for about 8 minutes. Once the batter is softened and fluffy, add
the cooled batter and beat on high for about 5 minutes until fluffy.
Fill
another pastry bag and pipe into your cooled macaron shells.