Wednesday, June 26, 2019

Pineapple Brown Butter Cake

This cake started out as a figment of my imagination. It started out as a hot buttered rum pineapple cake. I started it with a pineapple cake with a hot buttered rum soak and brown butter buttercream, but there was no pineapple to be found! It was delicious, but heavy AF. The brown butter and hot buttered rum was too much richness without the tart of the pineapple. I tried the cake again. Still not what I wanted. THIS TIME I think I have it where I want it! I scrapped the hot buttered rum sauce because that brown butter is doing kind of the same thing for this cake. Now we have a pineapple-y cake with a pineapple soak that breaks through some of that richness of the brown butter. This recipe makes three 8-inch round cakes and tons of buttercream. I warned you. You're gonna need a lot of butter. And a gym membership. Sorry, not sorry.

For the Cake:
1/2 c vegetable oil
1/2 c (1 stick) unsalted butter, room temperature
3 eggs
2 c granulated sugar
2 c all purpose flour
1 1/2 c cake flour
1 tsp salt
1 1/2 tsp baking soda
2 tsp baking powder
1 tsp vanilla
1 c buttermilk
7 oz by weight of crushed pineapple  *you're going to buy a 20 oz can of crushed pineapple drain it and save the juice!*
Juice of 1/2 a lemon *we will use the other half later*
1/2 c *ish* pineapple juice *see, the juice, and you'll use the juice in other places as well* **What I did was put the juice of half a lemon in a measuring cup, and then filled up the rest of the way to a half cup with pineapple juice

1. Preheat oven to 350F and prepare three 8-inch round cake pans with goop.
2. Combine vegetable oil and butter in the bowl of stand mixer fitted with paddle attachment.
3. Gradually add in the granulated sugar and whip until light and fluffy.
4. Add in eggs and vanilla to the sugar mixture.
5. In a separate bowl combine dry ingredients: flour, salt, baking soda, and baking powder.
6. Pour 1/3 of the dry ingredients into the sugar mixture and mix to combine.
7. Pour the buttermilk into sugar mixture and combine.
8. Pour another 1/3 of dry.
9. Pour the lemon and pineapple juice in and mix to combine.
10. Pour in the last 1/3 of the dry ingredients.
11. Add the crushed pineapple and stir to incorporate.
12. Divide the batter between the three cake pans. Bake for 22 - 27 minutes or until a toothpick inserted comes out clean.
13. Allow to cool slightly before turning out on a cooling rack to cool completely before assembly.

For the Soak:
1/2 c pineapple soda *I used Fanta*
1/2 c pineapple juice
Juice of that other 1/2 a lemon

1. Combine all of the ingredients in a small saucepan. Bring to a boil and reduce it by half.

For the Buttercream:
4 sticks unsalted butter, room temp
5 1/2 (ish) c powdered sugar, sifted
Pinch of salt
1 tsp vanilla
1 tbsp pineapple juice

1. Start by browning 2 sticks of the butter. *You will want to do this a bit in advance so that it can come back up to room temp before making the buttercream. Really it's easiest if you do this the day before.* Put 2 sticks of butter into a medium saucepan on medium heat. Bring to a boil and stir constantly. At first it will look really foamy, but then it will calm down a bit so that you can see it start to change color. Pull off the heat when it gets to an amber color- this took me about 5 minutes. Make sure you get all those brown bits! Those are the best. Allow to cool before using. Here are two videos from the first time that I browned butter. I think they help if you're browning butter for the first time and are freaking out a bit.

2. Combine the cooled (hopefully back to room temperature) browned butter with the other 2 sticks of butter in a stand mixer fixed with paddle attachment. Stir to combine.
3. Slowly add in powdered sugar, incorporating after each addition.
4. Add pinch of salt, vanilla, and pineapple juice and incorporate. Scrape down the sides, and allow to mix for a minute or so to incorporate some air. Then it's ready to use!

Assembly:
1. Put a dollop of buttercream on a cake stand and add first layer of cake.
2. With a pastry brush, brush the cake with the pineapple soak.
3. Put a layer of buttercream on top.
4. Rinse and repeat with the other two layers. Cover the cake completely once done.
5. Pour yourself a cup of coffee or a rum drink and enjoy yourself! You've earned it!

Tuesday, June 18, 2019

Graham Crackers

So as you know, it is summer, and that means lots of outdoor activities and campfires, and that means s'mores! Well, I have some awesome marshmallows already, but I wanted to try my hand at graham crackers. These are not like your store bought crackers. These are fatties. They have a great warming scent, a little chew, and a nice crumb. Overall, they go great with a slab of chocolate and a graham cracker sized marshmallow! This recipe makes 24 large crackers.

Ingredients: 
1 1/2 c all-purpose flour
1 1/2 c whole wheat flour
3/4 c brown sugar
1 tsp baking soda
1 tsp cinnamon
1/2 tsp salt
3/4 c unsalted butter, cold
1/3 c honey
1 tsp vanilla extract
5 tbsp (ish) heavy cream (or milk is fine)- I really started using about 7 tbsp or so, and it makes the dough more pliable to work with. 

1. Combine flour, sugar, baking soda, cinnamon, and salt in large bowl. *You can also do this in a food processor, but mine is tiny, so here we are.
2. Grate in butter and combine until a coarse meal texture. *Grating makes the butter into smaller pieces, and it is easier to combine. **If you are using a food processor, just pulse in your cubed butter until coarse meal.
3. Add honey and vanilla into flour mixture and stir to combine.
4. Add in heavy cream. Start with 4 tbsp and see how it is. You are looking to have your mixture just come together. It is a little dry, but it should stick together when you press it in your hand. It may take more or less cream depending on the humidity. It takes me generally 5 tbsp (ish).

5. Turn out dough onto a clean surface. Work the dough to combine (but try to work it as little as possible). 
6. Roll out crackers to about 1/8 inch thick (although the ones pictured were a bit fatter than that). Other recipes that I looked at say to chill the dough before rolling out, but then it's a bitch to roll out, so if yo want to do that, just come with a bit of aggression and some forearm strength. Otherwise, you can just do what I do, and say fuck it, and just roll them out; I haven't noticed a big change in texture or anything. 
7. Cut crackers into rectangles. *I also poked holes in them so they looked more graham cracker-y. Chill again for 10-20 minutes before baking. **You do want to do this chilling step though. 

8. While chilling, preheat oven to 350F.
9. Bake crackers for 15-22 minutes. *Mine took 18 minutes. If you make them a bit thinner, they take about 12 - 15 minutes. 
10. Allow to cool before eating! Also a perfect snack for coffee!

Wednesday, June 12, 2019

Chocolate Cake with Chocolate Buttercream

As I said a few posts back, I am trying my hand at recipe creation. I have delved into my true love- cake. For the first recipe that I wanted to try, I decided on chocolate cake. Why chocolate cake? I really don't know. I'm not a huge chocolate person. I'm a lemon person. Maybe I was feeling philanthropic and wanted to give to all my chocolate-loving friends. I don't know. Anyway, I went down the rabbit-hole of ratios again, so I will give you my measurements in both weights and American measures for the cake- this way you can see the ratios in action if you're also trying to figure out your ratio life.


Here's general information I found about cake ratios from this website:
Flour and sugar should be the same weight.
Eggs and butter (or fat- in this case I used oil) should be the same weight
Liquids (including eggs but not including fat) should be the same weight OR more than sugars
Generally 1 tsp of baking powder per cup of flour (if you have a more acidic base, sub some of that for baking soda as well)
Are you scared yet? Don't be! I swear I made a recipe with these ideas and it worked.

Okay, so let's get into what I have settled on as my chocolate cake recipe. This is enough cake for a three layer 8-inch round cake OR 24 regular sized cupcakes (plus a little extra).

For the batter:
2 c granulated sugar (14 oz)
2 1/2 c flour (11.5 oz)
1 c cocoa powder (2.5 oz - combined with the flour to make same weight as sugar)
3 eggs (5.8 oz)
3/4 c vegetable oil (5.8 oz - this is slightly over 3/4 c, but I did my best with giving an American equivalent)
2 tsp baking powder
1.5 tsp baking soda
1 tsp salt
1 c boiling water (7.3 oz) *I just put mine in a clean coffee pot.
1/2 c buttermilk (4 oz)
1 tsp vanilla extract

1. Preheat oven to 350F. Grease three 8-inch round pans using goop.
2. Combine sugar and vegetable oil in stand mixer fitted with paddle attachment.
3. Add eggs one at a time until incorporated. Add in vanilla extract as well.
4. In a separate bowl, combine the dry ingredients.
5. Alternate dry ingredients and buttermilk, incorporating each into the batter before adding more. Start and end with the dry ingredients.
6. Add the hot water *make sure your speed is on the lowest!* to the batter a little at a time. Once all incorporated, scrape down the sides of the bowl, and then turn to medium-high speed and whip for one minute. This batter will look really loose (see below), but that's how it should be.
7. Pour batter evenly into cake pans.
8. Bake for 18-22 minutes or until a toothpick inserted comes out clean.
9. Let cool on cooling rack. Turn out cakes when still a bit warm. Allow to cool completely before icing.
For the buttercream frosting:
4 sticks unsalted butter, room temperature *yes, this is pretty butter-heavy; trust me, it's delicious
1 c cocoa powder
4 c powdered sugar
1/4 tsp salt
1 tsp vanilla

1. Put butter into stand mixer fitted with paddle attachment.
2. Sift cocoa powder and powdered sugar together. *I don't sift unless I need to. You know this, but with a frosting, it's best to sift.
3. Pour sugar mixture into butter a little at a time until incorporated. Add salt and vanilla.

Assembly:
1. Place a dollop of frosting on your cake board to hold layers in place.
2. If the cake layers are a bit uneven, level off tops with a serrated knife.
3. Place one layer down and add a bit of buttercream to cover the layer.
4. Add second layer of cake with another layer of buttercream.
5. Add final layer of cake and cover entire cake in buttercream.

Tuesday, June 4, 2019

Lemon Macarons

I believe I have stated that macarons are my favorite thing. What's something you could eat 40 of and totally be okay? Macarons. Maybe you're thinking to yourself that that's overkill. Maybe you don't want to eat that many macarons. To you, I say, don't be a quitter. Anyway, I digress. So, this is my first macaron recipe based on ratios. As I have been doing the last several posts, I will show the ratios to you as well. I think this is especially helpful with macarons because your base ratio is egg whites. Do you know how hard it is to get an exact weight of egg whites????? I do. It's pretty difficult. Anyway, so if you want to follow the ratios, it doesn't matter what your egg white weight is because you can just figure out the rest from there!

So I found this website to be pretty helpful while trying to figure out
ratios and some techniques for macarons. I will give you the weights I used and the ratios for the basic ingredients for macarons. This particular recipe makes about 24 cookies (48 halves if you get what I mean).

For the Macaron Shells:
1 part egg whites - 64 grams (2 egg whites for me)
1.5 part almond flour - 96 grams (64 from egg whites x 1.5)
0.8 part granulated sugar - 51 grams
1.5 part powdered sugar - 96 grams

1/8 tsp cream of tartar
1/2 tsp cardamom * this is a little citrusy and a little warming and it's super nice
zest of 1 large lemon

1. In a stand mixer fitted with whisk attachment, start mixing egg whites. Don't mix them on too high of a speed (no higher than 6 on a kitchenaid). While this starts out, move to the second step.
2. Sift together almond flour, powdered sugar, and cardamom in a bowl. *I just put my bowl on my food scale and poured through my sifter until the right weight because I'm lazy.* Put aside until the egg whites are finished.
3. After the egg whites have started to foam up, add cream of tartar. *this is just to help stabilize the merengue, so you can leave it out if you want.
4. Start adding in the granulated sugar to the foamy egg whites a bit at a time. Let mixer keep whipping until you get to stiff peaks, like you see in the picture.
5. Once you have stiff peaks, gently fold in the lemon zest.
6. Pour in about half of your dry ingredients into the egg whites. You'd think you have to be gentle here because it's egg whites and you don't want to lose all that air. Nah. You can mix the shit of out of this; it's okay.
7. Pour the second half of dry ingredients in and keep mixing. Here I was a bit more gentle. You want to keep mixing until it looks glossy and it ribbons back on itself. The website I looked at said it should incorporate back into itself within 20 seconds or so. Here's a bit of me figuring out when it was ready.

8. Line baking sheet with silpat mat or parchment. *You will want to draw a circle template to pipe your macarons on to if you're using parchment;**You'll need at least two baking sheets with the parchment ***If you plan to make a lot of macarons, just invest in some mats. I bought mine on amazon for like 12 bucks for 2 mats.
9. Pour batter into a prepared piping bag with a large round tip. Pipe circles onto your parchment of silpat.
10. Whack the cookie sheet on the counter at least 3 times to get all the air bubbles out. *Again, you can whack them on the counter pretty hard.
11. Allow to sit at room temperature until they look matte and when you try to gently touch them with your finger, they don't stick. They form a skin on top. This can take between 20 minutes to an hour. In more humid months, this will take longer, but it's one of the most important steps! *also put them away from the edge of the table if you have a dog ;)
12. While you're waiting, preheat oven to 350F.
13. BEFORE you put them in the oven, drop to 325F. I would only bake one sheet at a time. I tried double once. It doesn't work out well. Anyway, bake for 12 - 14 minutes, but check at 10 minutes. If you can lightly touch it and the macaron doesn't move on it's base, it should be done.
14. Allow to cool completely before trying to remove from the sheet and fill.

For the Lemon Buttercream Filling:
1 stick unsalted butter, room temperature
1.5 (ish) cups powdered sugar
Zest of a lemon
2 tbsp lemon juice
1 tsp vanilla extract
A pinch of salt

1. In a stand mixer fitted with a paddle attachment, put in butter. Slowly add powdered sugar into the butter.
2. Add lemon zest, juice, vanilla, and salt into the mix. Check for taste. If you feel like it needs a bit more powdered sugar, this is a good time to add it.

Assembly:
1. Put buttercream in a piping bag with a round tip *or any tip really- you do you, boo.
2. Pipe a dollop of cream on half the shells. *don't overdo it; you feel like it can take a lot more cream than it can. I was overzealous. **I feel like there's a that's what she said joke in there.
3. Put the other half of the shells on top of the buttercreamed shells.
4. You can store in the fridge. I don't do this. I just stored them in an air-tight container on the counter. I like them better this way, but most websites say to store in the fridge.

Tuesday, May 28, 2019

Overnight Cinnamon Rolls


Okay, so these were also not on the original baking challenge for 2018. Originally I had a gluten-free dessert, but then I realized I had done a gluten-free dessert in the past (here’s looking at you, flourless Mexican chocolate cake), and I had NOT ever done cinnamon rolls. This was my last challenge of 2018. I made these for Christmas morning at my mom’s house. We always make cinnamon rolls from the tube for Christmas. My dad loved them, and even after he passed away, we still make them every year. So, needless to say, this was an emotional challenge. I’m not crying. You’re crying. There was some stress in the rise of the dough, but we got through that, and all of the cinnamon rolls were eaten and loved. Dad would be proud.
I used Alton Brown’s overnight cinnamon rolls recipe, which is perfect for baking off the next day. So if you have a Christmas morning, or a sleepover, or a brunch the next day, make these babies, and you’ll be the hit at the party! This makes one dozen big cinnamon rolls. Here’s the recipe: https://www.foodnetwork.com/recipes/alton-brown/overnight-cinnamon-rolls-recipe-2014250?soc=sharepin
For the Dough:
4 large egg yolks, room temperature
1 large whole egg, room temperature
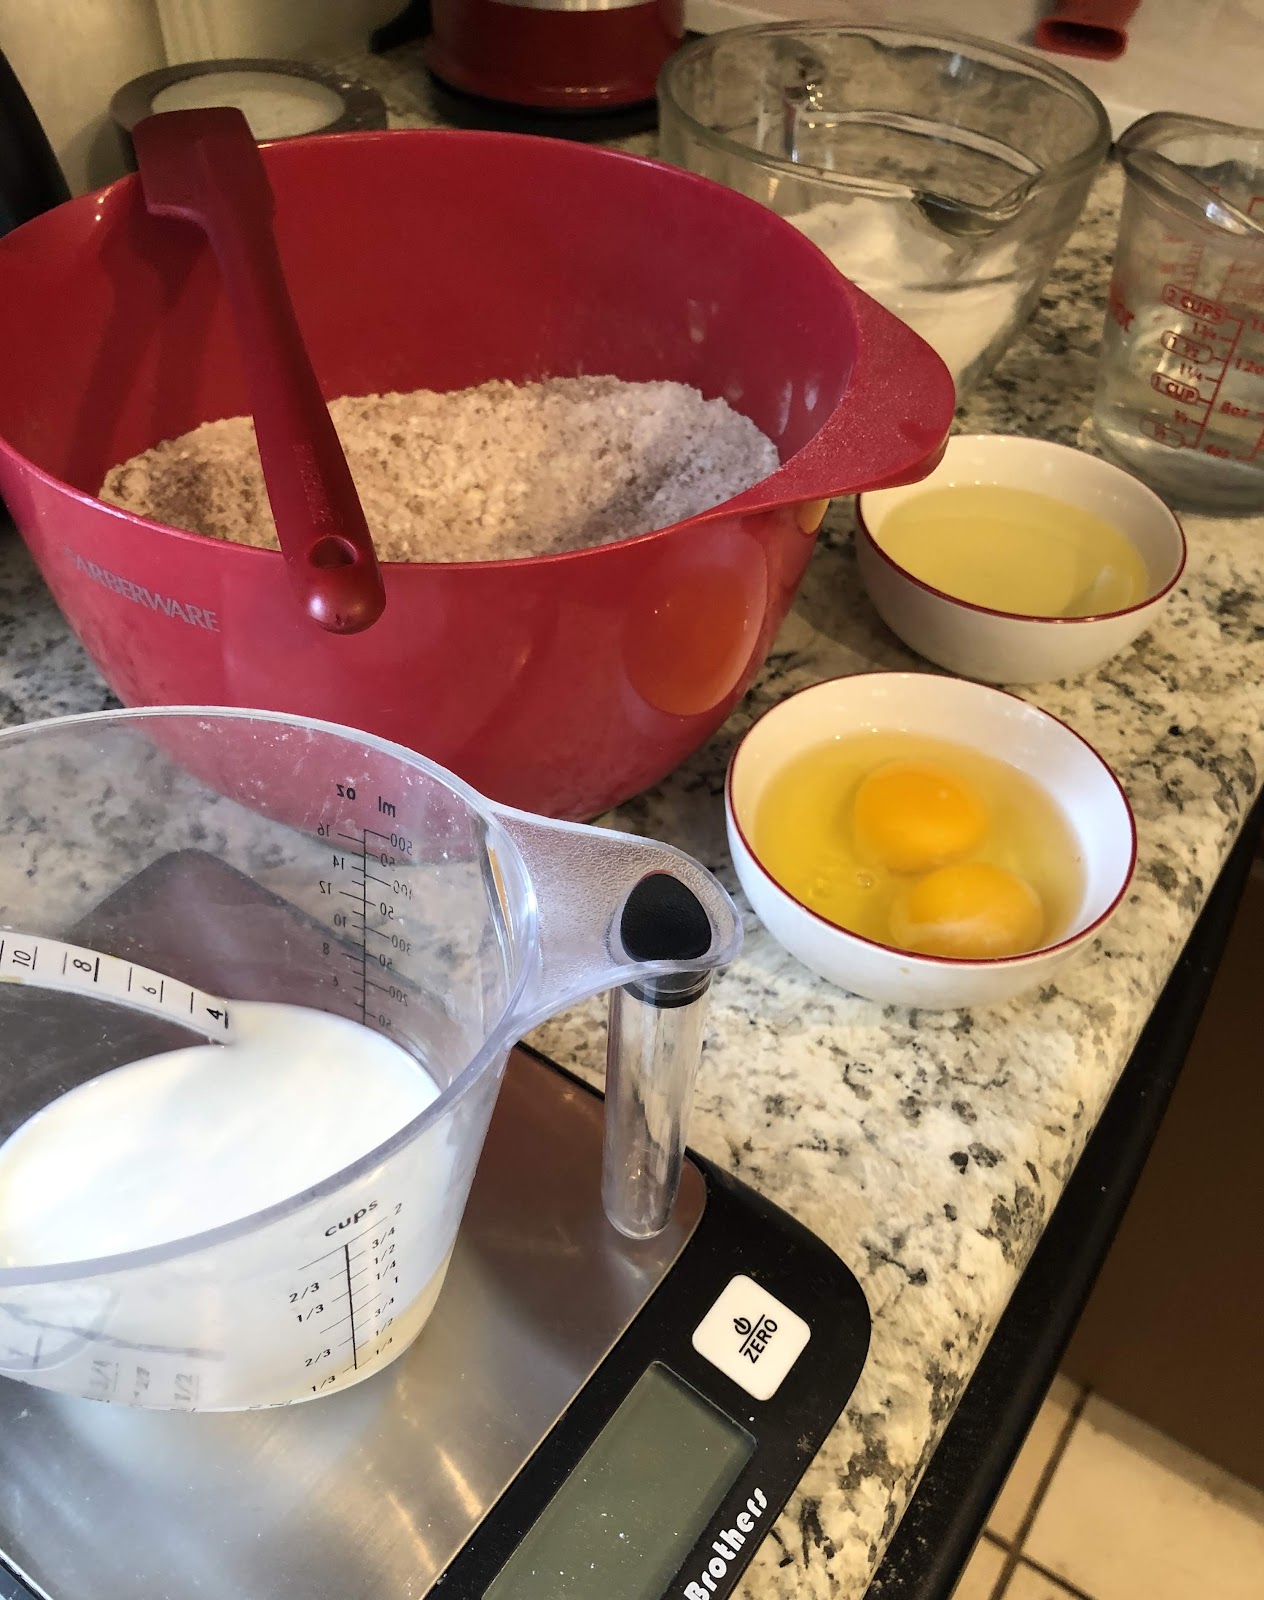
6 oz buttermilk, room temperature
2 oz granulated sugar, about ¼ c
3 oz unsalted butter, melted, about 6 tbsp
20 oz all-purpose flour, about 4 c, plus additional for dusting
1 package instant dry yeast, about 2 ¼ tsp
1 ¼ tsp kosher salt
Cooking spray
1. In the bowl of a stand mixer, with the whisk attachment, whisk the egg yolks, whole egg, sugar, butter, and buttermilk. Add approximately 2 cups of flour along with the yeast and salt; whisk until moistened and combined.
2. Remove the whisk attachment and replace with dough hook. Add all but ¾ c of the remaining flour and knead on low speed for about 5 minutes. *So at this point you've put in 2 and 3/4 c flour of your 4 cups. You may not use all 4 cups. I didn't.
3. Check the consistency of the dough, and add more flour if necessary. The dough will feel soft and moist, but not sticky and the dough clears the sides of the bowl. *Here’s some videos about how my dough looked:

4. Turn out onto a floured surface and knead by hand for about 30 seconds.
5. Lightly oil a large bowl. Transfer the dough to the bowl and lightly oil the top of the dough too. 
6. Cover and let double in volume, 2 to 2 ½ hours. *Let’s take a few minutes here. First of all, I used a dry erase marker on my bowl so I could see if it actually doubled. Super helpful.
*Secondly, my dough didn’t rise for fucking ever. Here’s what I would recommend and what eventually worked for me: turn your oven on to the lowest setting and let it preheat. Once it’s preheated, turn it off. Let it sit for about 10 minutes before you put your dough in there. Put your dough in and it’ll rise. DO THIS FROM THE BEGINNING! For the love of god. If you do it from the beginning, maybe it’ll take less time than 2 ½ hours. It took me 3 ½ hours including the hour in the oven.

For the Filling:
8 oz brown sugar, about. 1 c packed
1 tbsp ground cinnamon
Pinch of salt
¾ oz unsalted butter, melted, about 1 ½ tbsp
1. Combine brown sugar and cinnamon in a bowl; mix until well incorporated. Set aside for later.
2. Butter a 9 x 13 inch glass baking dish.
3. Once the dough has risen, turn out onto a lightly floured surface. Gently shape the dough into a rectangle with the long side nearest you.
4. Roll into an 18 x 12 inch rectangle.   
5. Brush the dough with the ¾ oz of melted butter, leaving ½ inch border on the top edge. *You’ll be rolling it that way, and you need to give some space for the innards to go AND you want to have dough on dough action for sealing up the log once you're done rolling.
6. Sprinkle the brown sugar and cinnamon mixture over the dough, leaving a ¾ inch border at the top edge. Gently press the filling into the dough.
 

7. Beginning with the long edge nearest you, roll the dough into a tight cylinder.
8. Firmly pinch the seam to seal, and roll the cylinder seam side down.
9. Very gently squeeze the cylinder to create even thickness. Using a serrated knife, slice the cylinder into 1 ½ inch rolls, or 12 equal pieces.

10. Arrange the rolls cut-side up in the baking dish; cover tightly with plastic wrap and store in the refrigerator overnight, or up to 16 hours.

Baking:
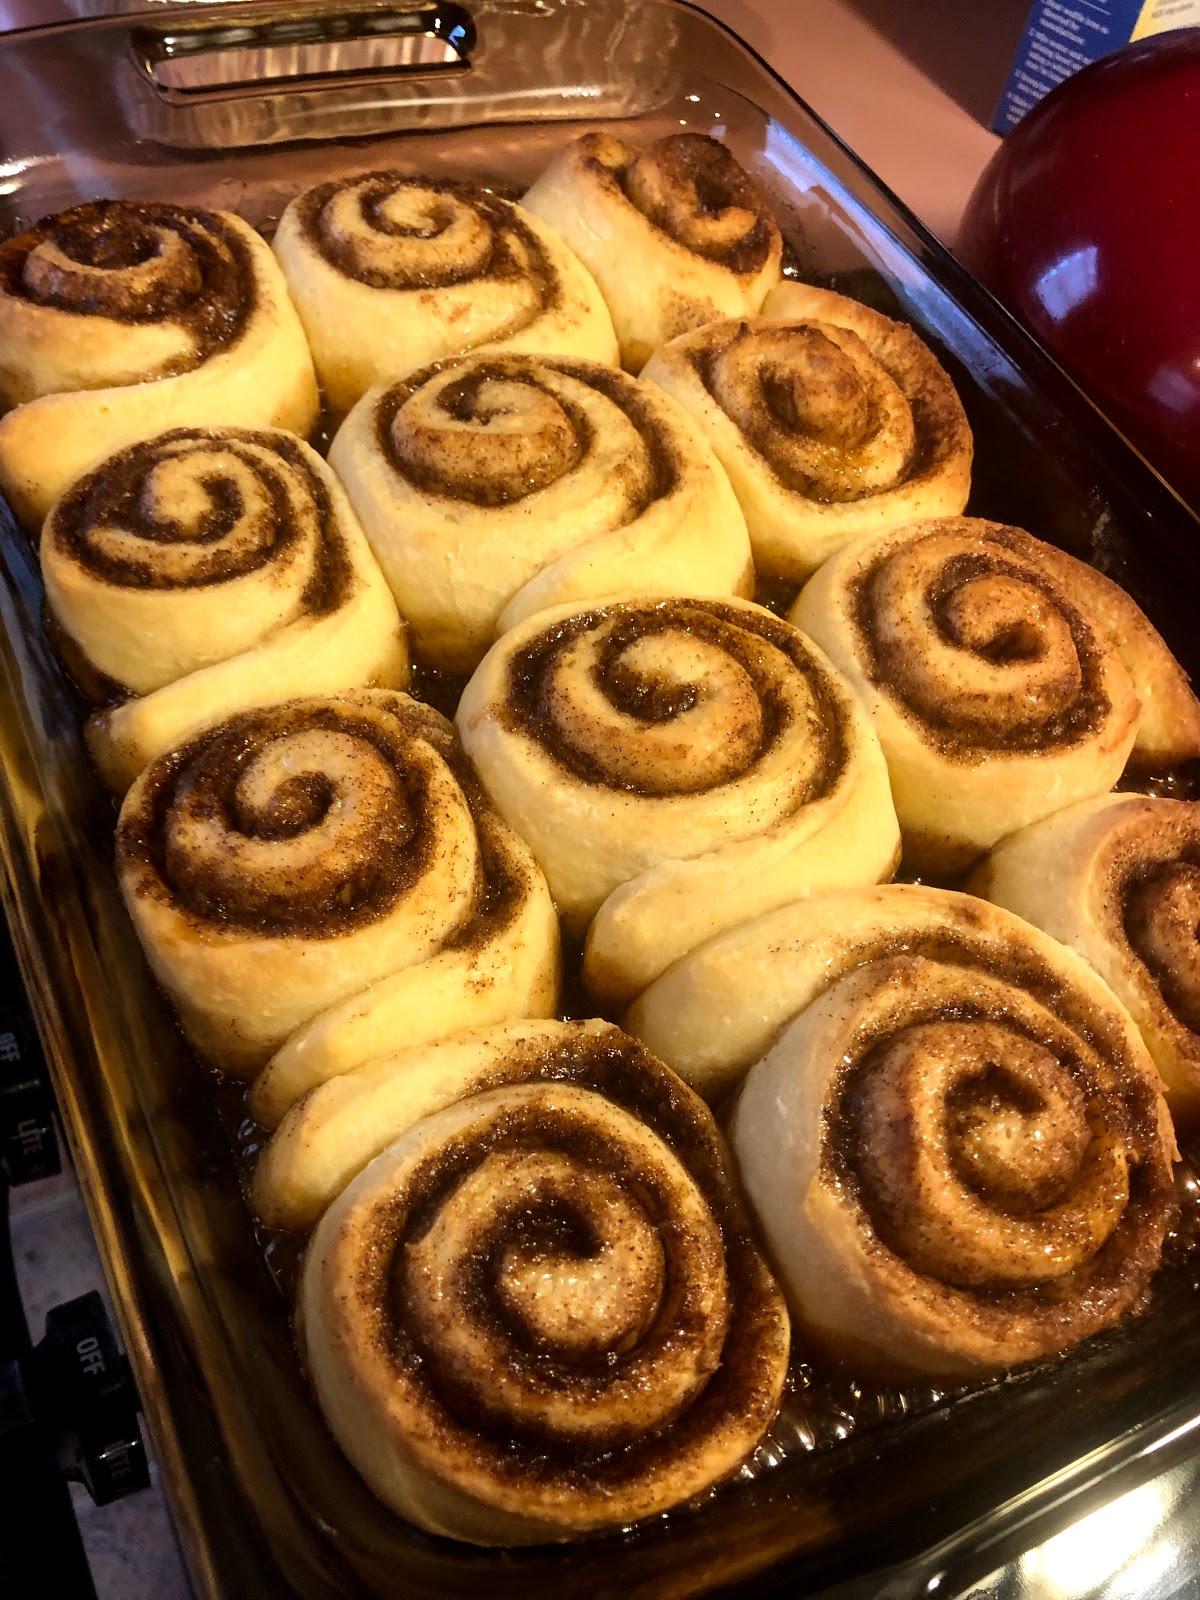
1. Remove the rolls from the refrigerator and place in an oven that is turned off. Fill a shallow pan 2/3 full of boiling water and set on rack below cinnamon rolls. Close the oven door and let the rolls rise until they are slightly puffy, approximately 30 minutes. *My rolls didn’t get that puffy, but they did puff in the bake, so no worries! See? This is post steam, pre bake. 
2. Remove the rolls and pan of water from the oven.
3. Preheat oven to 350F.
4. When oven is ready, place rolls on middle rack of oven and bake until golden brown, or until internal temperature of rolls is 190F on an instant-read thermometer, approximately 30 minutes. *See, the DO puff!
5. While rolls are cooling, make the icing.

For the Icing:
*Disclaimer… I didn’t make this icing because I forgot to buy cream cheese. I bet it’s delicious, so I’ll tell you what Alton did; then I’ll tell you what I did. Sorry.
2 ½ ounces cream cheese, softened, about ¼ c
3 tbsp milk
5 ½ oz powdered sugar, about 1 ½ c
1. Whisk cream cheese in bowl of stand mixer until creamy.
2. Add milk and whisk until combined.
3. Sift in powdered sugar, and whisk until smooth. *I didn't sift my powdered sugar. It's rustic...
4. Spread over the hot rolls and serve immediately.

*Okay, so I did just a buttercream. Not conventional, still DE-LI-CIOUS.
1 stick butter
3 tbsp milk
1 ½ c powdered sugar
1. It’s the same procedure as above, and you can add or subtract milk or powdered sugar depending on the consistency that you want. I made it pretty thick so that when it hit the hot rolls, it didn’t completely disappear.

Rating (Scale 1 to 5):
Difficulty: 3
Amount of Time: 4 (this is mostly just for the downtime) Active time is pretty low
Awesomeness: 5 *These are definitely in my top 5 for the year! 

Tuesday, May 21, 2019

Sugar Cookies with Royal Icing


Sugar cookies are the other re-do on my 2018 baking challenge. They’re my Achilles heel. I have failed at them many times, and haven’t even tried to make them again for like…seven years? Yeah, and I was making them for Christmas gifts, so it was a little stressful, but spoiler, they totally worked! My friend, Jill, told me about Wilton’s no-chill sugar cookie recipe, so I decided to try that: https://www.wilton.com/roll-out-cookie-dough/WLRECIP-31.html
For the Dough:
1 c granulated sugar
1 egg
3 ¼ c all-purpose flour
1 tsp baking powder
½ tsp salt
1 c butter, softened (2 sticks)
2 tsp vanilla extract
½ tsp almond extract *have I said that I hate almond extract? Yes. I know I have. I hate it, so I didn’t add it. I will say, though, that I felt like I wanted the cookies to be a little sweeter. Maybe the almond extract gives some of that sweetness.
1. Preheat oven to 350F.
2. In a stand mixer, beat eggs and sugar until light and fluffy. Beat in eggs and extract. Mix flour, baking powder, and salt; add to butter mixture one cup at a time.
3. Do not chill dough. Divide into two balls. *Can I just say at this point I was freaking out? This dough looks like fucking pie crust. It’s crumbly and chaotic. The more you work it, the better it becomes. It DOES actually come together, so if you see something like this, you’re okay.
4. On a floured surface, roll each ball out until approximately 1/8 inch thick. Dip cookie cutters in flour before each cut.
5. Bake cookies on ungreased cookie sheet for 8 – 11 minutes or until cookies are lightly browned. *It took my cookies a bit longer than this. I think it was 12-ish minutes, but you’re looking for something like this:


For the Royal Icing:
I used Pioneer Woman’s recipe that doesn’t require meringue powder: https://thepioneerwoman.com/food-and-friends/how-to-make-royal-icing-without-meringue-powder/
1 pound powdered sugar
3 pasteurized egg whites
1 tsp fresh lemon juice
1. Sift sugar into the bowl of a stand mixer. *You do want to actually sift here- no lumpy icing!
2. Add remaining ingredients to bowl. Using paddle attachment, mix on low speed until sugar is incorporated, and then increase speed to medium for about five minutes. Check for stiff peaks.
3. Once stiff peaks are formed, transfer the icing to bowls for coloring.
*This consistency is going to be your border frosting. I put some of each color into a piping bag. Then I added a little bit of water to each bowl so that I got a runnier consistency for flooding the rest of the cookies. So you have stiff icing to keep the softer icing in. You can also use the thick icing for detail work. I thought that I wasn’t going to have enough icing because I was making four colors, but I totally did, and I made a little over three dozen cookies.
**One final side note: They didn't have any more black gel coloring, so I bought this:

Don't fucking buy this for cookies. This never dries. I ended up having to take off all of the black and put melted chocolate in its place. It was horrible.

Other than that, just go to town! It's actually easier than you'd think, but it requires some time. Start by doing your borders. Then you can fill them in with the same color. Finally you can use additionally stiff icing to do your details. Here are some of my other cookies:


Rating (Scale 1 to 5):
Difficulty: 3 (really only difficulty is icing)
Amount of Time: 3 (again just with icing cookies- do it with a buddy)
Awesomeness: 4 (I wish they were sweeter, but they were adorable and impressive)

Tuesday, May 14, 2019

Marshmallows

Okay, so this challenge is one of the two challenges that I had on my list that are re-dos. 22 of the challenges were brand new. This challenge is something I failed at before and wanted to try again. And who doesn’t love marshmallows? Also, I used this on top of a chocolate ganache pie, and it was to. Die. For. I have no idea what I did the last time I made marshmallows or why they failed, but this recipe was easy peasy, and totally worked. I even made them again for Christmas gifts. You will need to make these the day before you want them. They have to sit overnight. Just a heads up.
I used this recipe, although I didn’t make mine peppermint, so I’m just gonna leave that part of the recipe out on here: https://www.bettycrocker.com/recipes/easy-peppermint-marshmallows/582fc3e4-bad5-40bf-8954-565947232145
1/3 c powdered sugar
2 ½ tbsp unflavored gelatin
½ c cold water
1 ½ c granulated sugar
1 c corn syrup
¼ tsp salt
½ c water *yeah, separate from the other ½ c water. I know. It was confusing to me too. It’ll all make sense, I promise.
1. Generously grease the bottom and sides of an 11 x 7 glass baking dish. Dust pan with powdered sugar. *Who the hell has an 11 x 7? Is that even a size? I used a 9 x 13 inch pan, and it was fine.
2. In the bowl of a stand mixer, sprinkle gelatin over ½ c cold water to soften; set aside.
3. In 2-quart saucepan, heat granulated sugar, corn syrup, salt, and ½ c water *you see, the second water* over low heat, stirring constantly until sugar is dissolved. Heat to boiling; cook without stirring about 30 minutes to 240F on a candy thermometer or until a small amount of mixture dropped into a cup of ice water forms a ball that holds its shape but is pliable. Remove from heat. *Okay, so I don’t know if it’s because I have an electric stove top, or what, but 30 minutes is insane. I got to soft ball stage at like 12 minutes. Trust your candy thermometer, and if you still aren’t sure, which I wasn’t, do the water trick. This is what you’re looking for:
4. Slowly pour syrup into softened gelatin while beating on low speed *I used the whisk attachment*. Increase speed to high; beat 8 to 10 minutes or until mixture is white and has almost tripled in volume. Add in salt and vanilla and mix to incorporate. Pour into baking dish, patting lightly with wet hands. Let sit uncovered at least 8 hours or overnight. *I so didn’t think that the water would work because this shit’s sticky AF, but it totally does.
5. Once set up, dust cutting board with powdered sugar. Place the rest of the powdered sugar in a bowl. Loosen the marshmallow from sides of dish. Lift out and place on cutting board. Cut into 1-inch squares. *Here’s what you should do. Second time, I totally got it down. Get yourself a bowl of water on the left side of your cutting board. Stick a pizza cutter into that water. On the right side of your cutting board, put your bowl of powdered sugar and a plate for your finished marshmallows. Then go to town! Every time your pizza cutter gets too sticky, just dip it in the water. Coat all cut marshmallows in powdered sugar. **I’d also let them sit a bit before packaging because I found that occasionally I’d have a sticky spot still, and I just dipped them again in the powdered sugar.
6.Store in an airtight container for up to 3 weeks!
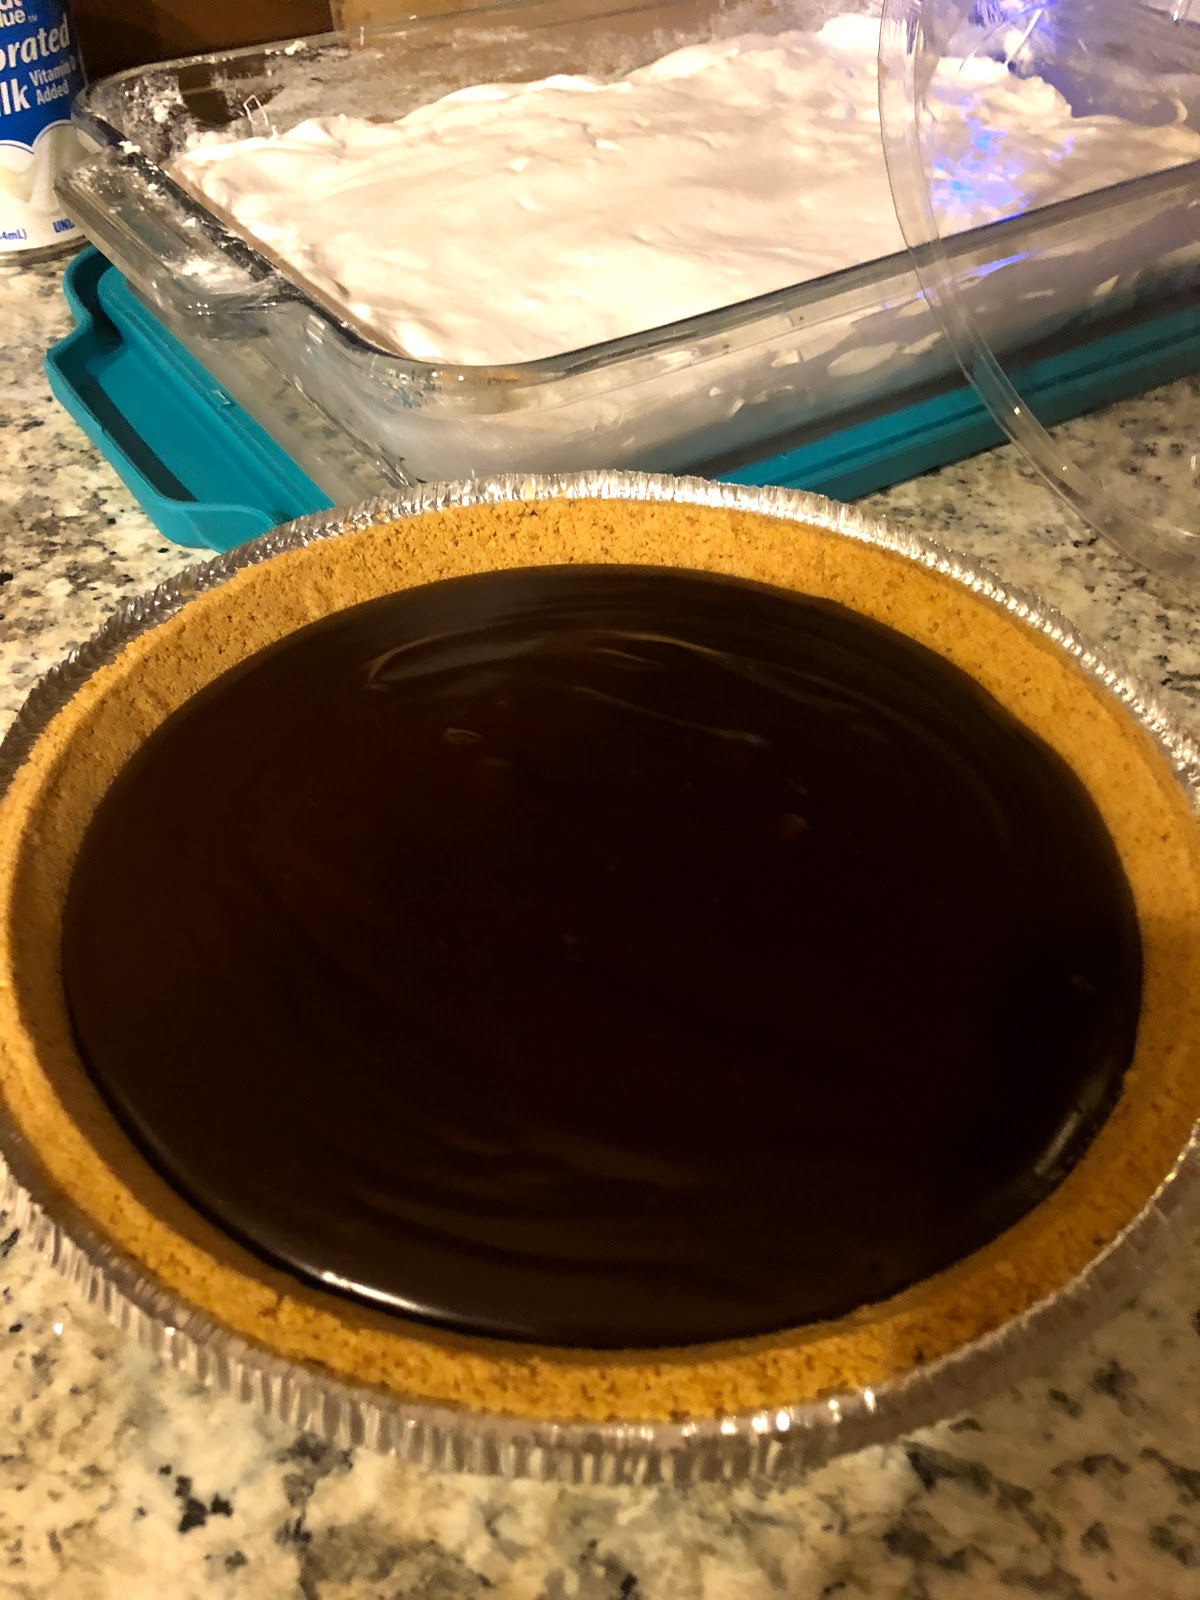
As I said, I used some to top a chocolate ganache pie. I got a store-bought graham cracker crust because Aldi was out of graham crackers…. That’s what happens right before Thanksgiving, I suppose. But, if you can, just make your own. The store-bought ones don’t have as much structural integrity.  
For the ganache, I use this recipe, all the time, and it couldn’t be easier: https://livforcake.com/dark-chocolate-ganache-tart/
12 oz dark chocolate *I just used chocolate chips, but I have also had a craving for this pie before and literally used all my Ghirardelli squares chopped up to get 12 oz.
1 c heavy cream
4 tbsp unsalted butter, room temp, cubed
*Also this recipe doesn’t say to put salt in this. PUT SALT IN THE CHOCOLATE. Always. Always.
1. Put the chocolate and butter into a bowl.
2. Heat heavy cream in a small saucepan barely to a simmer.
3. Pour warm heavy cream over chocolate and butter. Put some plastic wrap on top of the bowl for about 5 minutes to help the melting process along.
4. Stir with a spatula until smooth. 
5. Add salt to taste. *Oh poor you, having to taste glorious melted chocolate to make sure it’s perfect.
6. Pour into pie crust and let set up overnight at room temp, or 1 – 2 hours in the fridge.
7. If you have a blow torch because you bought one when you did crème brulee, unlike me, because you’re not a cheap ass, you can just put some of your marshmallows onto the set up pie and torch away, my friend. S’mores pie.
If you DON’T have a blow torch, line a baking sheet with parchment paper. Pile some marshmallows onto the parchment. Set your oven to broil. Stick those babies in and WATCH them. They will die quickly. Once they’re to your liking, take two spatulas, and try to get all of them on top of your pie!

Rating (Scale 1 to 5):
Difficulty: 1
Amount of Time: 2 (not including the fact that you have to wait overnight)
Awesomeness: 5

Tuesday, May 7, 2019

Cannoli


*Insert Godfather joke here* Did you get it out of your system? I completely understand. Anyway, it’s time for cannoli, y’all! Also, did you know that cannoli actually is the plural. The singular form is cannolo. It’s an irregular plural. So, no cannolis. Did I mention I’m a language teacher, and I can’t help myself? Now you’ll go to parties and be like, “Did you know that the singular form of cannoli is cannolo?” and you’ll either be shunned or applauded. I can’t guarantee results.
Anyway, I digress. This was a much faster process than I thought it’d be. My only complaint was that I didn’t roll out my dough thin enough, but that can be remedied pretty easily. I used this recipe: https://www.foodnetwork.com/recipes/homemade-cannoli-3408894?soc=sharepin
Can I also just add that this recipe requires you to have cannoli molds. I’m sure there are other options, but I went ahead and bought some. For all of my challenges, the only two things I had to buy were the cream horn molds and these, so not too bad. You can get them on amazon pretty cheap: https://www.amazon.com/Pieces-Stainless-Cannoli-Inches-Diagonal/dp/B076P3ZKC9/ref=sr_1_3?ie=UTF8&qid=1546190034&sr=8-3&keywords=cannoli+molds  
For the Shells:
2 c all-purpose flour
2 tbsp granulated sugar
½ tsp ground cinnamon
½ tsp kosher salt
2 tbsp unsalted butter, cold, cut into cubes
½ c dry Marsala or white wine *I used Chardonnay because I had an open bottle in my fridge. Marsala is the traditional, so I’d like to try that next time.
Vegetable oil, for frying
1. Pulse flour, granulated sugar, cinnamon, and salt together in a food processor. Add the butter and pulse until thoroughly combined. Add egg yolk and Marsala wine and process until the dough forms a ball.
2. Turn the dough out onto a piece of plastic wrap and flatten into a disk. Refrigerate for 10 minutes.
3. Fill a large, wide pot with two inches of oil and heat over medium-high heat to 350F. *Again, I used my Dutch oven; it's my frying vessel of choice.
4. Lightly flour a work surface and roll the dough into a thin circle, about 1/8 inch thick. Cut out as many circles as possible with a 3 ½ to 4 inch round cookie cutter. Gather the scraps, roll out again, and cut more. *I didn’t have a cookie cutter that size, so I ended up using the top of my coffee container. Totally works. **Also, make sure that once you start to see the dough shrinking on itself, stop cutting. The dough is being worked too much. I got 12 circles out of my dough. ***Sorry, so many side notes. I think my dough was still too thick. It wasn't as delicate as I had hoped after fried (although still delicious). I have seen people put their dough through a pasta sheeter, so if you have one of those, I would do that to get it to a thinner consistency.

5. Wrap a circle of dough around a cannoli tube. Lightly moisten an edge with water and press the edges together very firmly to seal. *I had two that popped open in the fryer; still delicious, but more like a tostada than a cannoli.
6. Place paper towels on a baking sheet.  
7. Fry the tubes with the dough, turning once until the shells are golden brown all over, about 4 to 5 minutes.
8. Carefully remove the tubes from the oil and slip off the cannoli shell onto the paper towels.
If you have more dough than tubes, let the tubes cool slightly before continuing to wrap dough and fry.
9. Let the shells cool completely.
For the Filling:
2 ½ c ricotta cheese
¾ c powdered sugar, plus more for dusting
½ tsp vanilla extract
½ tsp finely grated orange zest *I fucking forgot to buy an orange. I had a grapefruit, so I zested that. Traditional? No. Totally delicious still? Surprisingly, yes.
1/3 c shaved bittersweet chocolate *I used bittersweet mini chocolate chips.
1. Mix ricotta, powdered sugar, orange (or grapefruit) zest, and vanilla in a bowl until smooth. Stir in the chocolate. *Check the sugar level before you add chocolate chips. I added a bit more powdered sugar than it called for, so just check for taste.
*The recipe doesn’t call for this, but I also melted some chocolate and dipped my edges of shell in chocolate. Let chocolate dry completely before filling.
2. Fill a pastry bag with ricotta mixture. Hold a cannoli shell in one hand; with the other, insert the pastry tip into the center of the shell and fill one side. Flip to the other side, and fill again.
3. Dust filled cannoli with powdered sugar. Serve filled shells immediately. If you aren’t going to serve immediately, store shells at room temperature and filling in the fridge. Fill just before serving.
Rating (Scale 1 to 5):

Difficulty: 1
Amount of Time: 1
Awesomeness: 4

Dark Chocolate Torte (GF)

 This is a twist on a recipe from an Indigenous cookbook called "Seed to Plate, Soil to Sky" our friend group cooked out of for Co...