Sunday, November 21, 2021

Cranberry and Rosemary Shortbread Bars


I do a fair amount of markets at one of our local breweries, and I try to incorporate one of their beers into my bakes for the markets. The seasonal delight this time is Old Bakery Beer's Tannenbaum IPA with rosemary, so I decided to make a new shortbread to highlight the season. Get in bitches; we're going sleighing. This recipe makes an 8x8 pan of shortbread (12 bars). 


For the Shortbread:

6 oz Tannenbaum IPA from Old Bakery Beer reduced (optional)- *you will not use all of that here; also just a note that you're cooking the alcohol off. 

2 sticks unsalted butter, room temp

1/2 c granulated sugar

2 c all-purpose flour

3/4 tsp salt

1 tsp vanilla bean paste (or vanilla extract if you don't have it)

1 tbsp fresh rosemary, finely chopped 

1. In a small pan, bring beer to a boil and reduce to about half. Chill before using (I recommend you do this step the day before just for chilling time).

2. Preheat oven to 350F and line 8x8 pan with parchment and spray with cooking spray. 

3. In a stand mixer fitted with a paddle attachment, cream together the butter and sugar. 

4. Add salt, vanilla, and rosemary and combine. 

5. Slowly incorporate the flour until you get to a sandy texture that holds together when you squeeze it in your hands. 

6. Pour out into your prepared pan and press down into a solid layer. 

5. Par-bake for about 20-25 minutes. While that's baking, move on to the filling. 

For the Cranberry Filling:

12 oz fresh (or frozen) cranberries

1/2 c granulated sugar 

Zest and juice of one orange

A sprig of rosemary (whole)

1. Cut cranberries in half and place into a saucepan with sugar, orange juice and zest, and rosemary. 

2. Bring to a simmer and allow to cook and thicken - mine took  about 15 minutes. 

3. Remove rosemary sprig and discard; set aside cranberry filling until assembly. 

For the Crumb Topping:

1/2 c unsalted butter, cold and cubed

1/2 c all-purpose flour

1/2 c brown sugar

1/2 c rolled oats

Pinch of salt

1/4 tsp cinnamon

1 tsp rosemary, finely chopped

1 tbsp reduced beer

1.  Place all ingredients in a bowl and combine. Either use your hands or a pastry cutter to get the butter chunks to about pea size. 

Assembly:

1. Once shortbread is par-baked, pull out of oven and top with the cranberry filling and the crumb topping. 

2. Bake again for about 40 - 50 minutes or until topping is golden brown and set. 

3. Option to drizzle with melted white chocolate; I took this option, and I'm not mad about it. If you want to do that, just microwave about 4 oz of white chocolate in the microwave in 15 second intervals. 

4. Pour into a ziploc bag and cut off a small piece of the corner for a makeshift piping bag and drizzle til your heart's content. 


Wednesday, November 17, 2021

Honey Caramel Shortbread with Pepitas

So, I have chickens- the Spice Girls (Cinnamon, Cardamom aka Cardi B, Cumin, Ginger, and Nutmeg), and I have created a barter system with someone: eggs for honey. That's where this recipe came about; I got a lot of honey. Like a lot. I also recognize that this recipe isn't really a looker, but she's got a great personality. 

This recipe makes an 8x8 square pan (12 bars). I used pepitas on this, but you could do any kind of seed or nut you want really. You do you, boo. 


For the shortbread:

2 sticks unsalted butter, room temp

1/2 c brown sugar

2 c all-purpose flour *If it feels too wet and not very sandy, you can add a bit more. It should just hold together when you squish it in your hand.*

3/4 tsp salt

1/2 tsp cardamom 

1 tsp vanilla bean paste (or vanilla extract if you don't have it)

1. Preheat oven to 350 F and line pan with parchment (with a bit of overhang so you can pull it out of the pan for cutting and serving), and spray with cooking spray. I did double parchment going on both sides so all four sides are covered in parchment. We are working with caramel, folks. You don't want tears? PARCHMENT. 

2. Put butter and sugar in stand mixer fitted with paddle attachment and cream together for a few minutes. 

3. Add vanilla, cardamom, and salt. Slowly add in flour until you get the desired texture (that 2ish cups we discussed). 

4. Pour out into prepared pan and press down into a solid layer. 

5. Bake for about 40 - 50 minutes until golden brown on top. 

6. Allow to cool while you make the honey caramel. 

For the Caramel:

I used this recipe as a base (but halved it)

1/2 c honey

1/3 c heavy cream 

1 tsp vanilla extract 

2 tbsp unsalted butter 

1 c salted pepitas (ish) - I'm not gonna lie; I didn't really measure this... 

1. Place the honey and heavy cream in a pot on the stove and bring to a boil. Continue to cook, stirring occasionally, until the caramel is around 240 - 245 degrees. You want it to be loose enough that it won't harden and break teeth. If you aren't sure about the caramel, you can do the water test. Take a cup and fill with ice water. Drop a small amount of the caramel in to the water and see if it forms a soft ball. 

2. Once you get to the consistency you're looking for, take off the heat and add vanilla extract and butter, stirring until all combined. 

3. Add in the pepitas and pour over the shortbread crust. 

4. Allow to cool forever. This part is the bitch of this whole recipe. It'll take like 2 hours or so to cool. 

5. Turn out and cut into 12 squares. 


Thursday, August 26, 2021

Coconut Pound Cake

People sometimes are like, how do you decide what you want to try making? Well, here's how it usually goes: I was watching Virgin River, and the main character is like I just want a bath and a coconut cupcake for my birthday, and I was like damn, that sounds good. We always do our low country boil at the end of August, and for some reason, I always want a bundt cake for that occasion. I don't know why my brain has associated these two things, but you know what, every time I hear the song "Like a Prayer" by Madonna, I associate it with the movie Home Alone. I don't fucking know why. Who knows why our brains do what they do. What I DO know is that low country boil equates to a bundt cake, and this year, I needed coconut. 

This recipe makes one bundt cake (serves 18ish)

For the Bundt

1 1/4 c shredded coconut, sweetened

3 sticks unsalted butter, room temp

1 c granulated sugar

1/2 c brown sugar

6 large eggs

1 3/4 c all-purpose flour

1/4 c full-fat coconut milk (more needed for glaze as well)

1 1/2 tsp salt

1 1/2 tsp baking powder

1 tsp vanilla extract *you can use coconut extract here; I just don't really like it.

1. In a non-stick pan, put coconut on medium heat and lightly toast, stirring frequently. Do NOT walk away! She's fickle, and she'll burn in a heartbeat. 

2. Once toasted, allow to cool for a bit. 

3. Take one cup and finely chop in a food processor or with a sharp knife. Reverse the rest for the topping. 

4. Prepare bundt pan with goop and preheat oven to 325F. 

5. Cream together butter and sugars in a stand mixer fitted with paddle attachment. 

6. Slowly add in eggs, making sure to incorporate between each egg. 

7. Combine dry ingredients in a small bowl (flour, salt, baking powder). Add them to butter and sugar slowly until incorporated. 

8. Add vanilla and coconut milk to the batter and combine. 

9. Fold in the one cup of coconut. 

6. Bake for 45 - 60 minutes or until a toothpick inserted comes out clean. 


For the Glaze 

You either already hate me because you know what I'm going to say here, or you have grown confident with your glaze making skills and therefore no longer need me. We measure with our hearts, so I will try to give you an estimate, but really, it's all about the feel. 

About 2 c powdered sugar, sifted

Pinch of salt

Splash of vanilla 

1/4-1/2 c coconut milk 

1. Sift sugar into a large bowl. Add salt. 

2. Add vanilla and start to add a little coconut milk and whisk to combine. 

3. You are looking for something thick, but that will still run. If it's too thin, add more powdered sugar; if it's too thick, add more coconut milk. Here's my consistency:

Assembly

1. Once the bundt has cooled, turn out onto serving platter. If it sticks to the pan a bit, as mine did, that's okay! Peel it out and slap it back together - you're covering with glaze and coconut anyway. 


2. Drizzle with glaze- as you can see in my picture, I went a little overboard with the glaze, and I have no regrets. 

3. Top with the remaining 1/4 c of toasted coconut. 

4. Serve with a rum-based drink. You'll thank me. 

Thursday, August 5, 2021

Brown Butter Rice Crispy Treats


I am going to preface this recipe by saying it's really not a lot of a recipe. These are rice crispy treats, y'all. I mean, pretty fucking basic. I WILL say that this is a bit of a glow up for the rice crispies you had as a child. The brown butter makes it a little nutty, and the flakey sea salt give you the balance you didn't know you craved. This recipe makes a 13x9 pan. 

For the Rice Crispies:

6 tbsp unsalted butter, room temp

12 oz (ish) marshmallows

6 c rice crispy cereal

1 tsp vanilla bean paste (or vanilla extract if you don't have it)

1 tsp flakey sea salt 

1. Prepare a 13x9 with nonstick cooking spray. Keep the spray out as well- you can use this later. 

2. In a large pot, begin to melt butter. You will bring it to a boil and stir constantly. At first it will get foamy, and then it will begin to clear a bit, and you will start to see little brown bits. It will also darken in color some as well. 

2. Add in 10 oz of marshmallows and vanilla bean paste; stir constantly until all melted and incorporated with the butter. 

3. Take off the heat and then add in the rice crispy cereal and the last 2 oz of marshmallow so you get some marshmallow chunks. 

4. Pour the rice crispies into the prepared baking dish. Spray hands and pack down into the pan. 

5. Sprinkle with flakey sea salt. 


Thursday, July 15, 2021

Samoa Bars


I want to go on record by stating that Girl Scout Samoas are a thing of beauty and I would never say these are better than the original, but I will say that they are pretty damn good. You have a flaky shortbread crust, mountains of toasted coconut smothered in caramel, all drizzled with a little semisweet chocolate. This makes a 9x13 pan, so it's plenty to share (or not share; I won't tell you how to live your life).


For the Shortbread:

1 cup (2 sticks) unsalted butter, room temp

1/2 c granulated sugar

1 tsp vanilla bean paste (or vanilla extract if you don't have it)

3/4 tsp salt

2 c all purpose flour

1. Preheat oven to 375F. Prepare 9x13 pan with parchment paper and non-stick spray. 

2. Cream together butter and sugar. Add in vanilla bean paste and salt. 

3. Slowly incorporate flour. The mixture will be sandy, but you should be able to push it together in your hand and have it clump. Press dough firmly into prepared pan. 

4. Bake for about 20-25 minutes or until the crust is golden brown. 

5. Allow to partially cool before adding the coconut layer.

For the Coconut Layer:

2 c sweetened shredded coconut 

11 oz bag of caramel bits

3 tbsp heavy cream

1/2 tsp salt 

1 tsp vanilla extract 

4 oz semi sweet chocolate chips. 

1. While the shortbread is baking, put 2 c sweetened shredded coconut into a pan to toast. Make sure to stir frequently. When it gets slightly toasted and fragrant, remove to a bowl for later. 

2. Once the shortbread has come out of the oven, you can combine caramel bits, heavy cream, salt, and vanilla into a heat-safe bowl and microwave for 30 second intervals. It will look like it's not going to come together, but it totally will. 


3. Toss in the shredded coconut and mix to coat. 

4. Spread out evenly onto the shortbread crust. 

5. In a small heat-safe bowl, microwave chocolate chips in 15 second intervals until smooth. Put into a piping bag (or a ziploc bag with the corner cut off), and pipe lines onto the top of the bars. 

6. Allow to cool completely before cutting. *If you wanted to, you could dip the bottoms of the bars into chocolate as well once they're cut- this will be more reminiscent of the real deal, but it will also be a hot mess, so you do you, boo. 

Angel Food Cake


My husband bought an angel food cake pan about a year ago because he wanted to try making some.... Fast forward to a year later, and I have finally broken the seal on our angel food dreams. I went down the rabbit hole for angel food because people were scaring me about fucking it up. It's MUCH easier than I had thought it would be and way more delicious than store-bought. So what I'm saying is, don't be afraid! Come into the light, Carol Anne. I will say that there are some key tips to help you be successful, so it's not about the ingredients as much as it is the technique. You WILL want a food scale for this. I think that's really the only way to go. The ratios for an angel food cake are 3:3:1 by weight- 3 parts egg whites, 3 parts sugar, and 1 part cake flour (and you do want to go cake flour on this one because it is much lighter). Without a way to measure these weights, it's a difficult cake to do correctly.   

For the Cake:

407 g egg whites (this was 11 eggs for me- that's what I had; for a full sized angel food cake, you're looking at 10-12 egg whites)

407 g granulated sugar

136 g cake flour, sifted *You know I wouldn't say sift if I didn't mean it

1/2 tsp cream of tartar

1/2 tsp salt

1 tsp vanilla bean paste (or vanilla extract if you don't have it)

zest of 1 lemon, juice of 1/2 a lemon 

1. Preheat oven to 350F. Do NOT grease your angel food pan. It needs the sides to be able to climb up and get height. It can't do that if you slick down the walls. 

2. Put egg whites into a stand mixer fitted with whisk attachment. Start to whip up egg whites. *I only put it at max a 6 on a Kitchenaid because that's what I do for macarons and it always works. Does it matter here? No idea. If you're brave, you can crank it up faster if you want and see if it works. Report back please. 

3. Once egg whites start to get foamy, add in the cream of tartar. Then slowly stream in the granulated sugar. 

4. Continue to beat until at about a medium peak. You don't want it to be a stiff peak, but it needs to have some body. Like it can stand up on itself in the bowl for a bit, but it's not super excited about it.  

5. Add in the salt, vanilla bean paste, zest, and lemon juice. Incorporate. 

6. Turn off the mixer and gently fold in the cake flour until just incorporated. 

7. Fill up the angel food pan and bake for about 50-60 minutes. The internet told me not to put in a tooth pick because it can be deceptive for angel food, so I did the finger press- if you touch it gently with a finger and it starts to spring back, it should be done. It will also be golden in color. 

8. When it is out, immediately flip it over so that it cools upside down, preventing it from collapsing. I flipped it over onto a small bowl. 

9. When it is cooled, turn out onto cake stand. Serve with berries and whipped cream if you like. Or do like I did, and just rip off chunks of it throughout the day like a heathen. 


Sunday, June 13, 2021

Honeymoon Cake

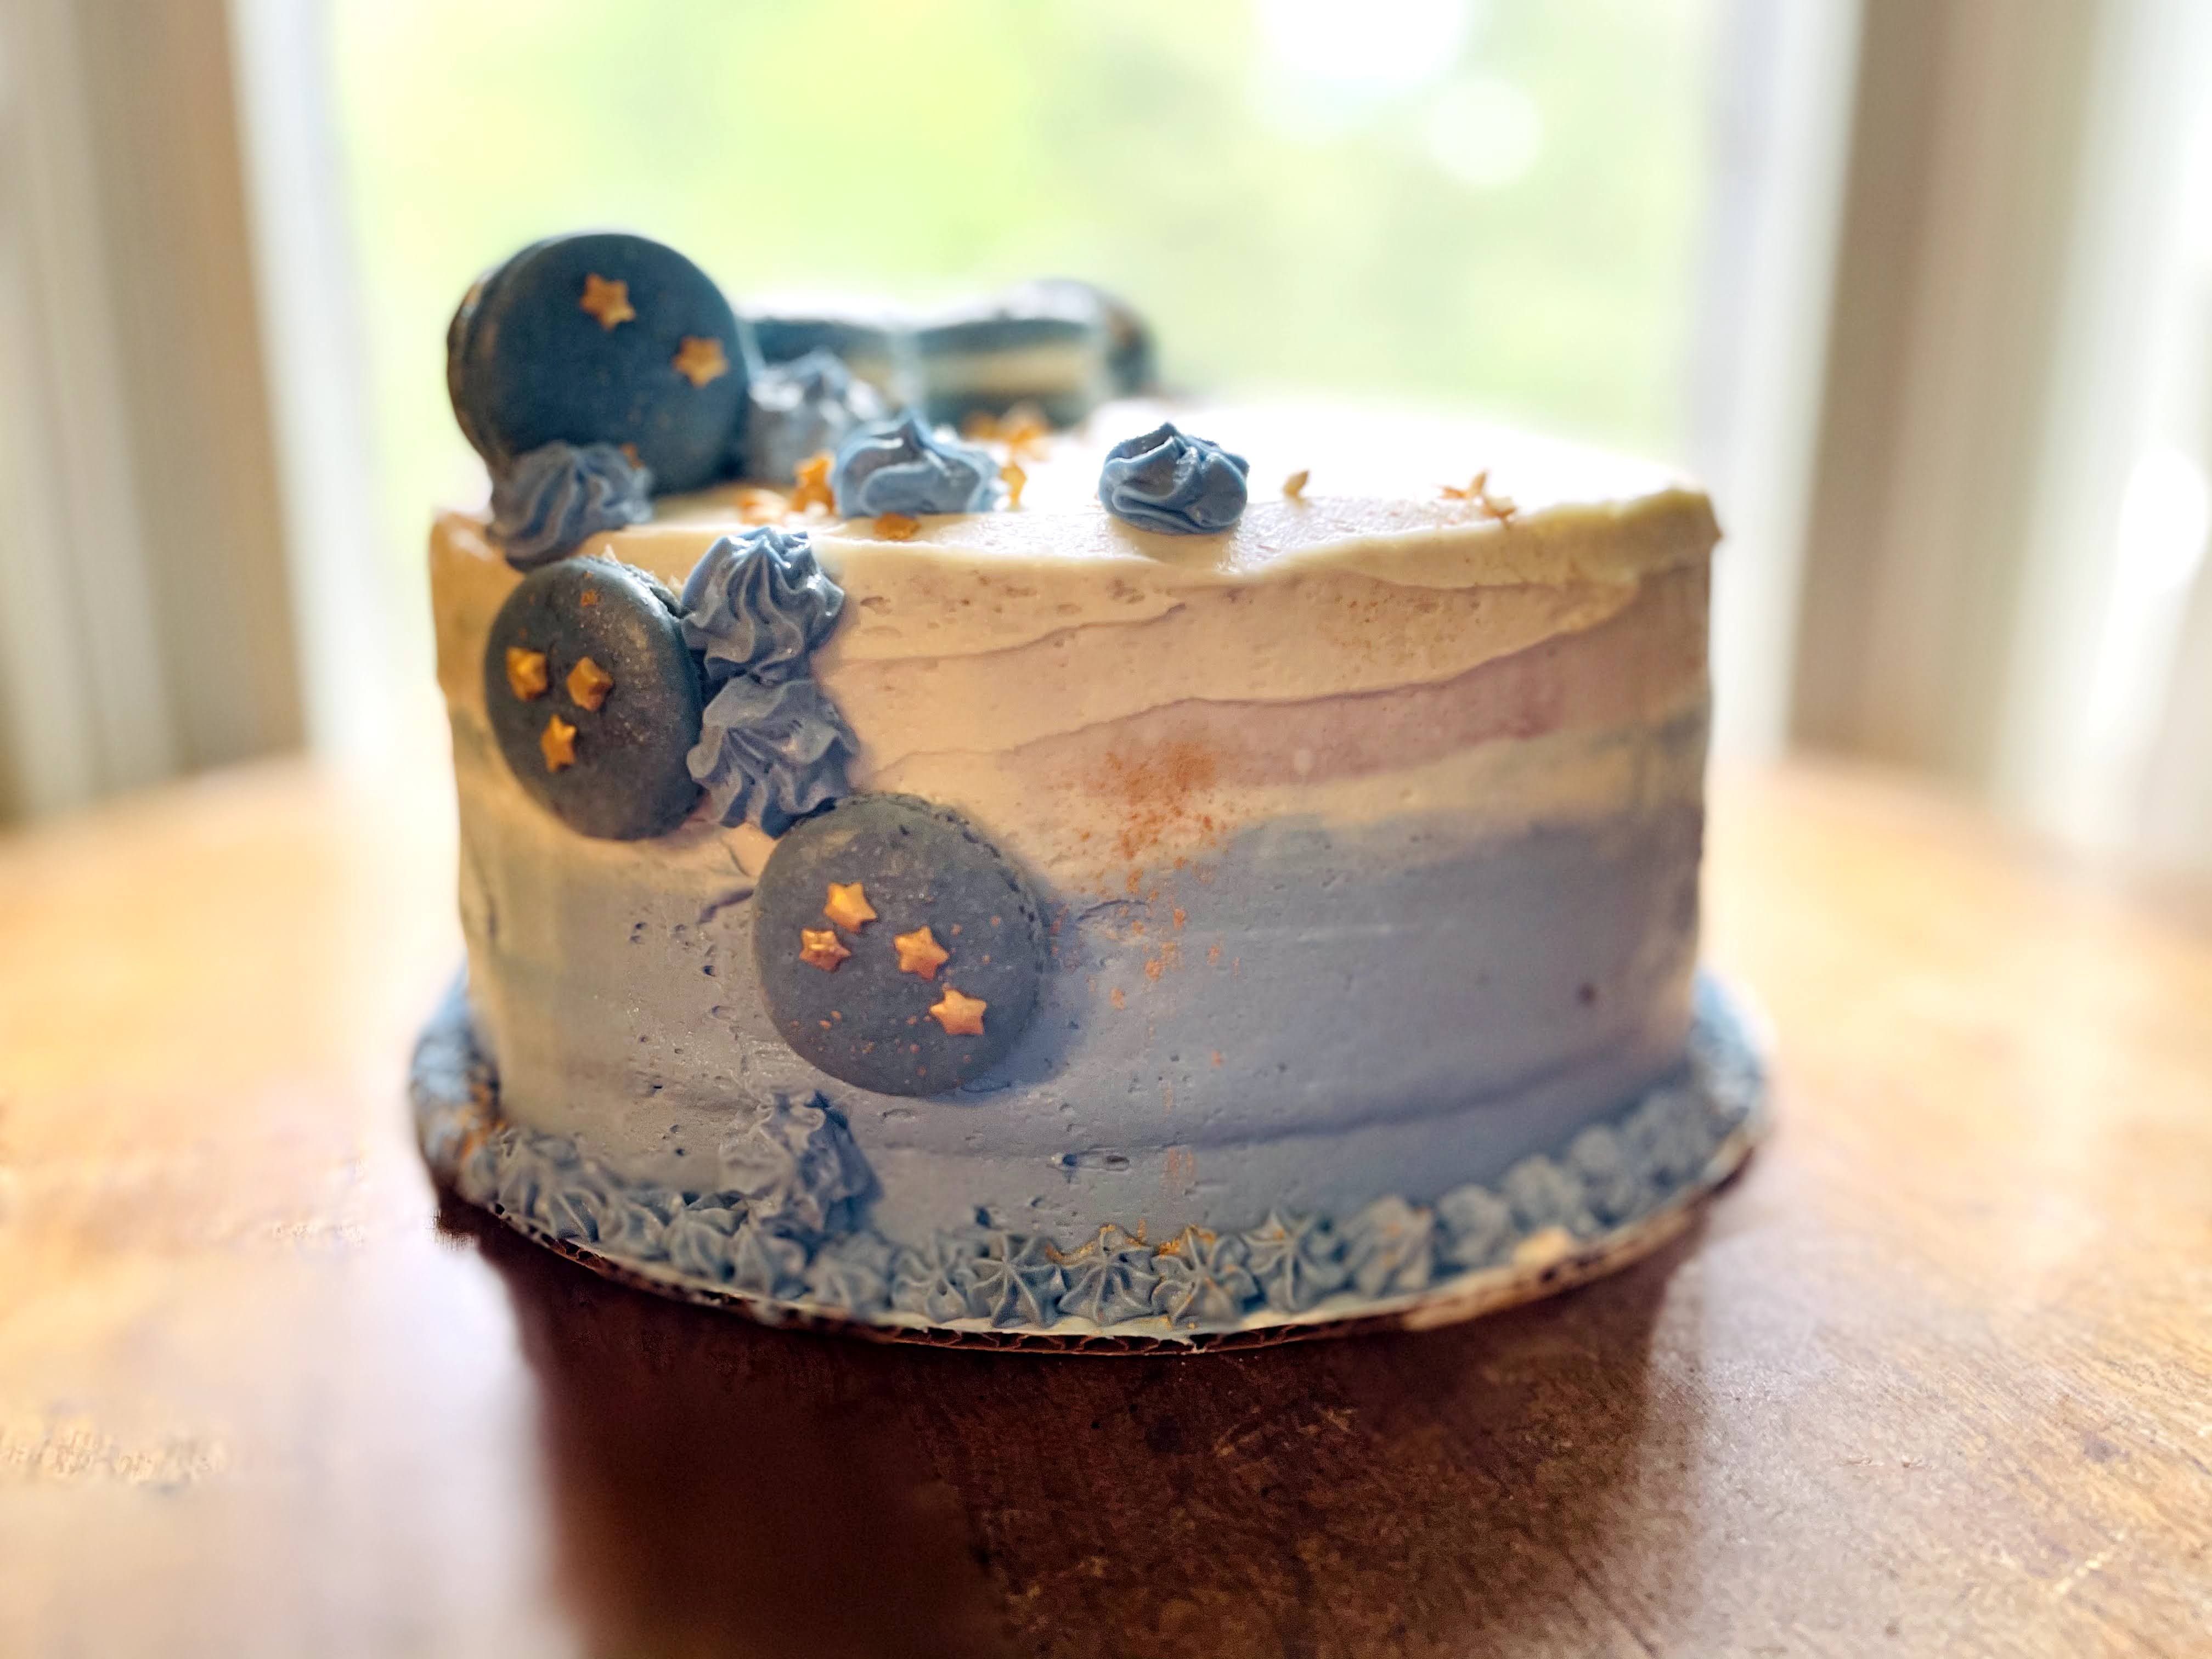
So y'all know I have the honeymoon cookies (with Blue Moon, honey, and orange), so I wanted to do that same flavor profile in cake form. This is a 3-layer cake soaked in Blue Moon beer, sandwiched with orange curd, slathered in orange buttercream, and topped with stellar macarons! I will say, to make your life easier, do the curd and reduce the beer the night before. 

This recipe makes three 9-inch round cakes or about 36 cupcakes and about 24 macarons. 

For the Orange Curd:

*I did the usual curd recipe I do from Ina, but subbed out all the lemon for oranges. I think next time I will do at least some lemon as well- the orange curd by itself had no tang. Just all sweet. I think the lemon will boost the flavor some. 

3 oranges (again, when I make this next time, I will probably do 2 oranges and 1 lemon)

1 ½ c granulated sugar

¼ pound unsalted butter, room temp (that’s 1 stick)

4 extra-large eggs

½ c orange (and maybe lemon) juice

1/8 tsp salt

1. Using a vegetable peeler, remove the zest of 3 oranges, being careful to avoid the white pith. Put the zest in a food processor. Add the sugar and pulse until zest is very finely minced into the sugar.

2. Cream the butter and beat in the sugar and orange mixture.

3. Add one egg at a time, and then add the orange juice and salt. Mix until combined.

4. Pour mixture into a 2-quart saucepan and cook over low heat until thickened, about 10 minutes, stirring constantly. The curd will thicken at about 170F, or just below a simmer. For this recipe, I kept cooking it for about 10 more minutes because I wanted it to be thicker so that it would not squish out of the cake layers.

5. Remove from heat and run through a strainer to get any lumps or bigger pieces of zest out of it. Cool or refrigerate. I put it in mason jar and let it cool slightly before putting the lid on and putting it in the fridge. 

For the Macaron Shells:

1 part egg whites - 64 grams (2 egg whites for me)

1.5 part almond flour - 96 grams (64 from egg whites x 1.5)

0.8 part granulated sugar - 51 grams

1.5 part powdered sugar - 96 grams

1/8 tsp cream of tartar

1/2 tsp cardamom * this is a little citrusy and a little warming and it's super nice

Zest of 1 large orange

Blue food coloring

Gold and/or silver luster dust

Star sprinkles

1. In a stand mixer fitted with whisk attachment, start mixing egg whites. Don't mix them on too high of a speed (no higher than 6 on a kitchenaid). While this starts out, move to the second step.

2. Sift together almond flour, powdered sugar, and cardamom in a bowl. *I just put my bowl on my food scale and poured through my sifter until the right weight because I'm lazy.* Put aside until the egg whites are finished.

3. After the egg whites have started to foam up, add cream of tartar. *this is just to help stabilize the merengue, so you can leave it out if you want.

4. Start adding in the granulated sugar to the foamy egg whites a bit at a time. Let mixer keep whipping until you get to stiff peaks, like you see in the picture.

5. Once you have stiff peaks, gently fold in the orange zest.

6. Pour in about half of your dry ingredients into the egg whites. You'd think you have to be gentle here because it's egg whites and you don't want to lose all that air. Nah. You can mix the shit of out of this; it's okay.

7. Pour the second half of dry ingredients in and keep mixing. Here I was a bit more gentle. Add the blue food coloring at this point too and incorporate. You want to keep mixing until it looks glossy and it ribbons back on itself. 

8. Line baking sheet with silicon mat or parchment paper and pipe the macarons into small circles. 

9. Whack the cookie sheet on the counter at least 3 times to get all the air bubbles out. *Again, you can whack them on the counter pretty hard.

10. Decorate with luster dust and star sprinkles.


11. Allow to sit at room temperature until they look matte and when you try to gently touch them with your finger, they don't stick. They form a skin on top. This can take between 20 minutes to an hour. In more humid months, this will take longer, but it's one of the most important steps! 

12. While you're waiting, preheat oven to 350F.

13. BEFORE you put them in the oven, drop to 325F. I would only bake one sheet at a time. I tried double once. It doesn't work out well. Anyway, bake for 12 - 14 minutes, but check at 10 minutes. If you can lightly touch it and the macaron doesn't move on it's base, it should be done.

14. Allow to cool completely before taking off parchment and filling. 

For the Cake:

1/2 c vegetable oil

1/2 c unsalted butter (1 stick), room temp

2 c granulated sugar

3 eggs, separated

1 tsp vanilla extract

2 c all-purpose flour

1 1/2 c cake flour

1 tsp salt

1 1/2 tsp baking powder

1 1/2 tsp baking soda

1 c buttermilk

1/2 c Blue Moon reduction *you will reduce 12 oz and use part of it here, and part of it to soak the cake.

Zest of an orange

1. Put Blue Moon into a small saucepan and allow to simmer and reduce to about half. Allow to cool before using (again this is why I would suggest reducing this the night before).

2. Preheat oven to 350F and prepare cake pans with goop.

3. In a stand mixer fitted with paddle attachment, cream together oil, butter, and sugar. Add in the yolks of the three eggs- keep the whites separate. Add in vanilla extract.

4. In a small bowl, whisk together egg whites until at stiff peaks. Set aside.

5. In a separate bowl, combine all dry ingredients- flour, baking powder, baking soda, and salt.

6. Pour 1/3 of the dry ingredients into the sugar mixture and mix to combine.

7. Pour the buttermilk into sugar mixture and combine.

8. Pour another 1/3 of dry.

9. Pour the half cup of Blue Moon reduction.

10. Pour in the last 1/3 of the dry ingredients.

11. Slowly fold in the egg whites that were whipped up earlier and the zest. *This ensures that the batter will be light and fluffy.

For the Buttercream:

*You will use this to decorate the cake and to fill the macarons. 

5 sticks unsalted butter, room temp

6(ish) c powdered sugar

2 tbsp honey

Pinch of salt

Zest and juice of 1 orange

Splash of vanilla extract 

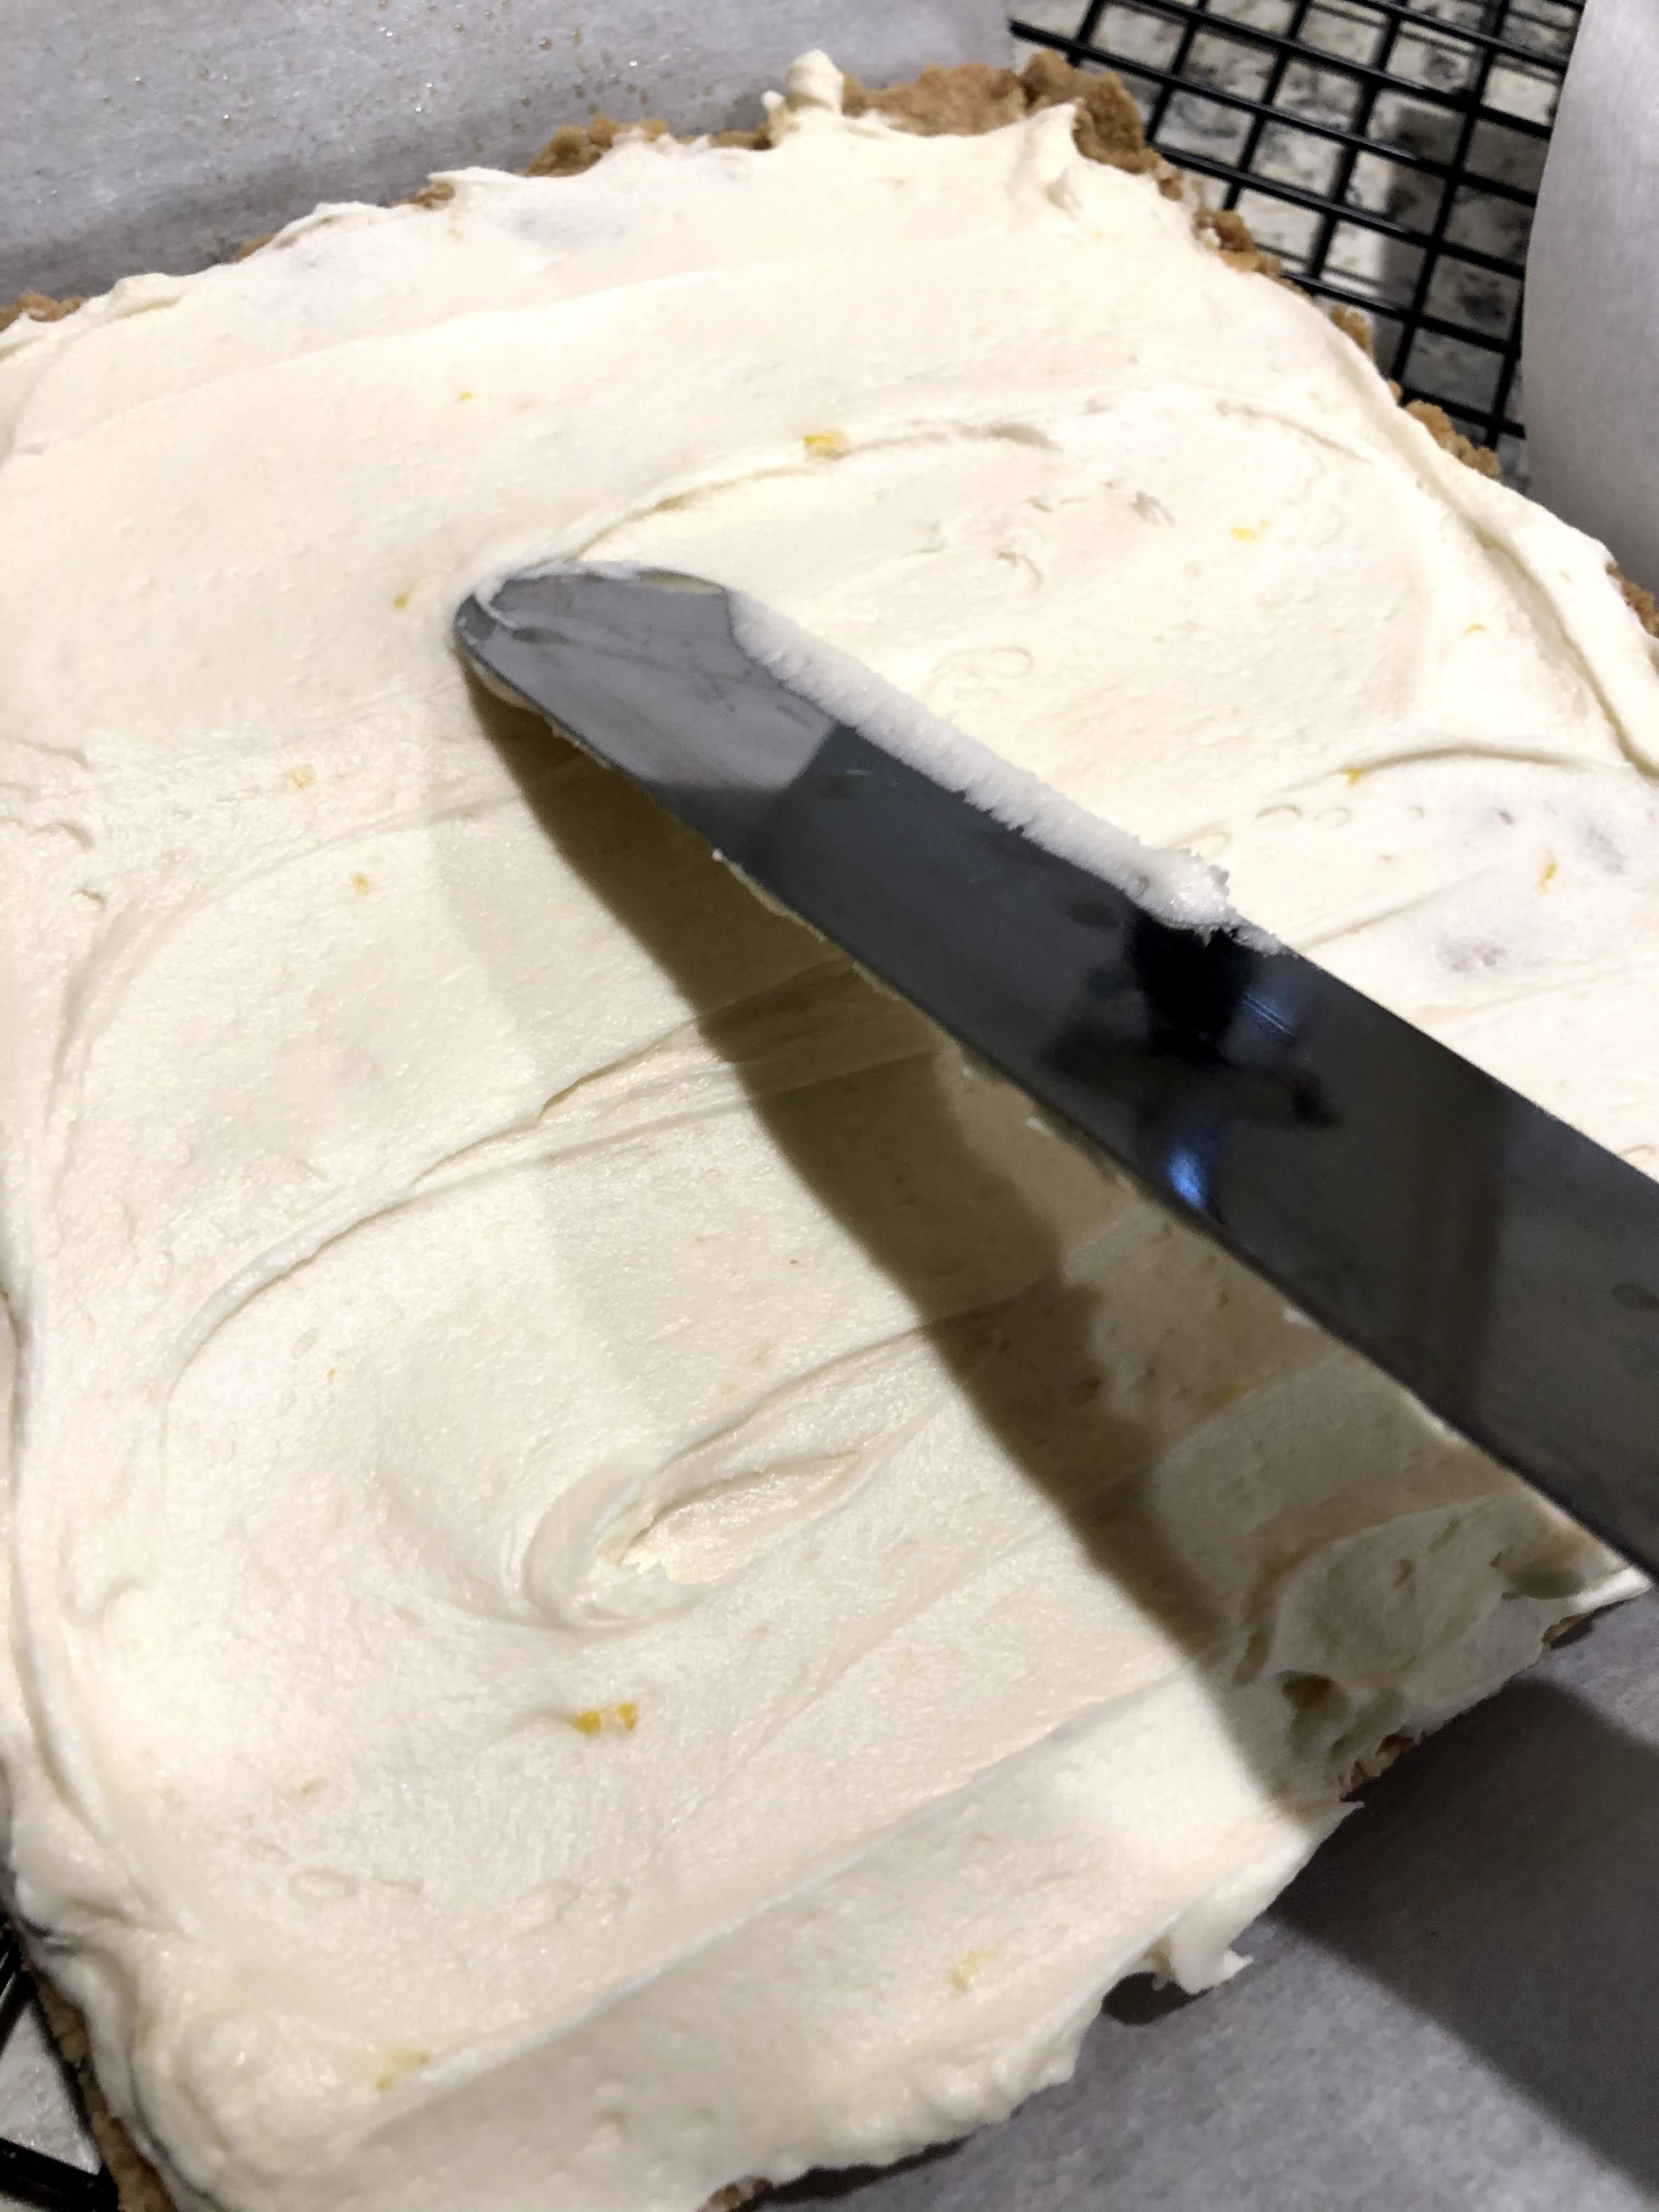
1. In a stand mixer with paddle attachment, cream butter.

2. Slowly add powdered sugar one cup at a time, and mix to combine.

3. Add salt, vanilla, orange juice and zest. 

4. Mix to incorporate and allow to continue mixing for a minute or two to fluff. 

5. Take about 1/3 of the buttercream into a separate bowl and dye with blue food coloring. 

Assembly:

1. Take a dollop of buttercream and put on serving board or plate. 

2. Put the first cake layer down. With a pastry brush, soak the cake with some of the remaining Blue Moon reduction (you will do this with each layer). 

3. Put blue buttercream and white buttercream into two pastry bags and cut the end off of each. Take the white buttercream and create a dam on the top of the cake layer. 

4. Spoon in about half of the orange curd to cover the layer. 

5. Repeat with second layer, more soak, dam, and curd. 

6. Top with final layer and soak. 

7. With pastry bag, start at the bottom with blue buttercream and run it up about half of the cake. 

8. Do the same with the white buttercream up to the top (and covering the top) of the cake. 

9. Take a bench scraper or an offset spatula and smooth out the buttercream- allowing the colors to mix gently in the middle. 

10. Fill macarons with buttercream as well and decorate the cake with macarons. I didn't fill some of them and just used the shells as well. I also did another smattering of luster dust on the cake. 


Sunday, April 25, 2021

Strawberry Lemonade Shortbread Bars


Yes, this is the second strawberry lemon dessert I've made this weekend, and you know what, you're welcome. This shit is delicious. Flaky shortbread crust and lemon buttercream topped with fresh strawberries. I worried it may be too sweet, but the shortbread is a little salty and the buttercream a little zippy, and overall, I'm not mad at this one bit. It's also like really easy. Really. You're gonna want to make these. 

This recipe makes two 8x8 inch squares or you could do a big one in a 13x9 pan. 


For the shortbread:

2 sticks unsalted butter, room temp

1/2 c granulated sugar 

2 c all-purpose flour (ish* see below)

3/4 tsp salt

1/2 tsp cardamom 

Zest of 1 lemon

1. Preheat oven to 350 F and line pan(s) with parchment (with a bit of overhang so you can pull it out of the pan for cutting and serving), and spray with cooking spray. 

2. Put butter and sugar in stand mixer fitted with paddle attachment and cream together for a few minutes. 

3. Add salt, cardamom, and lemon zest. Slowly add in flour until you get the desired texture (that 2ish cups we discussed)  *You want the texture to be sandy, but when you squeeze some in your hand, it should stick together. If it feels too wet and not very sandy, you can add a bit more flour. If you add too much flour, you're fucked, so err on the side of caution. I mean you're not really fucked; it'll still be delicious, but the texture won't be quite the same. Sorry for the scare tactic.*

4. Pour out into prepared pan(s) and press down into a solid layer. *If you're doing the two smaller pans like I did, just divide the dough evenly. 

5. Bake at 350F for about 40-45 mins or until lightly golden brown.

6. Allow to cool completely before assembly.

For the buttercream:

2 stick unsalted butter, room temp

3 c powdered sugar

1 tsp vanilla extract

Pinch of salt

Zest and juice of 1 lemon

1. In a stand mixer fitted with paddle attachment, combine butter, salt, and lemon zest. 

2. Slowly start to incorporate powdered sugar one cup at a time. 

3. In between sugar cups, squeeze in half a lemon. 

4. Finish with a splash of vanilla extract. 

5. Reminder that buttercream is a feel thing, so if it feels too loose, add more sugar. If it feels too stiff, add more lemon juice or heavy cream. 

6. Whip it for a minute or two at the end to aerate it and make it fluffier.

Assembly:

You will also need: 

1 pint of fresh strawberries, thinly sliced

A little apricot jam *optional

1. Take cooled shortbread and top with a layer of lemon buttercream. 

2. Arrange strawberry slices on top. I just did rows so that it was easier to cut in between them when serving.

3. Mix a little apricot jam with a splash of water. Brush onto the strawberries for a shiny finish. 

4. Cut into 12 slices (if you're in the 8x8 pans like me- so 24 pieces total). 

5. Store in the fridge, but take out a bit before serving so it can warm up a bit before eating.

Friday, April 23, 2021

Chocolate Orange Cake


A friend had her baby shower recently, and she requested a chocolate orange cake. I realized that I hadn't made this combo before, BUT I  had made all the components, so this is a bit of Frankenstein cake, complete with chocolate cake, chocolate buttercream, chocolate ganache, orange marmalade, and candied oranges! It weighs about 20 pounds, and now all of us that ate it feel about 20 pounds heavier. Worth it. I highly suggest that you make this a TWO day cake process. Start with the candied oranges the day before so they have time to dry out. This recipe makes a three layer 9-inch round cake.  
For the candied oranges:

I used this recipe for the candied oranges with slight modifications.

1 1/2 navel oranges sliced into about 1/8 - 1/4 inch thick.
2 cups granulated sugar
2 cups water
2 tbsp orange juice (from the other half of the second orange)

1. Put a pot of water on the stove to boil.
2. Make an ice bath in a large bowl and set by the boiling water.
3. Place orange slices in the boiling water for about one minute and then transfer them to the ice bath to cool. *The recipe said to drain them before the next step.... I didn't. I just kept them in the ice bath until my syrup was ready.
4. Bring the 2 cups water, granulated sugar, and orange juice to a boil on the stove. Once the sugar has dissolved, reduce to medium-low heat. Add orange slices in a single layer. *mine was not a single layer... It was still okay.
5. Simmer the orange slices for about 45 - 60 minutes, flipping every 15 minutes, until the rinds are slightly translucent.

6. Place orange slices on a cooling rack (preferably with something underneath to catch the drip) and allow to cool completely. *the recipe says at least an hour up to overnight. I did two hours, and it's fine, but I think next time I will do it overnight. For this cake application, two hours is fine. For like candy, overnight probably makes for a better chew. *Also, once they set up, I cut them in half to be able to place on the cake. Definitely wait until they have hardened!

7. Dust with additional granulated sugar to help with the stickiness.

8. RESERVE the syrup! That's your soak for the cake!

 For the batter:

2 c granulated sugar 
2 1/2 c flour 
1 c cocoa powder 
3 eggs 
3/4 c vegetable oil 
2 tsp baking powder
1.5 tsp baking soda
1 tsp salt
1 c boiling water 
1/2 c buttermilk 
1 tsp vanilla extract

1. Preheat oven to 350F. Grease three 8-inch round pans using goop.
2. Combine sugar and vegetable oil in stand mixer fitted with paddle attachment.
3. Add eggs one at a time until incorporated. Add in vanilla extract as well.
4. In a separate bowl, combine the dry ingredients.
5. Alternate dry ingredients and buttermilk, incorporating each into the batter before adding more. Start and end with the dry ingredients.
6. Add the hot water *make sure your speed is on the lowest!* to the batter a little at a time. Once all incorporated, scrape down the sides of the bowl, and then turn to medium-high speed and whip for one minute. This batter will look really loose, but that's how it should be.
7. Pour batter evenly into cake pans.
8. Bake for 18-22 minutes or until a toothpick inserted comes out clean.
9. Let cool on cooling rack. Turn out cakes when still a bit warm. Allow to cool completely before icing.

For the buttercream frosting:
4 sticks unsalted butter, room temperature *yes, this is pretty butter-heavy; trust me, it's delicious
1 c cocoa powder
4 c powdered sugar
1/4 tsp salt
1 tsp vanilla

1. Put butter into stand mixer fitted with paddle attachment.
2. Sift cocoa powder and powdered sugar together. *I don't sift unless I need to. You know this, but with a frosting, it's best to sift.
3. Pour sugar mixture into butter a little at a time until incorporated. Add salt and vanilla.

For the Ganache:
1 c heavy cream
12 oz semi-sweet chocolate chips 
4 tbsp (half a stick) unsalted butter, room temp - I almost ALWAYS don't do room temp because I forget to pull the butter out for this; it's fine; just takes a few more mins to melt
Pinch of salt
1 tsp vanilla extract

1. Place the heavy cream in a small pan on the stove and heat until just at a simmer. You don't want this to boil.
2. While the cream is heating, put your chocolate and butter chopped into small cubes into a heat safe bowl.
3. Once the cream has heated, pour over the chocolate and butter and cover bowl with plastic wrap for about 5 minutes. *This just ensures that your chocolate will melt and be easier to incorporate.
4. Stir the ingredients together. At first it will look like they aren't coming together. They will. Once it's smooth, I add some salt and vanilla to taste, and make sure to fully incorporate it.
5. You will want this to sit for a while so that it is pourable but will not fall off the cake. We want drips.

Assembly:
You will also need:
18 oz orange marmalade

1. Put a dollop of buttercream on cake stand to prevent slippage. Add first cake layer.

2. With a pastry brush, soak the cake with some of the orange simple syrup reserved from making the candied oranges. 
3. Put about 1/4 of the buttercream into a piping bag. Pipe a ring around the top of the first layer- this is a dam to hold in the marmalade. 
4. Spread marmalade on the cake. 

5. Top with second layer- repeat. 
6. Top with final layer. Cover the cake with buttercream. 
7. Slowly pour the chocolate ganache on the cake. Start to push some of it off the sides at intervals to create organic drips. *I put my ganache in the fridge to firm up a bit because I was impatient... then it was a little too firm. If that happens, put the ganache over a double-boiler to loosen a bit. 

8. Decorate with additional buttercream and orange slices.  

Sunday, March 7, 2021

Salted Caramel Shortbread Bars


This week in the 52 weeks of baking challenges is a timed challenge. What would you make if you were given 1 hour start to finish? This was hard for me to think of because I really just kept thinking of things that I would NOT be able to make in an hour. So I decided that I would finally try my hand at a recipe that my work wife, Jill, always makes. So, this is my rendition of her salted caramel butter bars. This recipe makes an 8x8 pan. Final time: 57 minutes and 29 seconds. It's damn good, so maybe make it when no one else is gonna be home so that you don't have to share. 

For the Shortbread

1 c (2 sticks) unsalted butter, room temp

1/2 c granulated sugar

1 tsp vanilla bean paste (or if you don't have this you can use vanilla extract)

3/4 tsp salt

2 c all purpose flour

1. Preheat oven to 375F. Prepare 8x8 inch pan with parchment and non-stick spray.

2. Cream together butter and sugar. Add in vanilla bean paste and salt. 

3. Slowly incorporate flour. This mixture will be sandy, but when you squeeze it together in your hand, it will clump. See below. 

4. Take about half of the dough and press into the bottom of pan. Bake for about 15 minutes. Reserve the other half of the dough for the topping.  

For the Caramel

1 bag (11 oz) caramel bits - if you can't find these, you can use the same weight of the regular caramels; they just take longer to melt; OR you can make your own caramel. This was a timed challenge. I was not making my own caramel, but you know what, follow your heart. 

3 tbsp heavy cream (or milk is fine)

1 tsp vanilla extract

1 1/2 tsp flakey sea salt

1. About 10 minutes into the baking of the bottom layer, combine caramel bits, heavy cream, and vanilla extract into a heat-safe bowl and microwave in 15 second intervals until smooth and melted.


2. Remove the pan from the oven after the 15 minutes and spread the caramel out onto the dough. 

3. Sprinkle 1 tsp of the flakey salt on top of the caramel. 

4. Take the remaining dough and top the caramel. I made big clumps of the dough with my hands and just plopped them on. It was easiest, and it also allows some of the caramel to stick out. Curb appeal, baby. 

5. Return to the oven for about 30 - 35 minutes or until just starting to get golden.

6. Sprinkle the remaining sea salt on top of the bars and allow to cool completely before slicing. This bake takes less than hour, but the cooling time will feel like a million years while you wait for this deliciousness. 


Gluten Free Brownies

This recipe is riffing off of a flourless chocolate cake recipe I have used in the past. So, like duh, it's already, gluten free, but I ...