Tuesday, May 28, 2019

Overnight Cinnamon Rolls


Okay, so these were also not on the original baking challenge for 2018. Originally I had a gluten-free dessert, but then I realized I had done a gluten-free dessert in the past (here’s looking at you, flourless Mexican chocolate cake), and I had NOT ever done cinnamon rolls. This was my last challenge of 2018. I made these for Christmas morning at my mom’s house. We always make cinnamon rolls from the tube for Christmas. My dad loved them, and even after he passed away, we still make them every year. So, needless to say, this was an emotional challenge. I’m not crying. You’re crying. There was some stress in the rise of the dough, but we got through that, and all of the cinnamon rolls were eaten and loved. Dad would be proud.
I used Alton Brown’s overnight cinnamon rolls recipe, which is perfect for baking off the next day. So if you have a Christmas morning, or a sleepover, or a brunch the next day, make these babies, and you’ll be the hit at the party! This makes one dozen big cinnamon rolls. Here’s the recipe: https://www.foodnetwork.com/recipes/alton-brown/overnight-cinnamon-rolls-recipe-2014250?soc=sharepin
For the Dough:
4 large egg yolks, room temperature
1 large whole egg, room temperature
6 oz buttermilk, room temperature
2 oz granulated sugar, about ¼ c
3 oz unsalted butter, melted, about 6 tbsp
20 oz all-purpose flour, about 4 c, plus additional for dusting
1 package instant dry yeast, about 2 ¼ tsp
1 ¼ tsp kosher salt
Cooking spray
1. In the bowl of a stand mixer, with the whisk attachment, whisk the egg yolks, whole egg, sugar, butter, and buttermilk. Add approximately 2 cups of flour along with the yeast and salt; whisk until moistened and combined.
2. Remove the whisk attachment and replace with dough hook. Add all but ¾ c of the remaining flour and knead on low speed for about 5 minutes. *So at this point you've put in 2 and 3/4 c flour of your 4 cups. You may not use all 4 cups. I didn't.
3. Check the consistency of the dough, and add more flour if necessary. The dough will feel soft and moist, but not sticky and the dough clears the sides of the bowl. *Here’s some videos about how my dough looked:

4. Turn out onto a floured surface and knead by hand for about 30 seconds.
5. Lightly oil a large bowl. Transfer the dough to the bowl and lightly oil the top of the dough too. 
6. Cover and let double in volume, 2 to 2 ½ hours. *Let’s take a few minutes here. First of all, I used a dry erase marker on my bowl so I could see if it actually doubled. Super helpful.
*Secondly, my dough didn’t rise for fucking ever. Here’s what I would recommend and what eventually worked for me: turn your oven on to the lowest setting and let it preheat. Once it’s preheated, turn it off. Let it sit for about 10 minutes before you put your dough in there. Put your dough in and it’ll rise. DO THIS FROM THE BEGINNING! For the love of god. If you do it from the beginning, maybe it’ll take less time than 2 ½ hours. It took me 3 ½ hours including the hour in the oven.

For the Filling:
8 oz brown sugar, about. 1 c packed
1 tbsp ground cinnamon
Pinch of salt
¾ oz unsalted butter, melted, about 1 ½ tbsp
1. Combine brown sugar and cinnamon in a bowl; mix until well incorporated. Set aside for later.
2. Butter a 9 x 13 inch glass baking dish.
3. Once the dough has risen, turn out onto a lightly floured surface. Gently shape the dough into a rectangle with the long side nearest you.
4. Roll into an 18 x 12 inch rectangle.   
5. Brush the dough with the ¾ oz of melted butter, leaving ½ inch border on the top edge. *You’ll be rolling it that way, and you need to give some space for the innards to go AND you want to have dough on dough action for sealing up the log once you're done rolling.
6. Sprinkle the brown sugar and cinnamon mixture over the dough, leaving a ¾ inch border at the top edge. Gently press the filling into the dough.
 

7. Beginning with the long edge nearest you, roll the dough into a tight cylinder.
8. Firmly pinch the seam to seal, and roll the cylinder seam side down.
9. Very gently squeeze the cylinder to create even thickness. Using a serrated knife, slice the cylinder into 1 ½ inch rolls, or 12 equal pieces.

10. Arrange the rolls cut-side up in the baking dish; cover tightly with plastic wrap and store in the refrigerator overnight, or up to 16 hours.

Baking:
1. Remove the rolls from the refrigerator and place in an oven that is turned off. Fill a shallow pan 2/3 full of boiling water and set on rack below cinnamon rolls. Close the oven door and let the rolls rise 
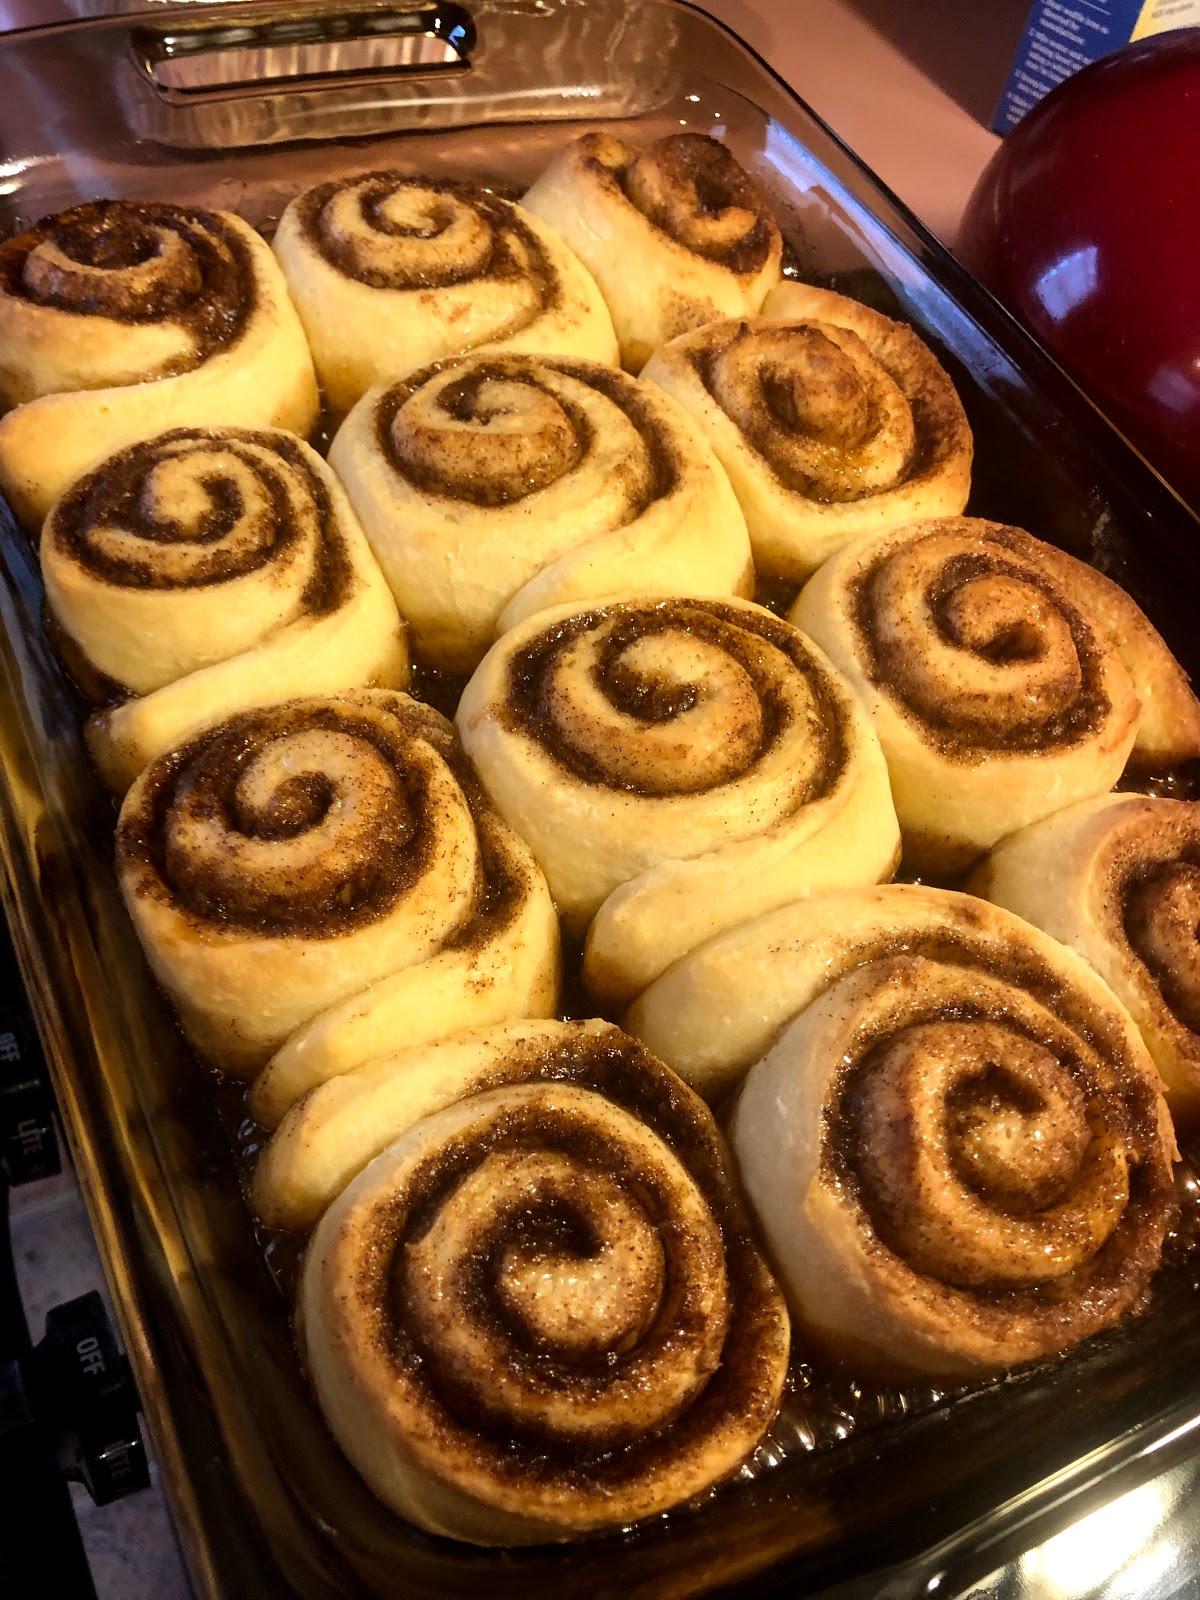
until they are slightly puffy, approximately 30 minutes. *My rolls didn’t get that puffy, but they did puff in the bake, so no worries! See? This is post steam, pre bake. 
2. Remove the rolls and pan of water from the oven.
3. Preheat oven to 350F.
4. When oven is ready, place rolls on middle rack of oven and bake until golden brown, or until internal temperature of rolls is 190F on an instant-read thermometer, approximately 30 minutes. *See, the DO puff!
5. While rolls are cooling, make the icing.

For the Icing:
*Disclaimer… I didn’t make this icing because I forgot to buy cream cheese. I bet it’s delicious, so I’ll tell you what Alton did; then I’ll tell you what I did. Sorry.
2 ½ ounces cream cheese, softened, about ¼ c
3 tbsp milk
5 ½ oz powdered sugar, about 1 ½ c
1. Whisk cream cheese in bowl of stand mixer until creamy.
2. Add milk and whisk until combined.
3. Sift in powdered sugar, and whisk until smooth. *I didn't sift my powdered sugar. It's rustic...
4. Spread over the hot rolls and serve immediately.

*Okay, so I did just a buttercream. Not conventional, still DE-LI-CIOUS.
1 stick butter
3 tbsp milk
1 ½ c powdered sugar
1. It’s the same procedure as above, and you can add or subtract milk or powdered sugar depending on the consistency that you want. I made it pretty thick so that when it hit the hot rolls, it didn’t completely disappear.

Rating (Scale 1 to 5):
Difficulty: 3
Amount of Time: 4 (this is mostly just for the downtime) Active time is pretty low
Awesomeness: 5 *These are definitely in my top 5 for the year! 

Tuesday, May 21, 2019

Sugar Cookies with Royal Icing


Sugar cookies are the other re-do on my 2018 baking challenge. They’re my Achilles heel. I have failed at them many times, and haven’t even tried to make them again for like…seven years? Yeah, and I was making them for Christmas gifts, so it was a little stressful, but spoiler, they totally worked! My friend, Jill, told me about Wilton’s no-chill sugar cookie recipe, so I decided to try that: https://www.wilton.com/roll-out-cookie-dough/WLRECIP-31.html
For the Dough:
1 c granulated sugar
1 egg
3 ¼ c all-purpose flour
1 tsp baking powder
½ tsp salt
1 c butter, softened (2 sticks)
2 tsp vanilla extract
½ tsp almond extract *have I said that I hate almond extract? Yes. I know I have. I hate it, so I didn’t add it. I will say, though, that I felt like I wanted the cookies to be a little sweeter. Maybe the almond extract gives some of that sweetness.
1. Preheat oven to 350F.
2. In a stand mixer, beat eggs and sugar until light and fluffy. Beat in eggs and extract. Mix flour, baking powder, and salt; add to butter mixture one cup at a time.
3. Do not chill dough. Divide into two balls. *Can I just say at this point I was freaking out? This dough looks like fucking pie crust. It’s crumbly and chaotic. The more you work it, the better it becomes. It DOES actually come together, so if you see something like this, you’re okay.
4. On a floured surface, roll each ball out until approximately 1/8 inch thick. Dip cookie cutters in flour before each cut.
5. Bake cookies on ungreased cookie sheet for 8 – 11 minutes or until cookies are lightly browned. *It took my cookies a bit longer than this. I think it was 12-ish minutes, but you’re looking for something like this:


For the Royal Icing:
I used Pioneer Woman’s recipe that doesn’t require meringue powder: https://thepioneerwoman.com/food-and-friends/how-to-make-royal-icing-without-meringue-powder/
1 pound powdered sugar
3 pasteurized egg whites
1 tsp fresh lemon juice
1. Sift sugar into the bowl of a stand mixer. *You do want to actually sift here- no lumpy icing!
2. Add remaining ingredients to bowl. Using paddle attachment, mix on low speed until sugar is incorporated, and then increase speed to medium for about five minutes. Check for stiff peaks.
3. Once stiff peaks are formed, transfer the icing to bowls for coloring.
*This consistency is going to be your border frosting. I put some of each color into a piping bag. Then I added a little bit of water to each bowl so that I got a runnier consistency for flooding the rest of the cookies. So you have stiff icing to keep the softer icing in. You can also use the thick icing for detail work. I thought that I wasn’t going to have enough icing because I was making four colors, but I totally did, and I made a little over three dozen cookies.
**One final side note: They didn't have any more black gel coloring, so I bought this:

Don't fucking buy this for cookies. This never dries. I ended up having to take off all of the black and put melted chocolate in its place. It was horrible.

Other than that, just go to town! It's actually easier than you'd think, but it requires some time. Start by doing your borders. Then you can fill them in with the same color. Finally you can use additionally stiff icing to do your details. Here are some of my other cookies:


Rating (Scale 1 to 5):
Difficulty: 3 (really only difficulty is icing)
Amount of Time: 3 (again just with icing cookies- do it with a buddy)
Awesomeness: 4 (I wish they were sweeter, but they were adorable and impressive)

Tuesday, May 14, 2019

Marshmallows

Okay, so this challenge is one of the two challenges that I had on my list that are re-dos. 22 of the challenges were brand new. This challenge is something I failed at before and wanted to try again. And who doesn’t love marshmallows? Also, I used this on top of a chocolate ganache pie, and it was to. Die. For. I have no idea what I did the last time I made marshmallows or why they failed, but this recipe was easy peasy, and totally worked. I even made them again for Christmas gifts. You will need to make these the day before you want them. They have to sit overnight. Just a heads up.
I used this recipe, although I didn’t make mine peppermint, so I’m just gonna leave that part of the recipe out on here: https://www.bettycrocker.com/recipes/easy-peppermint-marshmallows/582fc3e4-bad5-40bf-8954-565947232145
1/3 c powdered sugar
2 ½ tbsp unflavored gelatin
½ c cold water
1 ½ c granulated sugar
1 c corn syrup
¼ tsp salt
½ c water *yeah, separate from the other ½ c water. I know. It was confusing to me too. It’ll all make sense, I promise.
1. Generously grease the bottom and sides of an 11 x 7 glass baking dish. Dust pan with powdered sugar. *Who the hell has an 11 x 7? Is that even a size? I used a 9 x 13 inch pan, and it was fine.
2. In the bowl of a stand mixer, sprinkle gelatin over ½ c cold water to soften; set aside.
3. In 2-quart saucepan, heat granulated sugar, corn syrup, salt, and ½ c water *you see, the second water* over low heat, stirring constantly until sugar is dissolved. Heat to boiling; cook without stirring about 30 minutes to 240F on a candy thermometer or until a small amount of mixture dropped into a cup of ice water forms a ball that holds its shape but is pliable. Remove from heat. *Okay, so I don’t know if it’s because I have an electric stove top, or what, but 30 minutes is insane. I got to soft ball stage at like 12 minutes. Trust your candy thermometer, and if you still aren’t sure, which I wasn’t, do the water trick. This is what you’re looking for:
4. Slowly pour syrup into softened gelatin while beating on low speed *I used the whisk attachment*. Increase speed to high; beat 8 to 10 minutes or until mixture is white and has almost tripled in volume. Add in salt and vanilla and mix to incorporate. Pour into baking dish, patting lightly with wet hands. Let sit uncovered at least 8 hours or overnight. *I so didn’t think that the water would work because this shit’s sticky AF, but it totally does.
5. Once set up, dust cutting board with powdered sugar. Place the rest of the powdered sugar in a bowl. Loosen the marshmallow from sides of dish. Lift out and place on cutting board. Cut into 1-inch squares. *Here’s what you should do. Second time, I totally got it down. Get yourself a bowl of water on the left side of your cutting board. Stick a pizza cutter into that water. On the right side of your cutting board, put your bowl of powdered sugar and a plate for your finished marshmallows. Then go to town! Every time your pizza cutter gets too sticky, just dip it in the water. Coat all cut marshmallows in powdered sugar. **I’d also let them sit a bit before packaging because I found that occasionally I’d have a sticky spot still, and I just dipped them again in the powdered sugar.
6.Store in an airtight container for up to 3 weeks!
As I said, I used some to top a chocolate ganache pie. I got a store-bought graham cracker crust because Aldi was out of graham crackers…. That’s what happens right before Thanksgiving, I suppose. But, if you can, just make your own. The store-bought ones don’t have as much structural integrity.  
For the ganache, I use this recipe, all the time, and it couldn’t be easier: https://livforcake.com/dark-chocolate-ganache-tart/
12 oz dark chocolate *I just used chocolate chips, but I have also had a craving for this pie before and literally used all my Ghirardelli squares chopped up to get 12 oz.
1 c heavy cream
4 tbsp unsalted butter, room temp, cubed
*Also this recipe doesn’t say to put salt in this. PUT SALT IN THE CHOCOLATE. Always. Always.
1. Put the chocolate and butter into a bowl.
2. Heat heavy cream in a small saucepan barely to a simmer.
3. Pour warm heavy cream over chocolate and butter. Put some plastic wrap on top of the bowl for about 5 minutes to help the melting process along.
4. Stir with a spatula until smooth. 
5. Add salt to taste. *Oh poor you, having to taste glorious melted chocolate to make sure it’s perfect.
6. Pour into pie crust and let set up overnight at room temp, or 1 – 2 hours in the fridge.
7. If you have a blow torch because you bought one when you did crème brulee, unlike me, because you’re not a cheap ass, you can just put some of your marshmallows onto the set up pie and torch away, my friend. S’mores pie.
If you DON’T have a blow torch, line a baking sheet with parchment paper. Pile some marshmallows onto the parchment. Set your oven to broil. Stick those babies in and WATCH them. They will die quickly. Once they’re to your liking, take two spatulas, and try to get all of them on top of your pie!

Rating (Scale 1 to 5):
Difficulty: 1
Amount of Time: 2 (not including the fact that you have to wait overnight)
Awesomeness: 5

Tuesday, May 7, 2019

Cannoli


*Insert Godfather joke here* Did you get it out of your system? I completely understand. Anyway, it’s time for cannoli, y’all! Also, did you know that cannoli actually is the plural. The singular form is cannolo. It’s an irregular plural. So, no cannolis. Did I mention I’m a language teacher, and I can’t help myself? Now you’ll go to parties and be like, “Did you know that the singular form of cannoli is cannolo?” and you’ll either be shunned or applauded. I can’t guarantee results.
Anyway, I digress. This was a much faster process than I thought it’d be. My only complaint was that I didn’t roll out my dough thin enough, but that can be remedied pretty easily. I used this recipe: https://www.foodnetwork.com/recipes/homemade-cannoli-3408894?soc=sharepin
Can I also just add that this recipe requires you to have cannoli molds. I’m sure there are other options, but I went ahead and bought some. For all of my challenges, the only two things I had to buy were the cream horn molds and these, so not too bad. You can get them on amazon pretty cheap: https://www.amazon.com/Pieces-Stainless-Cannoli-Inches-Diagonal/dp/B076P3ZKC9/ref=sr_1_3?ie=UTF8&qid=1546190034&sr=8-3&keywords=cannoli+molds  
For the Shells:
2 c all-purpose flour
2 tbsp granulated sugar
½ tsp ground cinnamon
½ tsp kosher salt
2 tbsp unsalted butter, cold, cut into cubes
½ c dry Marsala or white wine *I used Chardonnay because I had an open bottle in my fridge. Marsala is the traditional, so I’d like to try that next time.
Vegetable oil, for frying
1. Pulse flour, granulated sugar, cinnamon, and salt together in a food processor. Add the butter and pulse until thoroughly combined. Add egg yolk and Marsala wine and process until the dough forms a ball.
2. Turn the dough out onto a piece of plastic wrap and flatten into a disk. Refrigerate for 10 minutes.
3. Fill a large, wide pot with two inches of oil and heat over medium-high heat to 350F. *Again, I used my Dutch oven; it's my frying vessel of choice.
4. Lightly flour a work surface and roll the dough into a thin circle, about 1/8 inch thick. Cut out as many circles as possible with a 3 ½ to 4 inch round cookie cutter. Gather the scraps, roll out again, and cut more. *I didn’t have a cookie cutter that size, so I ended up using the top of my coffee container. Totally works. **Also, make sure that once you start to see the dough shrinking on itself, stop cutting. The dough is being worked too much. I got 12 circles out of my dough. ***Sorry, so many side notes. I think my dough was still too thick. It wasn't as delicate as I had hoped after fried (although still delicious). I have seen people put their dough through a pasta sheeter, so if you have one of those, I would do that to get it to a thinner consistency.

5. Wrap a circle of dough around a cannoli tube. Lightly moisten an edge with water and press the edges together very firmly to seal. *I had two that popped open in the fryer; still delicious, but more like a tostada than a cannoli.
6. Place paper towels on a baking sheet.  
7. Fry the tubes with the dough, turning once until the shells are golden brown all over, about 4 to 5 minutes.
8. Carefully remove the tubes from the oil and slip off the cannoli shell onto the paper towels.
If you have more dough than tubes, let the tubes cool slightly before continuing to wrap dough and fry.
9. Let the shells cool completely.
For the Filling:
2 ½ c ricotta cheese
¾ c powdered sugar, plus more for dusting
½ tsp vanilla extract
½ tsp finely grated orange zest *I fucking forgot to buy an orange. I had a grapefruit, so I zested that. Traditional? No. Totally delicious still? Surprisingly, yes.
1/3 c shaved bittersweet chocolate *I used bittersweet mini chocolate chips.
1. Mix ricotta, powdered sugar, orange (or grapefruit) zest, and vanilla in a bowl until smooth. Stir in the chocolate. *Check the sugar level before you add chocolate chips. I added a bit more powdered sugar than it called for, so just check for taste.
*The recipe doesn’t call for this, but I also melted some chocolate and dipped my edges of shell in chocolate. Let chocolate dry completely before filling.
2. Fill a pastry bag with ricotta mixture. Hold a cannoli shell in one hand; with the other, insert the pastry tip into the center of the shell and fill one side. Flip to the other side, and fill again.
3. Dust filled cannoli with powdered sugar. Serve filled shells immediately. If you aren’t going to serve immediately, store shells at room temperature and filling in the fridge. Fill just before serving.
Rating (Scale 1 to 5):

Difficulty: 1
Amount of Time: 1
Awesomeness: 4

Tuesday, April 30, 2019

Pretzels


Okay, so this challenge was for October. It felt appropriate. This actually wasn’t originally on my list. I had Japanese Cheesecake on my list, but then someone I know made one, and it wasn’t that exciting to me, so then I decided on pretzels instead.
I will NOT call this a failure (ahem, unlike the mirror glaze cake), but it wasn’t awesome, and I have some tips for people if they were going to try it. Do as I say, not as I did.
Ingredients:
1 c whole milk
1 packet active dry yeast *I ended up using instant yeast (more on this later)
3 tbsp brown sugar
2 tbsp unsalted butter, melted
2 ¼ c flour
1 tsp salt
2 tbsp baking soda
1 ½ c warm water
Coarse salt (for topping) *I didn’t have this… I thought I did. Double check. You’ll want this.
2 tbsp butter, melted for brushing later

1. Warm the milk in the microwave or on the stove for about a minute until 110 F. If it’s too hot, it will kill the yeast. *Going on a long side note, so bear with me. First of all, I think my milk was bad. I tried doing this in the microwave at first, which I never do- I always do it on the stove. It started to separate and curdle. I was like WTF. I stirred it, and it seemed okay, so I checked my temp. DO NOT put it at 110F- the packet says BETWEEN 100 – 110F. Trust the packet. I usually try for about 105 in case of thermometer being off a bit or something. Anyway, so microwaved milk + yeast. Did nothing. Nothing. So then I was like Ima do this on the stove. What if the microwaving fucked up my milk? (I don’t know if that’s a thing, but I really didn’t want to go get more milk). Nope, same thing. So THEN, I went and bought new milk. Five dollar milk…. From the gas station… I’m still salty about it. Anyway, so I heat it on the stove to 105F and put in my yeast. It doesn’t do shit. I check my yeast- it doesn’t expire until 2020. SO, fourth attempt. I heated my milk and then had to use the instant yeast. I don’t think you’ll have this chaos that was my milk-gate 2018, so just use the active dry yeast. One would think it should be fine. Okay, back to the action. 
 

2. Stir in the active dry yeast and allow to sit for about 3 minutes. *It took me like 10 minutes for the yeast to be happy.
3. Add the butter and sugar. *Maybe you should add the sugar with the yeast? Yeast likes to eat sugar. Maybe this recipe is stupid and you shouldn’t listen to it. I say try to put the sugar with the milk and the yeast. I BET it will get happy faster. Everyone like sugar. Even yeast.
4. Once yeast is happy and butter and sugar are in, add flour one cup at a time. Then add salt.
5. Knead the dough for about 10 minutes in a stand mixer with the hook attachment or by hand until smooth and elastic. *I did a little of both. I am a new yeast dough-er, so I do the stand mixer, but then I still do some hand kneading because I am learning what it should look and feel like, and that’s easier with hands.
6. Place the dough in a greased bowl, turning once so that the whole ball is completely covered. Cover bowl with plastic wrap.


7. Let rise in a warm place for about an hour or until it doubles in size. **This is not my tip; it’s this author’s tip, but I liked it and used it. Preheat your oven to the lowest setting. Turn it off before you start kneading your dough. Place the covered dough in the warm oven to get fatty.


Making the dough into pretzels:
1. Remove dough from the bowl once it has risen.
2. Preheat oven to 400F.
3. Combine the warm water and baking soda into a bowl and set aside. *I call bullshit. I don’t think that this really did anything for my dough. I saw Trisha Yearwood, the day after I made this, do it a little differently. She had the water boiling on the stove. She put the baking soda in. I think this is better. More details in a minute.
4. Punch down the dough and turn out onto a lightly floured surface. *Maybe if you have a fancy kitchen with like marble countertops, you should flour. I have cheap laminate countertops. I do NOT want flour- you are about to try rolling these into snakes so you can twist into pretzels. The flour makes for zero traction while trying to roll.
5. Divide dough into 12 – 16 pieces. Roll the dough into logs (or snakes) as thin as you can. *I did 16 pieces, and I think maybe you should do 12. I had small snakes, and it made for stupid looking pretzels without clear twist definition.
6. Shape each dough into pretzel shapes. Here’s the video that I looked at (it’s the same one from the original recipe) https://www.youtube.com/watch?time_continue=3&v=sFuwBOQWHPg
7. Dip them into the baking soda water. *I dipped them. I don’t think it did anything. Like I said, try out the boiling water. Trisha kept them in the water for like 30 – 45 seconds. I literally dipped and moved on. Try keeping them in longer. I think this will help with the crust on the pretzels.
8. Place on a greased baking sheet and sprinkle with coarse salt. *I just had regular iodized table salt, and this was sad. Don’t be like Jenna. Be better.
9. Bake for 7 – 11 minutes until browned.
10. While still hot out of the oven, brush with the melted butter. Serve with cheese sauce. * I did make this, see recipe below. It was pretty good. It’s not like a queso. Just know this going in. I was picturing like a nacho cheese. It’s not quite like that.

Cheese sauce
2 tbsp unsalted butter
2 tbsp flour
1 c milk
8 oz extra sharp cheese, shredded *don’t buy the pre-shredded stuff- it has an anti-caking agent on the outside so it doesn’t stick together- this means it doesn’t melt as nicely. Build up some forearm muscle and shred it yourself.
Pinch of salt *I also did a pinch of pepper because I think you always should.
1. In a small saucepan, melt the butter.
2. Whisk in the flour and cook for about 30 seconds, whisking continuously.
3. Slowly whisk in the milk until there are no more lumps.
4. Stirring constantly, bring the milk to a simmer over medium-low heat until it thickens (about 3 – 5 minutes).
5. Remove pan from heat and whisk in the shredded cheese, stirring until all melted together.
6. Add a pinch of salt (and pepper) to taste. 


Rating (Scale 1 - 5):
Difficulty: 2
Amount of time: 2
Awesomeness: 3
*I will say that I took them to the Halloween party that night, and they were gone immediately, so obviously they're not that bad, but I'm jaded. 
**also, here's me and my dog as hipster Ariel and Sebastian! 

Tuesday, April 23, 2019

Cookies and Cream Drip Cake


This particular cake challenge has a funny history. So my husband wanted me to do this cake for his birthday: https://www.tastemade.com/videos/giant-funfetti-cookie-dough-cake
It was a total bitch of a cake, and I never even got to the drip part because the cake lost structural integrity and fell over. At like 11pm on a Monday night… There were tears.
Anyway, 8 months later, I have decided to finally do the drip cake- not that fucking cookie cake cake that required 6 layers of 4 different kinds of cookie and cake. No. Never. Again. I did, however, decide to do a cookies and cream drip cake- a little nod to the travesty that was the original plan.
So this cake was for my friends Nina (my photographer extraordinaire), and John’s birthdays. It has like 4 parts to it, but all the parts were pretty easy.


For the cake:
2 c granulated sugar
1 ¾ c all-purpose flour
1 c cocoa powder
1 ½ tsp baking powder
1 ½ tsp baking soda
1 tsp salt
1 c milk
½ c vegetable oil
2 tsp vanilla extract
1 cup boiling water *I’m lazy and just put water in my coffee pot and ran it through.

1. Preheat oven to 350 F and grease and flour two 8 or 9 inch pans *First of all, I used my goop recipe like I always do to prepare my cake pans. Also, it’s gonna tell you later to cut the cakes so you have four layers. I just put the batter into three 8-inch pans and had three layers instead of four.  
2. In a stand mixer with paddle attachment, stir together sugar, flour, cocoa powder, baking soda, baking powder, and salt.
3. Add eggs, milk, oil, and vanilla to the dry mixture. Beat on medium speed for two minutes.
4. Add the boiling water and stir on LOW *it’s hot, so be careful. Then once it was incorporated, I scraped the bottom and put it on medium high speed for about 2 minutes.
5. Pour into prepared pans and bake for about 30 minutes. *the batter will be pretty thin, so don’t worry if that happens to you. ** Like I said, I did three pans instead of two, but it still took about 30 minutes for my cakes.
6. Once cooked, allow to cool for a few minutes before turning out onto a cooling rack to cool completely. Once the cakes are room temperature, wrap and chill (preferably overnight). *Ain’t nobody got time for that. I just let it come to room temp and then started assembly. It was fine, although the cakes are delicate, so gentle touches if you’re rebelling like me. Suuuuuper gentle touches if you have to cut your cakes; or you know, maybe you should chill yours. 

For Oreo whipped cream filling:
2 c heavy whipping cream, COLD
½ c powdered sugar
15 Oreos, crushed *I just put it in a food processor and pulsed it up
1 tsp vanilla

1. Place a metal mixing bowl in the freezer along with the whisk attachment for about five minutes. *I did this- I feel like maybe it’s not super necessary, but it does help to keep everything very cold.
2. Remove from freezer and add heavy cream, vanilla, and powdered sugar. Beat on high until you have stiff peaks.3. Gently fold in crushed Oreos.
4. Put in the fridge until assembly time.


For fudge frosting:
2 sticks unsalted butter, softened
½ c cocoa powder
3 c powdered sugar
1 tsp vanilla
4 tbsp hot water *again, I just did the coffee pot water

1. Beat butter and vanilla on medium speed until smooth.
2. Add in cocoa powder and powdered sugar a bit at a time.
3. Add hot water and mix on high for about two minutes. *I had never made a chocolate frosting like this, so it was weird to me, but the frosting is delicious, so just try it.

For the chocolate ganache:
I “used” this recipe as a decorating inspiration and the ganache: https://www.sugarhero.com/cookies-and-cream-cake/
I say that I “used” it because the amounts to me were totally off, so I only kind of used it.
The recipe calls for 4 oz dark chocolate and 6 – 8 oz of heavy cream. No way man.
What I probably actually did:
6 oz heavy cream
6- 8 oz dark chocolate
1. Put both heavy cream and dark chocolate in a heatproof bowl. Put in the microwave at 30 second intervals.
2. Whisk until it all comes together. If it’s too thick, add more cream. If it’s too thin, add more chocolate. *You want it thin enough to run, but thick enough to stop dripping! As you can see in my video, it’s making ribbons on top of itself- the chocolate doesn’t just run right back into itself when you pull up the whisk. 

Assembly:
1. Level off cake layers if need be. *also if you did two cakes, you’ll need to cut each cake into two layers so you have four total- I didn’t do this, so I didn’t have to cut cake. #winning.
2. Put a dollop of the frosting or filling on cake stand to hold the cake on the plate. Put down first layer of cake.
3. Add the oreo whipped cream on top of the cake layer *note that this is only filling, so you’re not going to put this on the outside. Also, I did one layer and then stuck it in the freezer for a few minutes to firm up before adding the next layer. *I had extra, so I put it in a piping bag for decoration later.


4. Repeat with second layer of cake and filling. Finish with third layer of cake. *Or keep going if you did the four layers.
5. Put back in the freezer and make the fudge frosting while you let that cool off.
6. Put a crumb coat of the fudge frosting all around the cake and put in the fridge for at least 30 minutes before continuing to frost. *A crumb coat is just a thin layer of frosting to catch all the crumbs. I don’t always do a crumb coat, but this cake is very delicate and crumbly, so I’d suggest.
7. Once it’s sturdy, go ahead and finish frosting the cake. So, you're going to add another layer of the fudge frosting to your crumb coat. *I smoothed it by running my offset spatula under hot water and smoothing out the frosting.
8. Prepare the ganache. The recipe calls for putting it into a squirt bottle to help with dripping easily. *Did I read this beforehand? No.
9. If you don’t have a squirt bottle like I didn’t, spoon some ganache onto the top of the cake and gently push to the side of the cake. At intervals, push some ganache off the side to let it drip down.

10. Place back in fridge to harden.
11. Decorate how you like- I just took that Oreo whipped cream that I put in a piping bag with a star tip and made 8 star blobs (technical term) on top of the cake and put half of an Oreo on each one. * A smarter person may have bought mini Oreo cookies for decorating too. That would be a good idea.
12. Enjoy! Like there’s no other option. This shit’s delicious.


Rating (Scale 1 - 5):
Difficulty: 2
Amount of Time: 3
Awesomeness: 5

Dark Chocolate Torte (GF)

 This is a twist on a recipe from an Indigenous cookbook called "Seed to Plate, Soil to Sky" our friend group cooked out of for Co...